
How to Sample Any Sound: The End All Guide
“Sampling is kind of prehistoric, given the technology and the textures you can create.”
— Macklemore
To understand how to sample any sound, let’s start with what you’re already familiar with.
You know that song ‘Levels’ by Avicii? You know, the one that’s maybe the biggest electronic song of the last decade?
How about ‘Call On Me’ by Eric Prydz? Or ‘Hotline Bling’ by Drake?
All of these songs rely on samples. And no, I’m not talking about cherry-picking some claps and hi-hats from a sample pack. I mean that the producers behind the songs went out into the world and found unique, interesting, and creative pieces of audio that they made their own.
I’m writing this article to give you the ultimate, end all, be all guide of how to sample any sound. We’re going to give you actionable, tangible guidance on how to find great samples, clean them and process them in creative ways, and make them your own. Many of the best songs ever rely on samples, and you deserve to know how to sample.
But first, we need to start with a simple question...

What is Sampling?
Sampling is the reuse of a portion of a sound recording in another recording (thank you, Wikipedia…). The practice of sampling was foundational in both the birth of hip hop and house music.
In the 1980s in New York City, Grandmaster Flash and the Furious Five, Run-DMC, De La Soul, and countless others chopped up disco and funk records with 808 beats to form the foundation of what has become one of the world's biggest genres of music.
In Chicago around the same time, Frankie Knuckles, Larry Levan, Chip E, and their contemporaries followed a shockingly similar workflow to create the foundations of house music.
These pioneers created a unique workflow for music creation. They sidestepped the constraints of needing studio musicians and prohibitively expensive technology by leveraging pre-recorded source material to create their music.
Sampling Ideology
How do we approach sampling? How does sampling fit into our workflow?
Sampling is a form of creativity, not a means to cut creative corners (contrary to what a lot of sample pack makers nowadays would like you to believe). There are endless amazing sound sources out there, and with a little TLC, they can be integral parts of your records.
Well, a little TLC and some knowledge of copyright law…
I’m going to get this out of the way first. Sampling is a legal gray area, and as modern legal cases set new precedents in the age of digital music, the legal grounds of sampling are regularly evolving.
As a general rule of thumb, if the sample you use is unrecognizable as it was presented in the original work, you are generally in the clear.
I’m going to leave the rest of this discussion to the experts — this is a great video to watch on the legal side of sampling:
It is possible, however, to “clear” the original sample and use it in its original form. The practice of clearing samples is a conversation for another time, so let’s proceed on the assumption that we don’t have the resources to clear the samples we are interested in.
What to Sample: The Four Sources
I’m going to run through four sources of samples: sample packs, other songs, audio recordings that are not songs, and the real world.
Sample Packs
The creative use of samples in the birth of hip hop and house music is a far cry from the barrage of pre-canned sample packs we’re used to today. We are OVERLOADED with sample packs to choose from — even if we only consider Splice, the samples we have access to there are virtually endless.
The challenge with sorting through pre-made samples is that the vast majority are either 1) something we would never use in our productions, or 2) just not very good.
The good news is that these problems present their own solutions:
Problem: There are too many samples out there.
Solution: Create a favorites folder of your favorite samples. Rely on these and re-use them in your productions. We don’t need to look for the needle in the haystack every time we want to use a sample.
Problem: Most samples I find I would never actually use.
Solution: Figure out the samples you need before looking for them. Are you making house or techno? Grab some 909 drums. Are you making pop or EDM? The KSHMR and Oliver packs are amazing.
Problem: Most samples from sample packs just aren’t that good.
Solution: Do some research on great sample packs. At Hyperbits HQ, we spent over a year compiling the absolute best samples we could find, and released them as part of the Creative Suite. We also have some awesome free sample packs here.
Other Songs
The songs I listed at the beginning of the article all sample from other songs. This is potentially the best way to sample, but it’s also the hardest.
I don’t want to spend time on sample clearance: if you don’t have a big following as a producer, it’s usually very hard to get samples from third parties cleared (meaning you can use them in their original form), especially when they are released on major labels. The best advice I can give you is to figure out who owns the catalog of the sample and to contact them directly.
Just know, getting that sample clearance probably won’t be free.
That said, you can absolutely sample from other songs if you use the sample in a way that is unrecognizable. So, maybe don’t take the main vocal hook from a song, but grab a synth stab, a drum sample, or some tonal ambience. I’m going to talk about how to clean and process your sampled audio in the next two sections.
Audio Recordings that Aren’t Songs
The same principles that apply to songs apply to other audio recordings:
- There are incredible sound sources out there waiting to be sampled
- But, it is challenging to get samples cleared
- However, if you process the sample to a point where it is uniquely your own, that will generally put you in the clear
Movies, radio broadcasts, Youtube videos, voicemails that you haven’t deleted from five years ago — you name the source, and there are diamonds in the rough out there waiting to be discovered.
The Real World
No, not that MTV show that aired for WAY too long (although, I guess you could technically sample from that…). I’m talking about taking a field recorder (or your phone) to some cool place on the planet and recording what you hear.
Ambient soundscapes make exceptional background fillers in tracks — take a recorder out into nature and capture some birds chirping and leaves rustling, or record the sounds of a city street. Or, you can sneakily capture some chatter on the subway, hit things with other things to make percussion noises, or capture the sounds of a sea organ and program them into a sampler (or, just sample from that Youtube video).
How to Clean Your Samples
Ok, let’s get to the good stuff. We know what sampling is, we know how to think about sampling, and we know what to sample.
Now what?
Ok, the next step when talking about how to sample… You will almost never find a perfect sample out in the wild that you can just drop into your track. The key to effectively sampling is cleaning and processing your samples in a way that 1) makes them sound awesome, 2) makes them uniquely your own, and 3) naturally fits the track.
Let’s start with cleaning your samples. Here is some good news to start: your samples don’t need to be perfectly clean to still be able to use them effectively.
In fact, other “non-essential” sounds can make samples more unique. Kick drums that have some hi-hats printed in can help you build out a groove. White noise in samples you recorded yourself can make things feel more analog. I could go on forever…
Not having to achieve a perfectly clean, isolated sample means there are TONS more possibilities of things you can sample from. But when you do find a sample, there are three steps you should take: frequency processing, gain processing, and organization.
1) Frequency Processing
Start by applying different types of EQ to a sample in order to clean it.
First, use a high pass filter on a sample to remove any unwanted low end rumble. This is critical for anything sampled from non-music sources.
Next, use mid-side EQ to further remove unwanted frequencies, especially resonances. Sweep through your frequency spectrum with a high gain and narrow Q in order to identify resonant frequencies (effectively, unwanted frequency buildups that sound harsh to the ears). Oftentimes, you’ll find that these frequencies are more pronounced in the mids or on the sides, allowing you to isolate and reduce them without removing unwanted sounds.
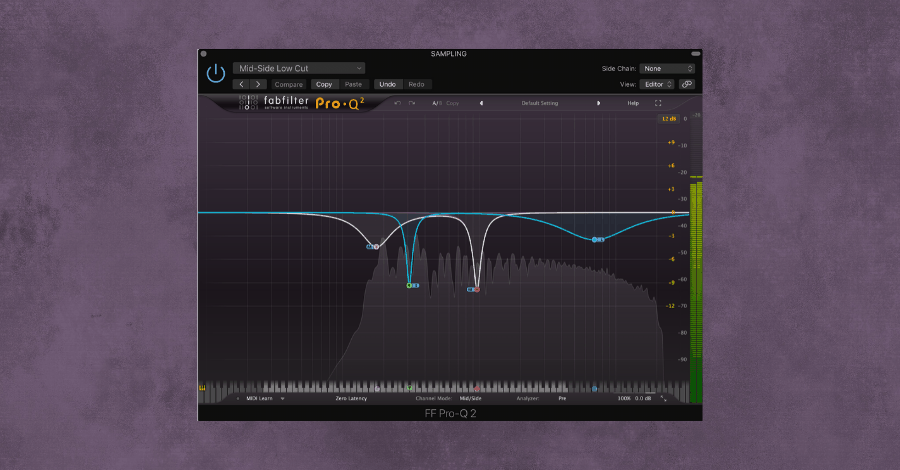
Hyperbits pro tip incoming: one of the most effective ways to clean samples is by EQing over time. Effectively, this means automating an EQ to remove certain frequencies at different times during the course of your sample. More on that later 😉
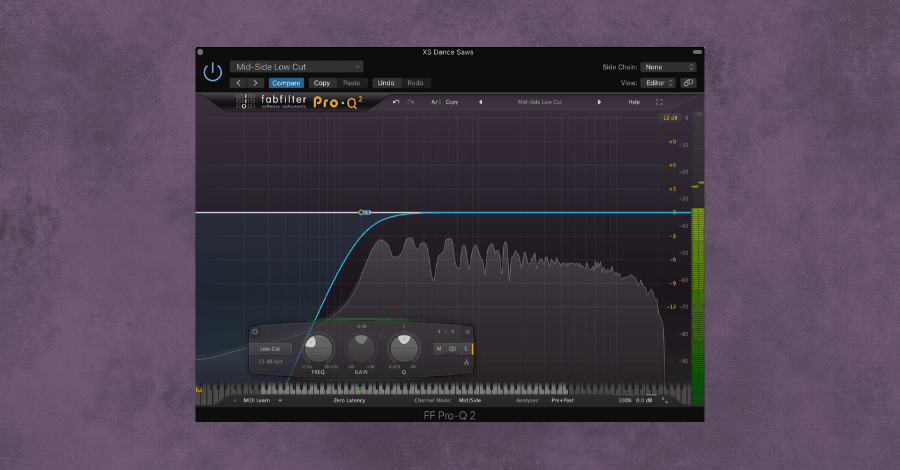
If you don’t feel the need to process your sample with that much detail, you can apply a more streamlined version of this technique by just automating a high pass or low pass filter over time. Here an an image of how I would isolate just the click and low end of a kick with a low pass filter (removing the hi-hats that are printed into the sample):
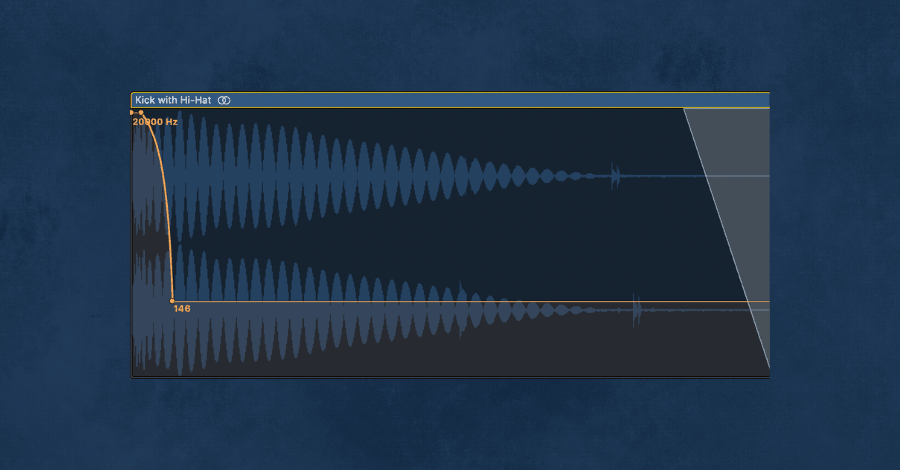
Between removing low end rumble, isolating and removing unwanted frequencies in the mids and sides, and automating EQ over time, you will have cleaned out a lot of audio information that you don’t need.
2) Gain Processing
Next, you need to shape the volume of the sample. This allows you to better mold the sample for your track and will get rid of more unnecessary audio that you don’t need.
This stage is pretty straightforward, but let’s take it in two steps:
First step: chop your sample to remove audio you don’t need.
This seems pretty intuitive, but is sometimes overlooked. Take the extra 30 seconds to make sure you are capturing everything you need, but only those necessary things. Make sure the ends of the sample don’t pop when played. You can even do your chopping by frequency band, as Zach demonstrated in the Youtube video above.
Second step: reshape the volume envelope.
The volume characteristics of the original sample are almost never going to be exactly what you need in your track.
- Ambient Samples: manually draw in volume automation to get rid of unnecessarily loud peaks. Also, try adding some light compression (low ratio (2:1 or similar), slow attack, slow release, and a few dBs of gain reduction) to smooth out the dynamic range.
- Voice Samples: try using a gate to keep the voice (the loud part) but remove unwanted ambient noise (the quiet part). You can also manually reduce the sample volume in between words.
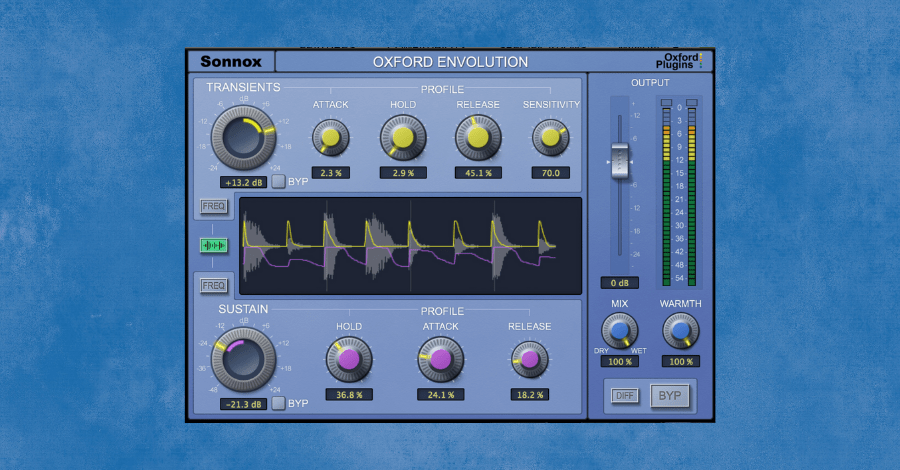
- Percussion Samples: grab an envelope shaper (I love the Sonnox Oxford Envolution for this) to make samples tighter by reducing the release, or give them more punch with a boost in attack.
3) Organization
This is hands down the most overlooked part of cleaning samples (or maybe even sampling in general). Let’s say you find a great sample, you clean it up, you drop it into your project, and now… uh oh, turns out it just doesn’t work in the track.
Guess what? It might still be a great sample that you can use later down the road.
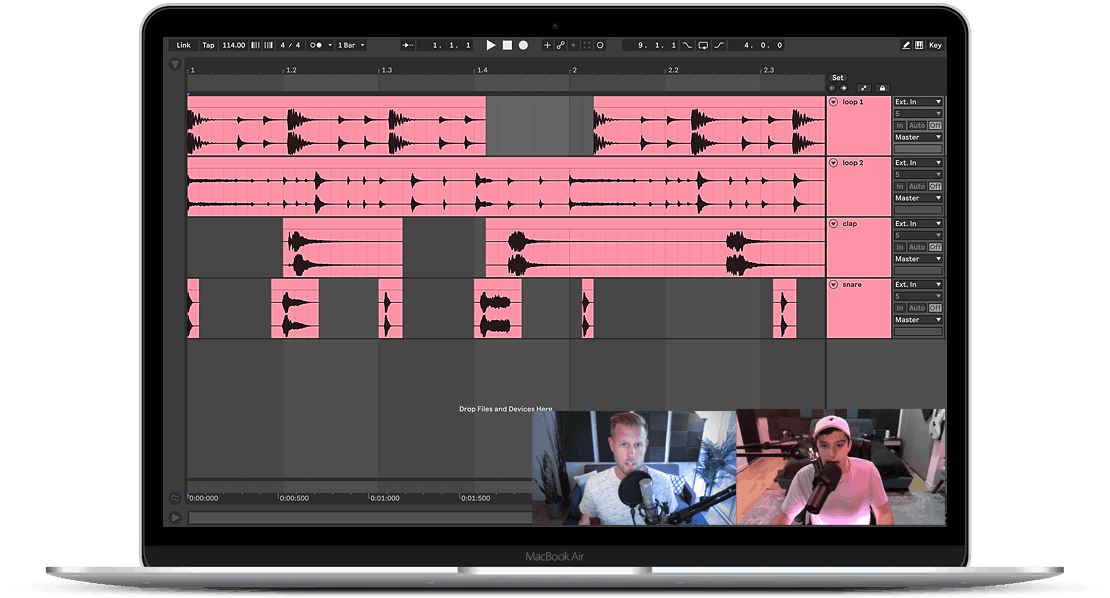
Maintain a folder of samples where you tag the type of sound (Snare, Clap, Ambience, Voice, etc), the key of the sample (if there is one), the BPM (if there is one), and any other important identifying information. Here is an example of some kicks I have sampled, where I’m also tagging by the original artist. They exist in a folder specific to the year I sampled them.
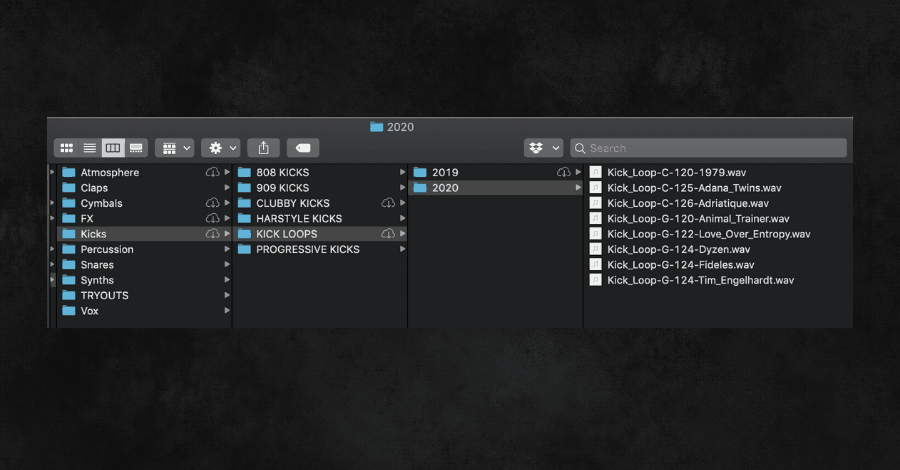
Now, I don’t need to reinvent the wheel every time I need a new kick loop in G — those samples are already there waiting for me.
How to Sample ANY Sound
We’ve already talked about WHAT you should be sampling, and we’ve also given you several methods as to how to CLEAN your samples so you can use them in your music.
But what if there was a method that combines all of these strategies, to truly let you sample any sound you’ve ever come across?
This is hands down the ultimate solution when it comes to learning how to sample, because you can control multiple parts of the frequency spectrum.
We’ve actually put together a video about this specifically in regards to sampling kick drums, so I’ll let the video do the talking.
This means regardless of your sound source, you should be able to carve into any sound and extrapolate whatever you want. Pretty incredible, right?
How to Creatively Process Your Samples
This stage is critical when considering how to sample. This is where you take this cool piece of audio and make it more unique — effectively, this is where you make it yours.
The way you creatively process every sample will necessarily be different. Because of this, it’s impossible to provide a step by step guide for this stage. But, what I can give you is a framework of how to make the decisions of what creative processing to apply.
You can apply two types of processing at this stage: timbre processing and time processing. Let’s break these down.
1) Timbre Processing
Think of this as sound design for your samples. Starting with your clean sample, how can you change what the sample sounds like to make it something new?
Modulation
We have lots of cool modulation tools at our disposal. I love adding flangers to percussion loops, choruses to stagnant mono samples, and tremolos to give cool movement and pump to anything. I don’t think there are any better plugins out there for this than the Soundtoys bundle: PhaseMistress, FilterFreak, Tremolator, and PanMan alone will let you mangle and rework samples to your heart’s content.
Distortion
Who doesn’t love some crunchy warmth in their tracks?! Insider tip right here: apply some movement (via pan modulation or tremolos) and then add distortion to tonal ambient samples. Adjust the distortion amount so you’re only getting some crunch sporadically through the course of the sample (i.e. it isn’t all-crunch all-the-time). Remember that sea organ video from above (you know, this one)? Do this trick to the audio from that video.
2) Time Processing
How you modify when the listener hears certain parts of the sample is critical. I’m not talking about how the sample fits into the arrangement of the song as a whole, but rather how the sample itself is arranged. Here are three types of time processing to consider:
Chopping and Reordering
You have a clean sample, but who says you can’t change the order of the parts?
- In a vocal, cut out each word and change their order to create new meaning.
- In ambient samples, try reversing them to give an otherworldly feel.
- In percussion loops, cut out each individual beat and reorder them to give them a different groove.
Quantizing and Sidechain
The rhythm of samples, especially drum loops and vocals, might not always fit the groove of your track. Quantizing them is critical:
- For drum loops, match the quantization of the sample to the rest of the track.
- For vocals, retime the transients of each syllable to give a more natural flow when paired up with the rest of the elements in the song.
Timed Effects (Reverbs and Delays)
Not only are these effects critical to making the sample live in the same “space” as the rest of your song (so critical, in fact, that we have an entire separate Ultimate Guide to Reverb), but they can also transform the sample itself to make it unique.
Try a 1/16th note tape delay with a lot of feedback on a hi-hat to transform it into a shaker loop, or apply the Gated Reverb trick if you want to sound like Eric Prydz (or Phil Collins…).
Between timbre processing and time processing, you can affect what you hear and when you hear it, which pretty much covers all dimensions of how you can creatively transform a sound.
Programming Your Samples
As an aside, I want to quickly mention that there are DAW-specific resources out there to help you take those samples and streamline the process of putting them into your track. Here are some starting resources for most DAWs, and I’ll leave it to you to check these out:
Final Thoughts: It’s Time to Get Sampling
Phew, we’ve made it to the end. Before we part ways, I want to highlight three key takeaways to leave you with:
Takeaway #1: Sampling is a form of creativity, not a means to cut creative corners.
In the age of Splice, I think this is a major mistake producers make. The goal of sampling is not to find something that “works” and speeds up your workflow. The goal of sampling is to hunt down the unique pieces of audio that you can use to elevate your track to the next level.
Takeaway #2: The proof is in the pudding: great samples can make great records.
Two of the world’s biggest genres were fundamentally built on sampling. Some of the best records, electronic or otherwise, rely on samples to make them so special. But, again, none of those special samples were taken from a pack on Splice. They required some digging and creative work, but in the end, that work was beyond worth it.
Takeaway #3: Saving and organizing your samples is key.
Sampling is a lot of work, and sometimes the sample you work on just doesn’t work for the song. This work doesn’t need to go to waste — just save it for later. Chances are, it’s a great sample that can find a home in another song.
That is how to sample. Now, it’s time to go sample hunting, clean and process those diamonds in the rough, and make some incredible songs.
These Might Also Interest You:
8 Creative Ways to Use Sample Packs & Soundbanks (…that actually work)
The Ultimate Guide to Starting Songs: 22 Foolproof Techniques to Crush Writer’s Block

Hyperbits
FOUNDER, HEAD-HONCHO, THE BIG CHEESE
A bit about me in case you're new here: my music has been streamed over 52+ million times.
I've done official remixes for artists like Beyonce, Tove Lo, and Nick Jonas, signed record deals with Universal, Island, and Sony, and worked with brands like Target, Samsung, and Equinox. I've even DJed some of the world's biggest stages, like Electric Daisy Carnival, Terminal 5, Fonda Theater, and Echostage.
If you have questions about music production or the Hyperbits Masterclass get in touch. I'm here to help.