How to Mix Music: 8 Technical Steps for Beginners
“A mixer’s job is to make the song work, not the mix work.”
— Chris Lord-Alge
It’s no secret that it’s incredibly difficult to figure out how to mix music. That's why we've put together 8 technical tips to get you started in the right direction.
Some people dedicate their lives to audio mixing — some people even get college degrees in it. How are you supposed to mix like professionals when you don’t have the time or budget to uproot your life and focus on the pursuit of a perfect mix?
Well, here’s the bad news: it takes a ton of practice to get great at mixing. There is no substitute for hours and hours of practice, and the pros do exactly that.
But the good news? Making your mix sound great is possible, and more easily doable than you think. You don’t have to be a pro to get your mix sounding close to theirs..
So, how do you actually mix music? How do you make your volume levels right? How do you get rid of muddiness? How do you make music LOUD like the pros? What on earth are you supposed to do first?!
Below are 8 technical steps for how beginners can mix music. Make sure you make it all the way to the end: numbers five, six and seven are my top three processing tips.

1. Organization — Preparing to Mix
Mixing music is hard as f***. The absolute last thing you want to deal with is a messy project file that causes CPU overload.
Start your mixing process with a fresh project file by “exporting stems.”
What does this mean?
Exporting stems means saving every sound and instrument from your song as a separate WAV file. Logic calls this bouncing, Ableton calls this exporting — but the universal term across all DAWs is printing.
That means, print the “stems” into a new project file to do your mixdown. Be careful: you have to make sure that nothing is clipping on the individual stems when you bounce them, and we like to make sure no processing is on the master. And side note, make sure normalization is off when you export.
Yes, this is time-consuming, but it is 100% worth it. You will be completely organized, and the audio stems will be much less taxing on your CPU when you apply new mixing plugins.

2. Intentional Referencing
I know, producers like to make things hard on themselves, so let me make things easier: There is no need to reinvent the wheel every time you mix a track.
Find a couple stylistically similar songs that you think have good mixdowns, download them (buy them on iTunes or Beatport — no Youtube rips allowed here), and put them into your project file.
These are your “Reference Tracks.” They will be your map to the buried treasure that is a great mixdown.
What does this mean? Well, not sure if your hi-hats are loud enough or if your vocal is bright enough? Flip back and forth between your track and your reference tracks to hear how loud and bright those elements are in the other tracks.
Every song out there is a chance to learn something. In fact, that sentence was so good I'm going to write it again: every single song out there is a chance to learn something.
So, if you take nothing else away from this article, just make sure to reference, reference, reference.

3. Order-of-Importance Approach
Ok — we have our stems, we have our reference tracks, now where do we start? Where do we go from there when learning how to mix music? Try approaching elements in your mix in the order of their importance to the song.
Ask yourself: what is the most important element in your song?
For an electronic track, it’s probably your vocal or your kick. So, start there. Mix this element first, then move on to the next most important element. Follow this strategy until you’ve mixed everything.
Pro tip: once you’ve mixed an important element, modify the lesser important sounds to fit around the important ones, not the other way around.
This way, you won’t be making changes to your kick and vocal (the important stuff) to fit a lesser important element into the mix.

4. Delete, Delete, Delete
One of the biggest mistakes I see beginner producers make when mixing music is trying to fit WAY too much into a song. Less is more.
Once you mix the important things in your track, you’ll be left with a lot of lesser-important supporting sounds. Truth is, you probably don’t need all of them.
I’ve heard many high-level mixing engineers say that the first thing they do when they start a mixdown is check to see if there is anything they can delete.
I get it: it’s hard to do this to your own music. But, seriously ask if you can delete some sounds before cramming them into your mix.

5. Processing Key #1: Gain Staging
Porter Robinson once said that you can get 90% of the way to a good mixdown just with gain staging. I couldn’t agree more.
Use your reference tracks to help you set volume levels of all your elements, moving in order of importance (i.e. set your kick volume level, then your vocal level, etc).
Turns out, you can do this by inserting a Utility/Gain plugin as the first plugin on your channel strip (leave the faders for volume automation later on). And remember (again): less is more.
When gain staging, try to see if you can turn things down to make room for other elements, rather than boosting everything to make things feel louder.
6. Processing Key #2: Saturation
Saturation is basically a necessity to a full, warm, and polished mixdown. If you aren’t sure what saturation is or how to use it, check out our article on it here. After you gain stage, look to add saturation to your sounds.
Use the Makeup Gain feature on plugins like Soundtoys Decapitator and Fabfilter Saturn so you don’t make massive changes to your gainstaging. For example, if saturation adds 3db of volume, dial back 3db on your makeup gain.
7. Processing Key #3: Reductive EQ
Ok, we have our gain staging pretty much set, our sounds are saturated…
...and now everything sounds muddy. UGH.
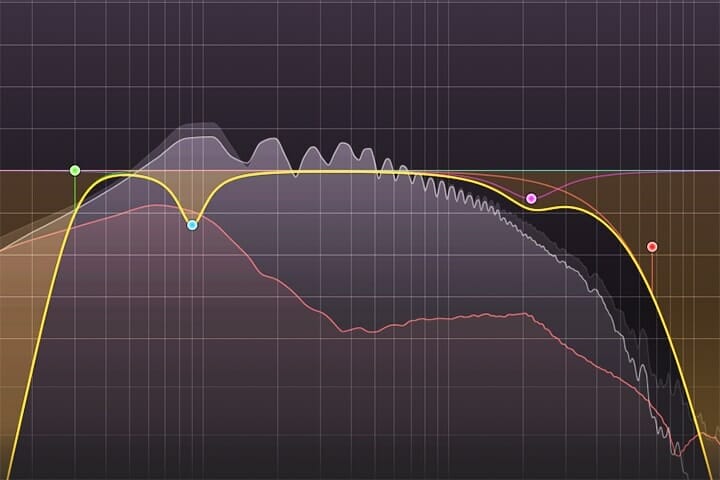
This is where EQ, specifically reductive EQ, is critical. We need to get rid of all the frequencies that sound bad in each sound, especially frequencies in the lows and low-mids.
Start with a high pass filter and knock out the low end rumble on your sounds (saturators will add some of this). Then, look to reduce somewhere between 150-400Hz to reduce the “mud” of any lower sounds. We generally like digital parametric EQs for this (i.e. your stock DAW EQs, FabFilter Pro-Q, etc).
Lastly, look for and remove resonant frequencies. Do a large EQ boost (15dB+) with a narrow Q and sweep through the frequency spectrum to find unpleasant frequencies. When you find one, change your boost to a reduction (anywhere from 3-10db) and broaden the Q value a little bit.
This will help add clarity and definition to all of your sounds.
8. Mastering
Ok, this technically isn’t part of mixing, but I still need to talk about it.
The key to getting a great master is having a great mixdown. Simple as that.
So, don’t stress too much about the intricacies of mastering. In general, your mastering chain should be the icing on the cake of your mixdown.
For mastering, we want small, subtle changes that make modest enhancements to your mixdown. I can’t spell out a perfect solution for mastering in every track (which, by the way, is exactly what I do in the Hyperbits Masterclass), but generally, look to add:
1. Modest reductive EQ
2. A little compression (1-2dB)
3. Some “secret sauce” (i.e. the Sonnox Inflator)
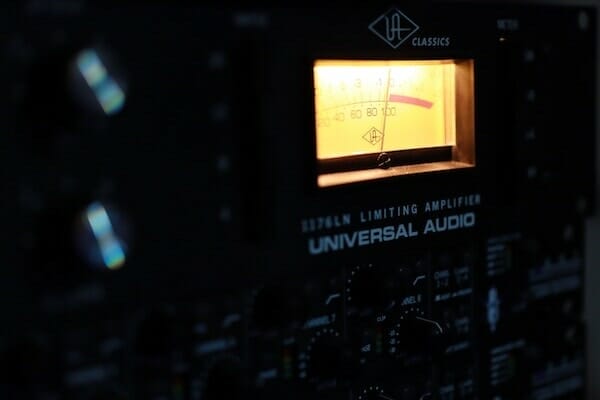
4. A limiter (Fabfilter Pro-L2 is tough to beat)
Wrap-Up: Where do you go from here?
Some people literally spend their entire careers mixing music for others. One of the most successful mixing engineers of our time is Dave Pensado, and he put together an incredible video of his top 15 mixing tips (almost all of which you can implement today):
Mixing music is no easy skill set to learn, but that doesn’t mean you can’t master the basics and greatly improve the quality of your records.
Remember: organization, referencing, and simplicity is key. Start with a fresh project file, make use of reference tracks, and remember that less is more (delete things you don’t need!).
That said, there is one last thing you need to do: practice. Did Michael Jordan come out of the womb an amazing basketball player? Of course not. In fact, he got cut from his high school team.
At the end of the day, if you want to be great at mixing music, you need to mix a lot of music! Follow the steps above and you’ll be on your way to better mixdowns.
Do you think there are other critical steps to mixing music? Do you have any personal keys of how to mix music? Get in touch and let us know.


