
Jump to a section9
- How To Get a Great Vocal Recording
- Vocal Processing Chains
- Best All-In-One Vocal Plugins
- Best Pitch Correction Plugins for Mixing Vocals
- Best Compressor Plugins for Mixing Vocals
- Best Equalizer Plugins for Mixing Vocals
- Best Reverb and Delay Plugins for Mixing Vocals
- Best Limiter Plugins For Vocal Processing
- Build Your Chain and Mix Like a Pro
The best vocal plugins for most producers are Melodyne for pitch and an 1176 into an LA-2A for compression. FabFilter Pro-Q3 is the workhorse for cutting harshness and mud, and Valhalla Vintage Verb makes a great main vocal reverb. The Waves versions of the 1176 and LA-2A keep the chain affordable.
Quick picks
| Name | Best for |
|---|---|
| Celemony Melodyne | Precise pitch and timing correction |
| 1176 (UAD or Waves) | Workhorse compression on a lead vocal |
| LA-2A (UAD or Waves) | Smoothing out a performance after the 1176 |
| Soothe2 | Taming harsh resonances in any vocal |
| FabFilter Pro-Q3 | Reductive EQ on lead and backing vocals |
| Valhalla Vintage Verb | Your main vocal reverb |
| Soundtoys Echoboy | The main 1/4 or 1/8 note delay on a lead vocal |
| FabFilter Pro-L2 | Catching harsh transients at the end of the chain |
The best vocal plugins make for the best-sounding vocals. If you plan to add vocals to your music, you want some of the best vocal plugins for mixing vocals in your arsenal.
Now, this isn’t the case with every area of production. Here at Hyperbits HQ, we are all about learning to use the tools you’ve got. We are very much against gear acquisition syndrome.
So, why are vocals so different?
Mixing vocals is a nuanced process, and some plugins just work better than others. Plain and simple, you need some of the best vocal plugins if you want to make your vocals sound as good as the artists you love.
In this article, I’m laying down the absolute best plugins for mixing vocals. But before we get to the list, we need to cover two essential things: getting a great vocal recording and the overall vocal processing chain.
While not many Slate Digital plugins made this shortlist, they did upload a fantastic video on getting a fantastic vocal recording. Most Slate Digital plugins would make an honorable mentions list.
How To Get a Great Vocal Recording
Even if you have all the plugins on the list below, you still need a great vocal recording if you expect to have a fantastic end result. There are three steps to getting a good vocal recording:
Create a good recording environment. You don’t need a perfectly treated sound booth, but you certainly need a quiet listening and recording environment. Make sure the space you are recording in doesn’t have the AC running, buzzing light fixtures, or open windows where even a light breeze can creep in.
Having furniture in the room and laying down a rug or carpet will help dampen the sound as it moves throughout the space (this is known as sound absorption). This is supported further by placing your microphone away from walls and other hard, flat surfaces.
Looking for more studio inspiration? Check out our studio desks article for design ideas.
Use a good microphone. You don’t need to shell out for a vintage ribbon microphone, but your mic is a critical part of your recording. It is worth investing some money into this stage of the process since any cheaper option you purchase will only get replaced in a short time. We have a guide on the best microphones for vocals if you want to learn more.
Get a good vocal performance. Obviously, having a Grammy-winning singer will help your overall vocal. But when that’s not an option, it’s up to you to get the best performance out of whatever singer you’re working with. At a minimum, record multiple takes of every vocal line so you can choose the best one, or better yet, splice the nest parts of multiple takes into one composition!
Vocal Processing Chains
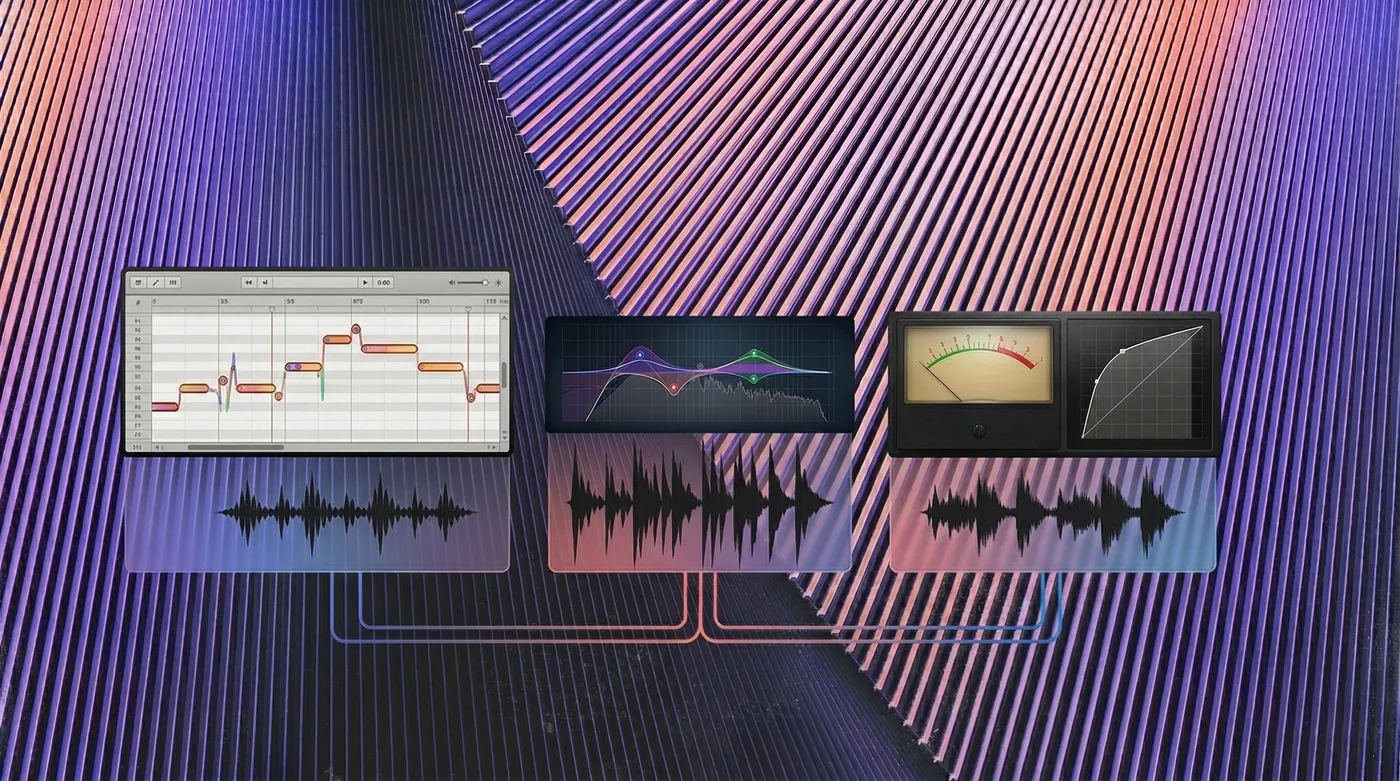
The order in which you place these plugins in your vocal processing chain substantially affects the end result. This order of your plugins at this stage is almost as crucial as the plugins themselves.
In general, here is how I recommend ordering your plugins:
Autotune, Want to know a secret? Virtually every singer and producer is using autotune, which means you should be too. The goal is to tighten up the singer’s pitch without making the autotune itself audible to the listener. Subtlety is key.
Compression, We like to stack multiple compressors in a row. This boosts the quiet parts of the vocal and adds a larger-than-life feel to the performance. Whenever I hear an amateur-sounding vocal, it’s usually because there isn’t enough compression. A mark of an excellent vocal take is hearing every inflection point in the vocal performance.
EQ, Only three words should be at the forefront of your mind when you are EQing vocals: harshness, presence, and mud. You want to reduce the harshness , so the vocal is pleasant to listen to, add presence so it cuts through the mix, and reduce mud to sound crisp and clean.
Reverb & Delay, Reverb and delay put your clean, dry vocal into real space. Once again, this helps your vocal feel larger-than-life and makes the performance more authentic.
Limiting, We all know how effective a limiter can be at the end of a chain. But in this instance, adding just a light touch of limiting to your vocal chain’s end can catch any harsh transients that the compressors missed. Look to reduce ~2db on the loudest parts of the vocal. Anything more than that risks making the vocal take appear overly compressed and squashed.
The truth is, if you want your vocals (or any sound that is) to sound more professional and polished, nothing will accomplish that faster than a comprehensive understanding of how to use and apply processing chains. So before we dive DEEP into the best vocal plugins themselves, check out the above video for our quick and easy approach to vocal processing.
Now, let’s get to the list! When it comes to Autotune, Compression, EQ, Reverb & Delay, and Limiting, these are the absolute best plugins for mixing vocals.
Best All-In-One Vocal Plugins
Everything below this point assumes you want to build the chain yourself. For a lot of producers that is the wrong answer, at least for now, so here is the other one.
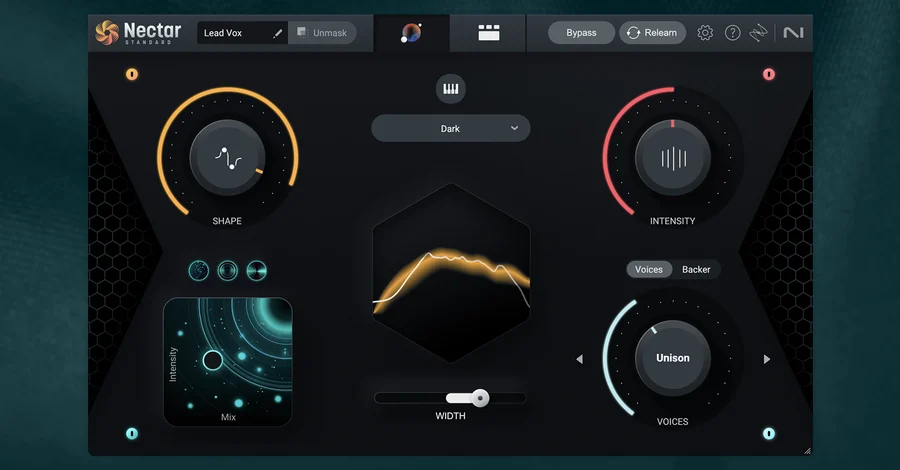
Price: $55 (Elements), $199 (Standard), $299 (Advanced)
UX: One window holding the whole chain as modules: EQ, compressor, de-esser, pitch correction, dimension, reverb and delay. There is also a Vocal Assistant that listens to your vocal and builds a starting chain for you. Standard adds the Voices module for auto-harmony under MIDI control and Backer for synthesized background singers.
Character: Whatever you ask it for, which is both the appeal and the risk. On its own the processing is clean and modern. Left on the Assistant’s settings it is usually doing more than the vocal needs.
Uses: Start here if the five-stage chain below feels like a lot, then graduate to the individual plugins as you start hearing what each stage is doing. The Elements tier at $55 is the one worth looking at first for that. Audiolens tone matching is the standout feature: point it at a reference vocal on a record you love and it builds an EQ and tone target from that recording.
How We Make It Better: Let the Vocal Assistant build its chain, then immediately turn off its reverb and halve its EQ moves. It tends to over-process, and the reverb choice in particular is almost never right for the track. If you want this idea in its simplest form, Waves CLA Vocals is six faders modeled on Chris Lord-Alge’s vocal chain, and it will get you a rough mix vocal in about thirty seconds. You give up almost all the fine control, which is the whole trade.
Best Pitch Correction Plugins for Mixing Vocals
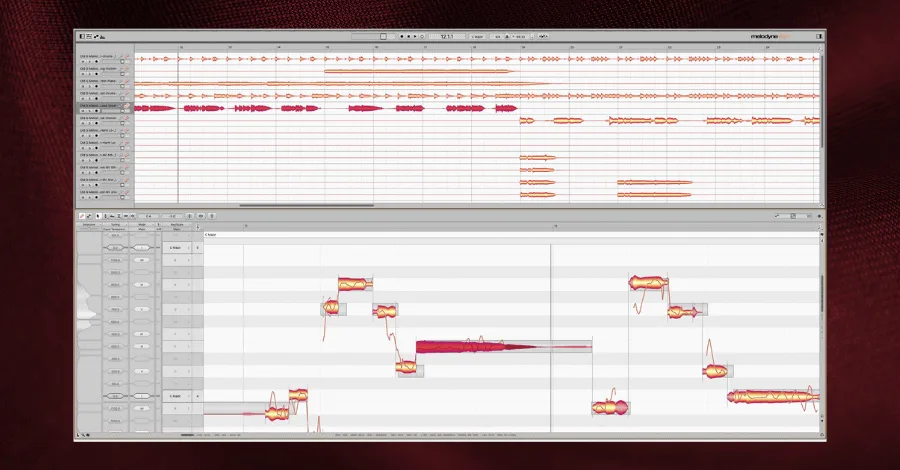
Price: $99 (Essential), $299 (Assistant), $499 (Editor), $849 (Studio)
UX: A little bit of a 2010 Macbook vibe, but highly visual and ultimately functional.
Character: Melodyne is the godfather of all autotune plugins. It allows you to adjust the pitch and timing of a vocal performance with precision and ease. This is the go-to of vocal editing plugins.
Uses: You can accomplish any autotune or performance correction task with Melodyne. It also has extensive uses beyond vocal editing, you can even correct the pitch of polyphonic audio with the Editor version (like tuning a particular string in a guitar chord recording).
How We Make It Better: The Vibrato feature is essential for getting a tight, but realistic vocal performance. Full Vibrato means that your singer might sound “pitchy” when they hold a note. No vibrato makes them sound like T-Pain. Go for a moderate Vibrato value.
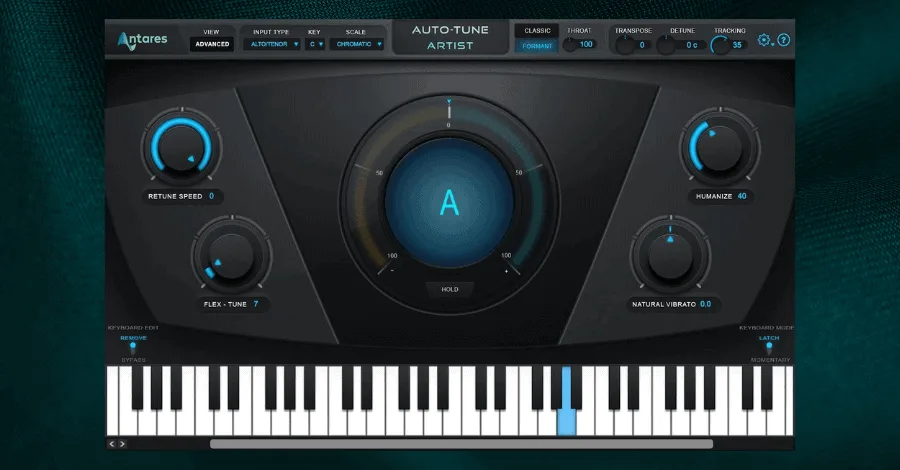
Price: $99 (Access), $399 (Pro)
UX: Sleek and intuitive. Autotune has a quick learning curve to get you editing vocals in no time, but it has some great functionalities the further you dive in.
Character: Autotune seeks to give you transparent vocal corrections without the manual work that is often required with Melodyne. It can provide easy touch-ups for vocal performances or be used more extensively for creative vocal processing.
Uses: Autotune is also a one-stop-shop plugin for all your pitch correction needs. It has some great presets from top-level engineers for everything from tweaking toplines to creating uniquely processed adlibs.
How We Make It Better: The “Retune Speed” parameter is one of the most important features of Autotune. Slow speeds give you the most natural and subtle correction, we recommend slow speeds for any vocal that you want to feel especially human and organic.
Best Compressor Plugins for Mixing Vocals
1176: UAD or Waves
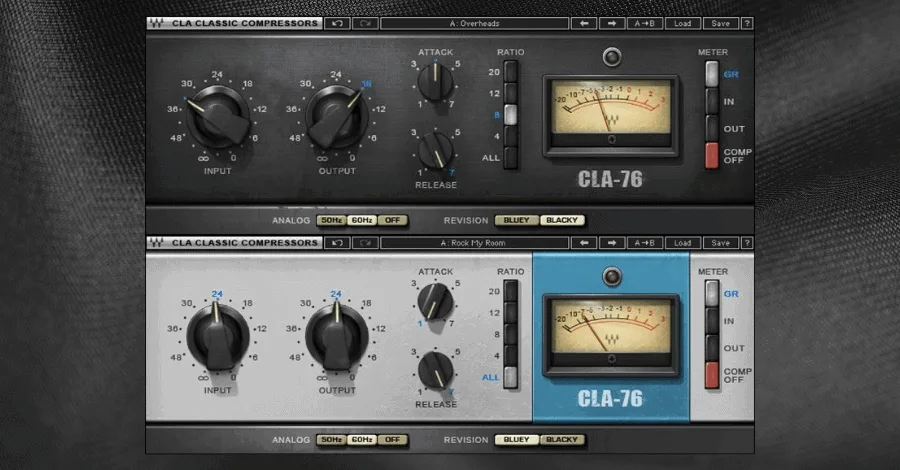
Price: $149 (UAD) or $29 (Waves)
(Note: These are essential vocal compression plugins used by professionals)
UX: Classic and streamlined. The 1176 is a powerful compressor that packs a punch with five main controls: input gain, output gain, attack, release, and ratio. This compressor is fast and aggressive, making it an ideal choice for taming the vocals’ dynamic range.
Character: Analog and punchy. The 1176 is a classic vocal compressor that provides rich warmth coupled with lively dynamics. This is one of our all-time favorite compressors.
Uses: The 1176 is best used as a workhorse compressor on a lead vocal. Alternatively, use a high ratio (12 or 20) along with a fast attack time to squash the dynamic range of backing vocals.
How We Make It Better: On a lead vocal, use the slowest possible attack time and a relatively quick release. The slow attack on the 1176 is still faster than most analog-modeled compressors. You can usually get away with up to 10-15dB gain reduction without it feeling overbearing.
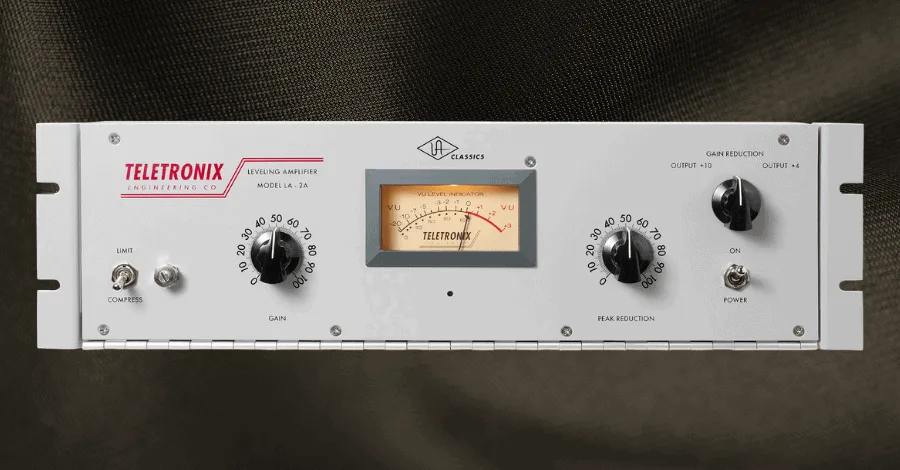
LA-2A: UAD or Waves
Price: $149 (UAD) or $36 (Waves)
UX: Extremely minimalist. The LA-2A has two controls, input gain, and output gain. You’ll be able to use it effectively right out of the gate, and fewer controls mean less room for user error!
Character: Unlike the 1176, the LA-2A is smooth and gradual. It’s an exceptionally musical compressor where you will hardly ever hear it pumping as it’s working to reduce your dynamic range. There is a reason this has been a go-to compressor for half a century: it sounds fantastic.
Uses: Use on your lead vocal chain after an 1176 (or another compressor). This is an excellent general-purpose compressor that works hard to catch individual syllables and smooth out a performance’s broad dynamic range.
How We Make It Better: Add the LA-2A to a group of your dry vocals. Adjust until you get a modest gain reduction in the loudest parts (3dB or less). This is a great way to smooth out your vocal bus.
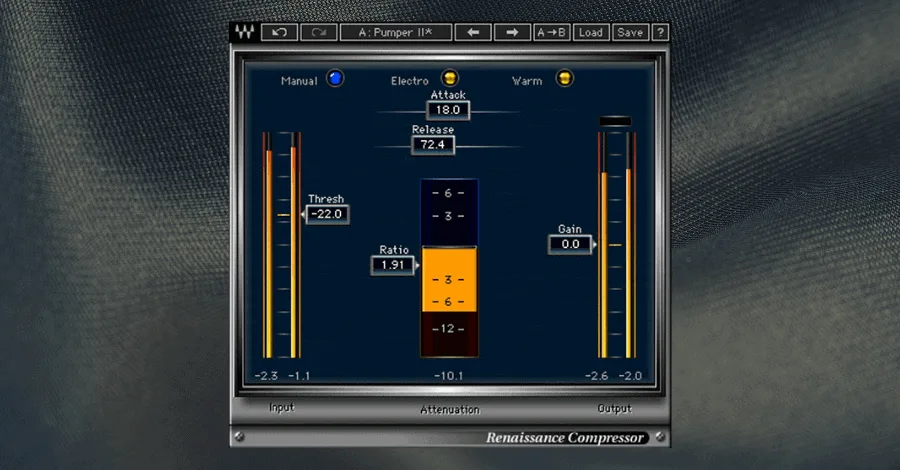
Price: $29
UX: Waves RVox is one of those magic plugins that gets us great results with minimal effort. The plugin is streamlined and visual, allowing you to easily see how much gain reduction you’re implementing without getting caught up in a web of parameters you could tweak.
Character: Bold and musical. RVox combines gating, compression, and limiting into one plugin, it does a lot of work “under the hood” to give natural-sounding results.
Uses: RVox is best used on a lead vocal, but it could also be used for backing vocals or even in spoken word scenarios. Here at Hyperbits HQ, we like to use RVox in tandem with other vocal compressors, so RVox itself is only bringing a moderate gain reduction.
How We Make It Better: With so few parameters, RVox presents an excellent opportunity to use makeup gain so you can hear exactly what the compressor is doing. Once you set your threshold for gain reduction, adjust the output to make up the amount you just reduced, which allows you to hear the net effect of the compression.
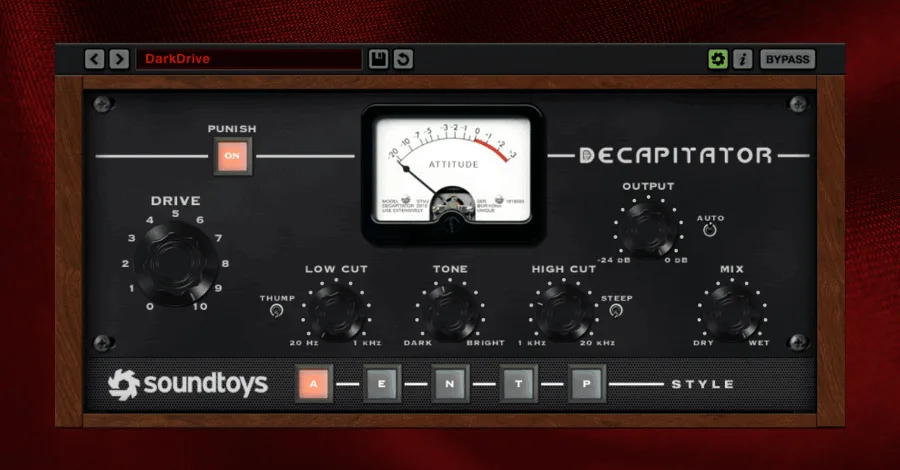
Price: $199
UX: Ok, so this is our wild card pick. Decapitator is a saturation plugin. It’s probably also our favorite plugin, like, EVER! But in applying saturation, Decapitator also applies some compression and reduces the dynamic range of a signal. This is a little more challenging way to compress a vocal because the compression is happening in tandem with saturation and distortion.
Character: Analog. Decapitator can take a sterile, amateur recording and make it sound rich and analog.
Uses: Use Decapitator subtly on lead vocals and heavily on backing vocals. We like the A (emulating the Ampex Tape Machine) and P (emulating the Pentode setting on the Thermionic Culture Vulture) styles best for any vocals.
How We Make It Better: On backing vocals, select A or P and hit Punish. Boost the drive knob until you get some subtle crunchy distortion. Finally, set the mix knob to about 50%. This gives you some excellent parallel compression and parallel distortion.
Best Equalizer Plugins for Mixing Vocals
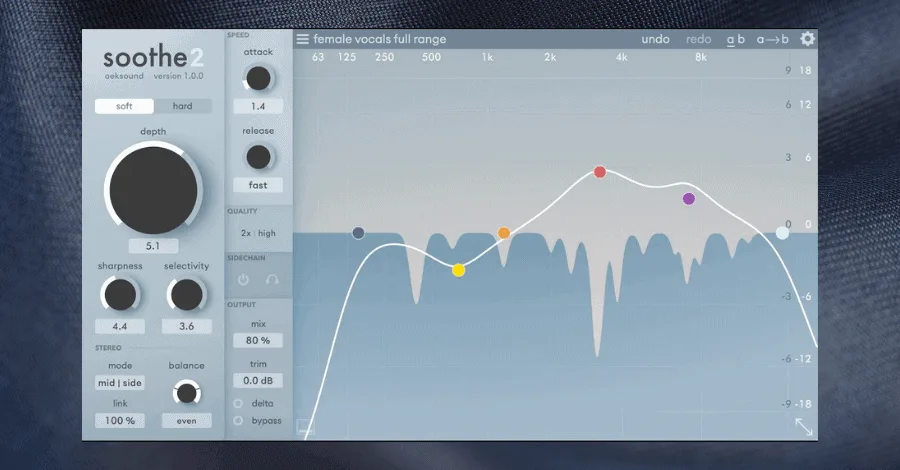
Price: $219
UX: New-age and intuitive. Soothe2 is a dynamic EQ, meaning it functions like an EQ, but responds to input gain changes (like a compressor). Soothe2 is intended to be a quick plug-and-play plugin. Add it onto your channel, make a couple of quick tweaks, and move on.
Character: Transparent and clear. You don’t usually want to add anything with Soothe2. Instead, we take away the resonances that sound unpleasant in the vocal to make it feel more smooth.
Uses: We find ourselves using this on literally all vocals styles, but especially “loud and proud” leads. The human voice is notoriously resonant, so this is a great tool to tame harsh frequencies in any kind of vocal recording.
How We Make It Better: Start with the default settings and tweak the depth knob, typically, resonances from 1-8kHz will be the ones most important to reduce, so you can even limit your band to that range. Crank away on depth until you find a level just beyond what you like, then close your eyes and lower the mix knob until you get the most natural-sounding result.
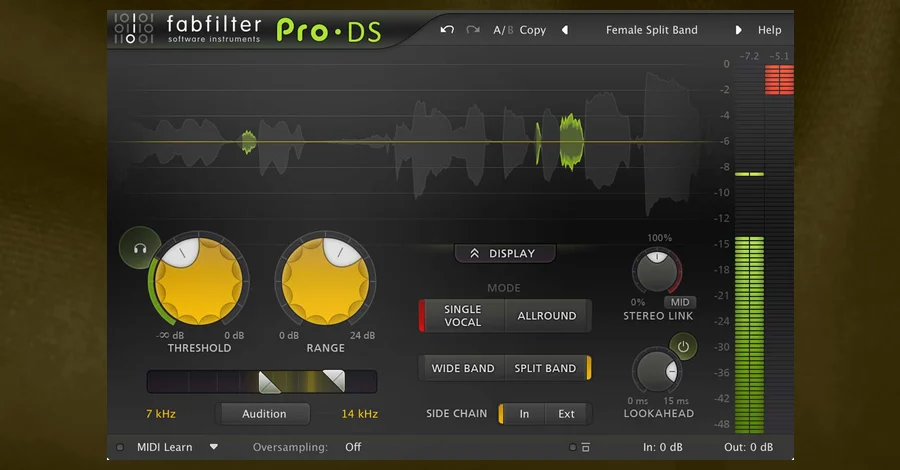
Price: $199
UX: A small window with very few controls, and it mostly sets itself. Pro-DS finds the sibilant range on its own and drops a threshold line over it, so the real decision you are making is how hard to push. Two detection modes: Single Vocal locks onto one voice, Allround is for mixes and busses.
Character: Invisible when you use it right. Wide Band mode ducks the whole signal for a moment, which sounds natural on a solo lead. Split Band ducks only the sibilant range and leaves everything else alone, which is what you want on a busy vocal bus where a broadband dip would pull the whole thing down.
Uses: Esses, and only esses. Soothe2 above deals with broadband resonance, the harshness sitting under the whole performance. De-essing is the narrower job, the specific bursts around 5-9kHz on every s and t. Those are two different problems and a bright vocal usually wants both.
How We Make It Better: Hit the Audition button. It solos only what the plugin is taking out, so you can hear whether you are catching sibilance or eating the top off the vocal. If you hear words rather than hiss, back off the threshold. Fair warning on the price: $199 is a lot for one narrow job, and if the budget is tight, a multiband compressor you already own gets you most of the way there.
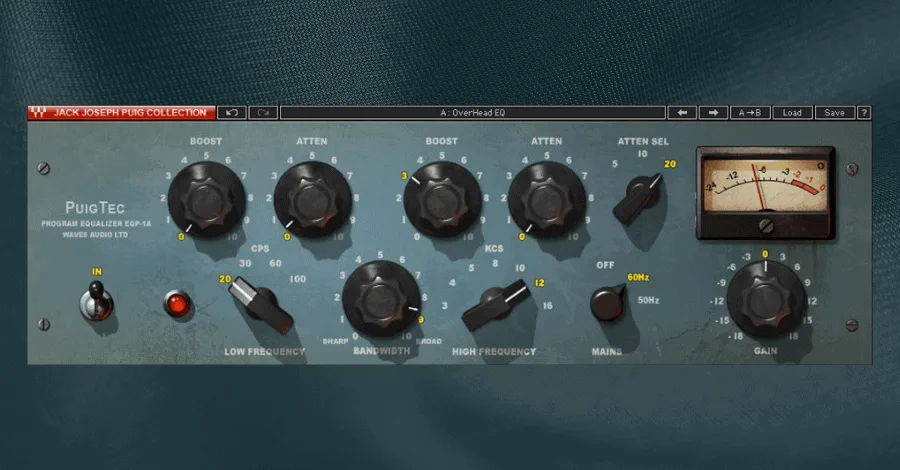
Pultec EQP1A: UAD or Waves
Price: $149 (UAD) or $49 (Waves)
UX: What Pultecs lack in their number of parameters, they make up for in over-the-top warmth. I’m not going to lie; they are deceptively complicated to use. You have just a few knobs that you can tweak to predetermined frequency values. This makes them streamlined to use but somewhat inflexible.
Character: Warm, warm, warm. Pultecs make any vocal feel old-school and analog. The low frequencies can add body and boom to a thin recording, and the high shelf can add smooth, crispy clarity.
Uses: Pultecs are best for smooth, broad boosts. Use the EQP1A on your main vocal group to make subtle tweaks to the high or low ends of all your vocals.
How We Make It Better: To add some shine to a vocal bus, set the High Frequency to 10 or 12 and the Bandwidth to somewhere between 5 and 8. Finally, gradually bring up the Boost to get a beautiful and smooth high shelf adjustment
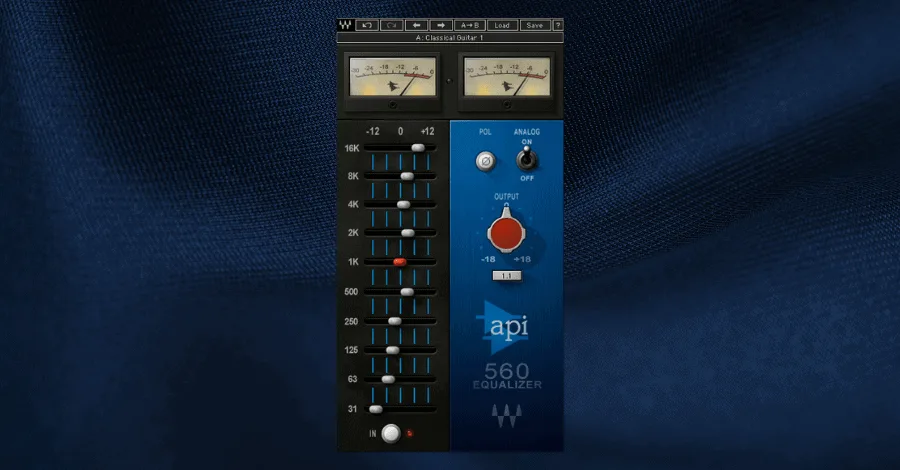
Price: $29
UX: The API-560 is a visual and easy-to-use EQ. You have 11 bands, each spaced an octave apart, that allow you to apply smooth EQ to your sound.
Character: The API-560 is soft and creamy. Because you only have 11 bands, each band provides a relatively wide boost or cut to your sound. It’s a quick plug-and-play EQ for nice analog warmth.
Uses: This is a great EQ for a vocal bus where you need to apply some final, broad coloration. Look to other EQ plugins for narrow reductive moves. The API-560 is a “big picture” EQ.
How We Make It Better: Add onto your vocal chain and boost 3-6dB at 16kHz. Listen as your vocal comes to life.
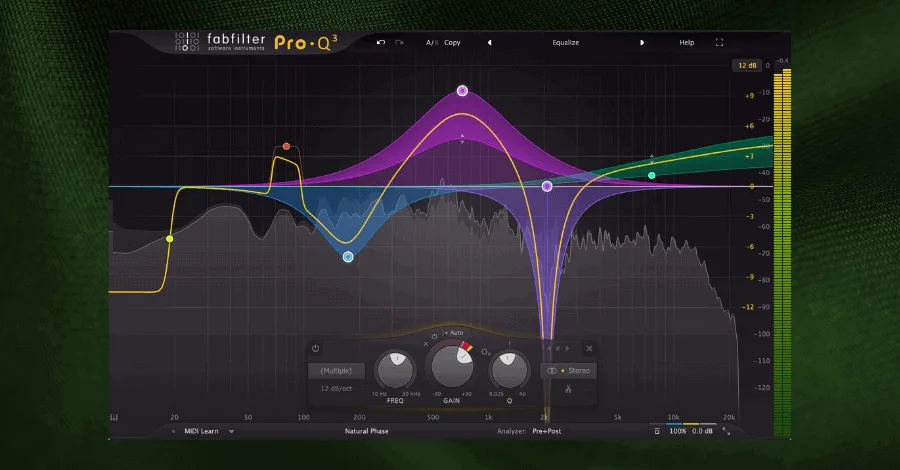
Price: $179
UX: The layout of Pro-Q is a UX designer’s dream. It has a clean interface with intuitive controls that contribute to its very quick learning curve.
Character: Like many FabFilter plugins, Pro-Q sounds clean. You’re provided with virtually endless flexibility in the number of frequency bands, mid/side proportions, and a variety of natural/linear phase options. This EQ can make massive changes to your vocal while still providing a transparent feel.
Uses: Pro-Q’s flexibility makes it a great choice for a variety of settings. It should be your workhorse plugin for reductive EQ on your vocal. It’s also great for carving resonances out of vocal reverbs.
How We Make It Better: Use the Dynamic EQ feature to remove resonances from both lead and backing vocals. If you like how it sounds, you won’t have much of a need for Soothe2.
Best Reverb and Delay Plugins for Mixing Vocals
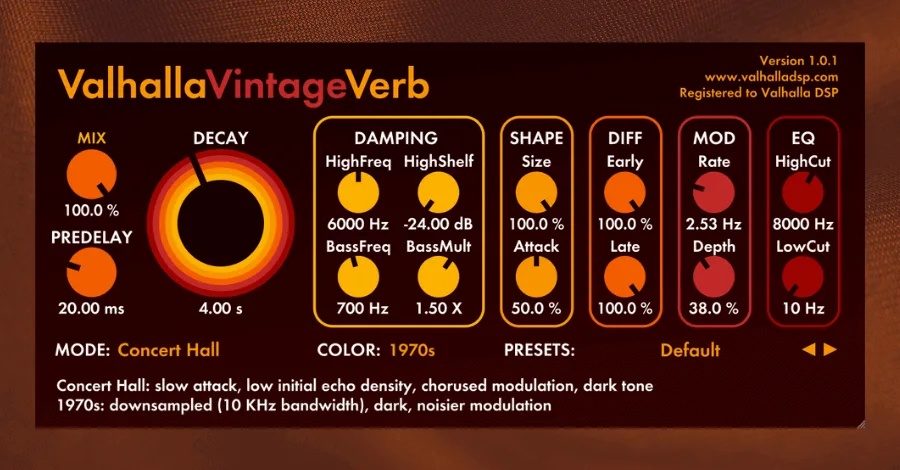
Price: $50
UX: Psychedelic and fun. Valhalla plugins have a retro, colorful vibe while still being straightforward and easy to use.
Character: Vintage Verb is extremely popular for good reason: it sounds phenomenal. It’s known for being very forward, bright, and having very smooth tails. It’s called “vintage” because it is meant to give off the 70s/80s vibe in the spatial atmospheres it creates.
Uses: Vintage Verb is a great choice for your main vocal reverb. You can even crank up the decay time to add some tonal atmospheres throughout the background of your production.
How We Make It Better: Put two instances of Vintage Verb on two separate sends. Make one short and upfront, and the other long and muted.
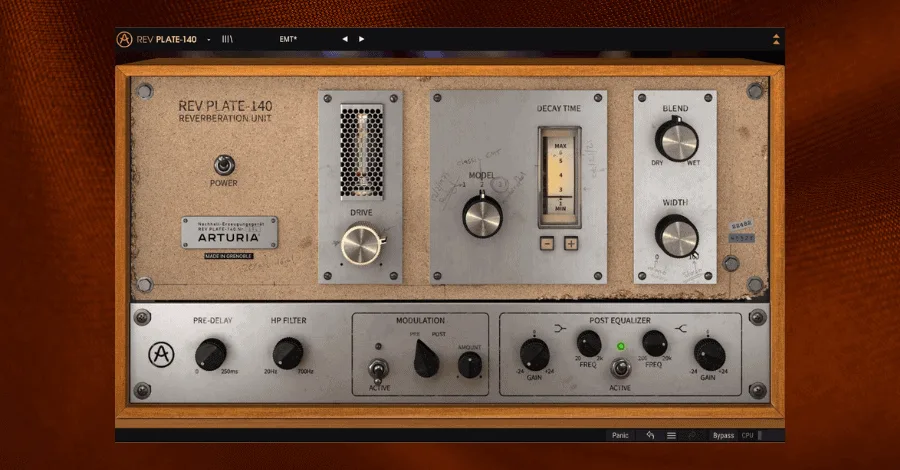
Price: $69
UX: Unapologetically old school. PLATE-140 is supposed to take you back 50 years to the days of obnoxiously large plate reverb units.
Character: PLATE-140 is an emulation of the EMT-140 reverb unit, the mother of all plate reverbs. It is bright, smooth, resonant at times, and promises to bring any vocal to life.
Uses: We love using PLATE-140 as the primary “long” reverb on a vocal. Set the decay time up to 5 seconds (or longer) for smooth, spatial tones.
How We Make It Better: Add a little bit of “Pre” modulation to your vocal to help smooth out some of the tones you get in the reverb.
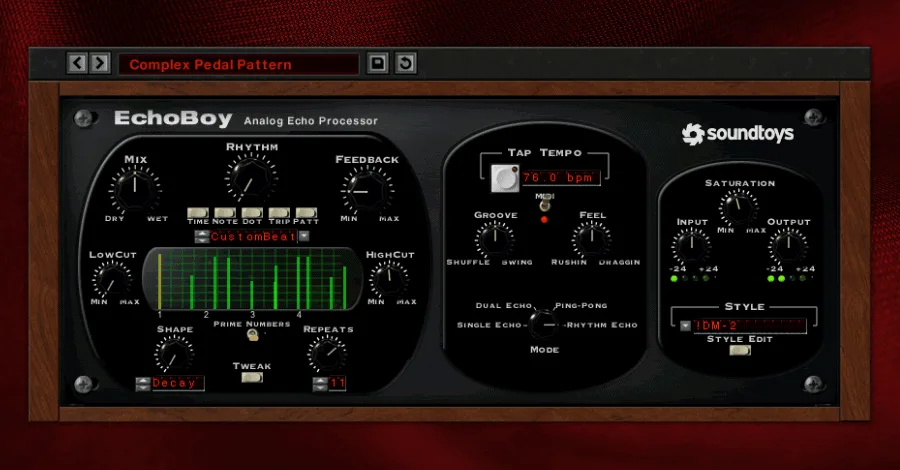
Price: $199
UX: Straightforward and intuitive. Echoboy gives off a classic vibe, but it comes with a new-age design that makes it a sleek plugin.
Character: Diverse and malleable. Echoboy is our favorite delay plugin. Period. Why? Because it can be anything you want: a simple transparent delay, an emulation of a Space Echo or EchoPlex, or a wonky digital delay from the future.
Use: Any type of vocal delay. Echoboy is an easy choice for the main ¼ or ⅛ note delays on your lead vocal.
How We Make It Better: Select the DM-2 style and add a little L/R offset for a great wide, muted vocal delay.
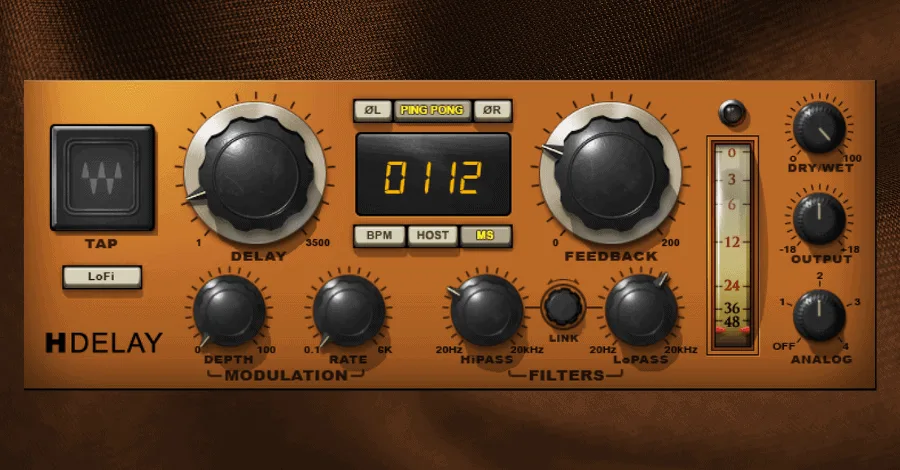
Price: $49
UX: H-Delay has no additional dropdowns or menus, so it is a simple and visual plugin.
Character: Analog and warm. H-Delay’s default settings emit a little bit of white noise, and when you tweak the delay time you’ll hear some pitched artifacts, reminiscent of physical tape delays.
Uses: Like Echoboy, H-Delay could easily be the main delay on your lead vocal. Since it is less detailed than Echoboy, we recommend sticking to the standard delay sounds and going to other plugins for more complicated, sound-design-intensive delays.
How We Make It Better: Hit the “Lo-Fi” button for an even more warm, muted feel to the delay.
Best Limiter Plugins For Vocal Processing
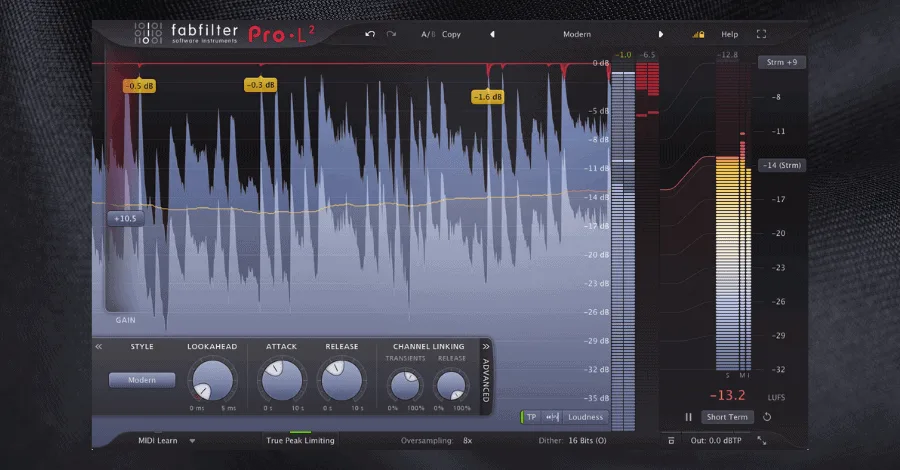
Price: $199
UX: Clean and digital. L-2 doesn’t try to feel classic or old-school, it tries to feel like the modern, transparent, visual plugin that it is.
Character: L-2 works with precision and clarity. When applied at the end of the vocal chain, it will tame harsh transients in a way that even the most skilled listeners will hardly notice.
Uses: Add L-2 to the end of your lead vocal chain or as the last plugin on your vocal bus. Remember, we only want to reduce a couple of dBs on the loudest parts of the vocal.
How We Make It Better: Enable 1:1 mode so you don’t add any net gain into the vocal. This will ensure that you hear the effect of the plugin and aren’t fooled by a boost in volume when you turn it on.
Build Your Chain and Mix Like a Pro
While you certainly don’t need all of these plugins to get phenomenal vocals, investing in just a few of these top plugins can bring significantly better results to your next vocal track. Remember the order in which you use the plugins matters an enormous amount. With the best vocal plugins in your arsenal and a good strategy of how to use them, you’ll be ready to mix professional-quality vocals in no time.
Pro Tip: We spend a massive portion of the Hyperbits Masterclass digging even deeper into the tools, science, and best practices needed to release professional-quality music, which includes intensive vocal work, advanced mixing approaches, sound design, and more. A great track sounds powerful, warm, and confident, and we teach you how to get there in as little as 8 weeks.
Related tool: Start to Finish with Syence: Produce a vocal track from blank session to commercial master, step-by-step with Zach from Syence.
Heads up: some of the links below are affiliate links. If you buy through one, we earn a small cut (costs you nothing extra). But we'd point you at this exact gear whether we made a dime or not.