
Jump to a section5
Knowing how to create contrast in a mix is essential. All art forms pay attention to contrast, but I often see producers skip this step. I presume this is because blogs and YouTube videos solely talk about all the technical aspects of mixing, while completely ignoring the creative aspects of it.
Rest assured, the mixdown process is just as creative as it is technical. Assuming otherwise will only leave your mixes sounding sub-par.
Here are four ways that you, as a producer, can break the mold and reintroduce some more thoughtful perspectives back into your mix, achieving more creative results and better mixdowns.
1. Create Contrast In Your Mix With Depth

Visual art mediums, such as photography, require the artist to create depth to communicate the emotion and introduce a three-dimensional impression to the work. You can create a similar impression of movement and depth in your productions by contrasting elements in the mix to create a similar effect as what is shown in the photo above.
Depth of Focus
Photographers rely on focal points to create depth in their work, having nearer objects showcase more detail and definition compared to background elements that show less detail. Check out the above image and notice how much more detail can be seen in the nearby blades of grass than in the mid-field trees.
The contrast is critical to achieving the sense of depth in the image. And transient shapers and compressors can be used to achieve a similar effect in the world of mixing.
Transient shapers and compressors set with slow to medium attack times will help attenuate the initial details of any mix element you wish to drive to the front of the mix in the same way that the focal depth in the image draws the grass closer to the viewer.
But in the same way that slow to medium attack time compressors can draw elements closer, fluid and gentle compressors with fast attack times can squash these detail transients so much so that they are pushed back in the mix.
Ableton’s Glue Compressor is a perfect tool to experiment with this. Try placing a glue compressor on an element you want to push further back in a mix, set the attack to .1 or .3, and adjust the threshold to taste. You will quickly notice how the fast-acting compressor removes the details in the sound, thus pushing it further away in the mix.
Another note on proximity through contrast is why reverb is such a powerful tool to push things back in a mix. Where transient shapers attenuate those details, reverb washes them out and muddies the details in a way that makes them feel further away.
So let’s hear everything we just discussed live in action.
Now listen to what happens when a transient shaper pulls the lead forward and reverb pushes the supporting elements back.
Listen to the two examples above and notice how the transient shaper being used in the second example pulls the lead elements forward in the mix. Sure, it gives it a bit more perceived volume. But more importantly, it attenuates the details in the transients which draw our attention to it.
This contrast in focal depth is further heightened through the use of reverb on the supporting elements, pushing them even further away. The contrast between the focal depths in the mix instantly creates a much more dynamic and interesting mix (much like the photo).
Depth of Movement

Giving mix elements movement can be another powerful way to create a sense of depth and contrast in your mix. Notice how the gradient density in the fog in the image above changes, giving the impression that the mist is moving towards the distant mountain?
Motion plugins, like Ableton’s AutoPanner or SoundToys PanMan can bring similar senses of motion to supporting sounds in your mix. In contrast, the attention of your listener is drawn to the more stagnant and immobile elements of the mixdown.
Now with a slow panner added to the supporting element.
Compare the two examples above. Do you notice how the lead guitar in the second example actually feels more of a leading element once a bit of movement is added to the supporting element?
These types of tools can be powerful but use them sparingly. Using panners on any more than a couple of mix elements will likely lead to a disjointed and jumbled mix that lacks direction. So do your best to use these effects on only a channel or two in your mixdown.
Pro Tip: When using AutoPanner or PanMan on supporting elements, keep the rate slow, somewhere between 0.1Hz and 0.5Hz. Faster rates turn into an obvious effect rather than a subtle spatial cue. The goal is to make the listener feel depth, not notice a plugin.
2. Create Contrast In Your Mix With Width

Humans have evolved to perceive width entirely through contrast. Even two identical sounds panned left and right will be summed to mono simply because of a lack of contrast between the two channels.
But the second that we add in any sort of difference between the left and right channel, additional width is created.
So let’s get into some ways we can use contrast in a mix to help achieve a wider sound.
I give feedback on a LOT of music at the Hyperbits Masterclass. And the one thing I most commonly hear in the sub-quality mixes of a lot of my earlier students is a lack of definition in the stereo field. These are the types of mixes where the producer wants the mix to sound wide. So they make every single thing in the mix have as much width as possible.
The end result of this means that nothing is wide.
But professional engineers avoid this exact issue by relying on contrast. Quality, professional mixes appear wide because the engineer has been incredibly deliberate about which elements they keep in mono.
And here’s the same mix with deliberate mono elements anchoring the center so everything else has room to breathe.
Compare the two examples above and think about what you notice across multiple listens. You may want your headphones for this one.
The best mixes are always greater than the sums of their parts. So when comparing the two examples above, it’s more important to pay close attention to how each layer of the mix is interacting with the others to achieve the result.
Setting benchmarks in a mix can be a powerful way to get the most out of this concept. Benchmarks like this are all about the extremes. So be deliberate and intentional about panning some lighter elements in the mix to the extreme lefts and rights of the stereo field.
Let’s extrapolate this familiar idea from above by using two shaker loops to establish these benchmarks.
Notice how much wider this mix sounds already. Once the absolute extremes are established, suddenly so much more definition is created in every other element in the mix. By relying on benchmarks such as this, the three-dimensional space professional mix engineers achieve with ease is likewise created in our own projects.
Pro Tip: Before reaching for a stereo widener on your mix bus, try narrowing your kick and bass to mono first. That contrast alone will make everything else sound dramatically wider without adding a single plugin.
To go deeper on stereo imaging techniques, check out our complete guide to stereo imaging and wide mixes.
3. Create Contrast In Your Mix With Coloration

In the same way that our eyes are attuned to being able to identify changes in coloration in hues and textures. So are our ears. Being deliberate about contrasting similar colorations in your music can be a quick and effective way to achieve a few different things simultaneously in a mix.
Take a moment to soak in the image above before listening to the mix below it. Both have a lot of common elements but also lack any emotional weight or central themes. The below image is the equivalent of the rough mix that follows. And it’s our job as engineers to turn the stale, lifeless mix into something extraordinary.
Listening to the above example, the first thing we need to address is the lack of contrast between the bass line and the guitar lead.
It’s important to know your plugins here, as some handle and address different frequency bands in different ways. And how they each do this is paramount in achieving the contrast in colorations we are seeking.
Let’s start by adding some brightness to the lead, which will be contrasted against the grizzled darkness we will add to the bass line afterward.
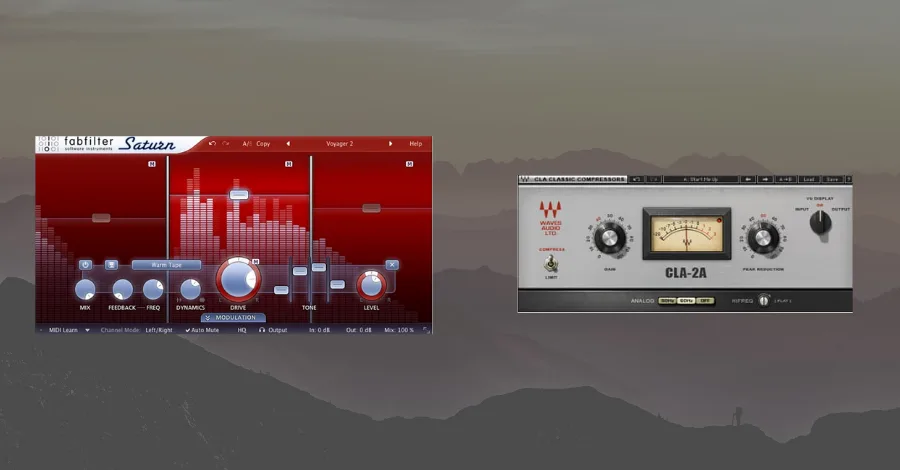
Digital saturation paired with analog-emulation compression will be the best combination to achieve the bright and cutting crispiness in the lead. FabFilter Saturn is a powerful tool for this, as being able to saturate a few different frequency bands in various ways will help heighten the contrast we are after from the start.
Once the saturation adds the energy, the analog compression helps add the life and energy to help the lead cut through the mix.
Listen to the result for yourself:
Now that we have a defined vibe and tone in the lead, let’s add some contrast to the bass by introducing some darker, grittier modulations to the low end.
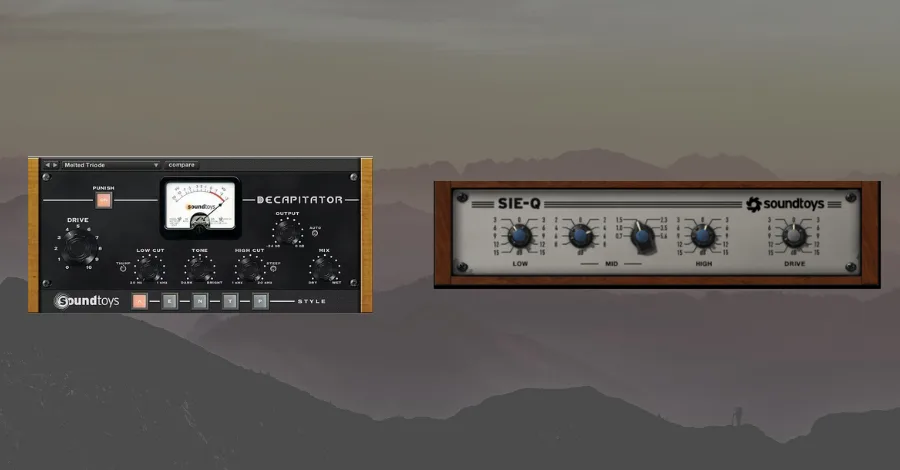
Where the digital saturation introduced a brighter texture to the lead, analog saturation of SoundToys Decapitator will help add the chunky weight to the bass. From there, a bit of analog EQing will help round out the upper mids of the bass.
Now listen to the mix after the bass has been processed. The tonality and energy of the bass have completely changed and is now far more drastic while also separating itself from the brightness of the lead.
The tonal separation between the lead and bass is now clear enough that the two elements coexist without fighting. And visually, this is the effect you’re after.

Notice the color differentials now in the image above and think about how they affect how you perceive the image. The brighter colors against the darker mountains below allow you to easily trace and track the movement of the image without much issue at all. This creates a much more fluid and enjoyable viewing experience, just like it did in the mix.
The effect achieved in the mixdown is twofold, as it not only creates a livelier and more energetic mix but also creates an inherent separation between the different elements, leading to an easier mixing process. Only a few small EQ tweaks are required.
4. Create Contrast In A Mix with Dynamics
Add more impact to your transitions between sections by being mindful of the volume changes and frequency densities. The initial impact of a hook or drop section can be magnified if the section before it is, by contrast, quieter or less full.
Conversely, breakdowns can be even more emotional if the energy level is brought up to the max during the preceding drop.
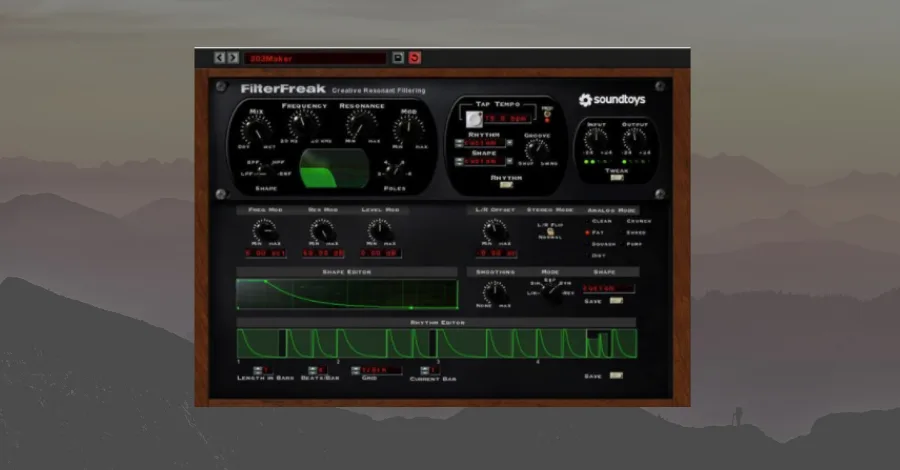
Filter sweeps and volume automation are standard ways to heighten the contrast between sections. But relying on the suite of tools within plugins like FilterFreak 2 can get you even better results.
The added modulation options that come with tools such as FilterFreak allow you to maximize the creative potential of an otherwise generic high-cut sweep leading into a drop.
If you want to see how compression fits into this dynamic picture, this one’s worth 4 minutes of your time before getting into FilterFreak’s controls.
Now here’s FilterFreak doing its thing on an actual transition. Listen for how the sequencers and LFOs add layers of movement that a simple volume fader or basic filter sweep could never achieve.
Listen to how much energy just a few simple tweaks for FilterFreak’s parameters add to the track. Sequencers and LFOs are working in tandem to add new layers of movement that help heighten the transitions between sections. The result is a build and release of tension that creates a far more impactful point in the song.
Every technique in this post works because contrast gives your listener’s ear a reference point. Depth needs flatness to feel deep. Width needs mono elements to feel wide. Bright tones need dark ones to cut through. And loud drops need quiet sections to feel loud.
Contrast Is What Makes Mixes Come Alive
If you want to have your track come alive with detail, nuance, and space, contrast is a major piece of the puzzle.
But no matter how large of a piece it is, there is still so much else that goes into making music at the highest possible level. If you’ve ever wanted to take your music as far as it can go but got frustrated with half-baked YouTube tutorials and Reddit trolls, the Hyperbits Masterclass is the perfect solution. In as little as eight weeks, you will learn everything you need to know to start making professional quality music that you are excited to show your friends and send to labels.
Heads up: some of the links below are affiliate links. If you buy through one, we earn a small cut (costs you nothing extra). But we'd point you at this exact gear whether we made a dime or not.