
Jump to a section51
- Universal Mac Shortcuts
- Global Commands
- 1Logic Key Commands: ⌥+K
- 2Record: R
- 3Toggle Click Track: K
- 4Play/Stop: Space
- 5Split at Playhead: ⌘+T
- 6Hide Track: ⌃+H
- 7Open/Close Mixer Window: X
- 8Open/Close Piano Roll: P
- 9Open/Close Audio File Browser: F
- 10Mute: M
- 11Mute Specific Region: ⌃+M
- 12Solo: S
- 13Toggle Cycle Mode: C
- 14Bounce Session: ⌘+B
- Main Window Commands
- 15Set Locators By Region or Marker: ⌘+U
- 16Delete Track: ⌘+⌫
- 17Automation View: A
- 18Global Track Lanes: G and ⌥+G
- 19Zoom with the Magnifying Tool: ⌃+⌥+Click & Drag
- 20Copy & Paste: ⌥+Click & Drag
- 21Open Color Palette: ⌥+C
- 22Bounce In Place: ⌃+B
- Track Commands
- 23Create New Tracks: ⌘+⌥+N
- 24New Audio Track: ⌘+⌥+A
- 25New Software Instrument Track: ⌘+⌥+S
- 26New External MIDI Track: ⌘+⌥+X
- 27Create Track with Duplicate Settings: ⌘+D
- 28Create a Track Stack: ⌘+⇧+D
- Piano Roll Commands
- 29Quantize: Q
- 30Force MIDI Notes to Stretch to Following Notes: ⇧+\
- 31Remove Overlapping MIDI Notes: \
- 32Move Selected MIDI Notes Up or Down 1 Semitone: ⌥+Up/Down
- 33Move Selected MIDI Notes Up or Down 1 Octave: ⌥+⇧+Up/Down
- Advanced Shortcuts and Key Commands
- 34Move Region to Playhead: ;
- 35Time Stretch to the Nearest Bar: ⌘+⌥+B
- 36Time Stretch to Locator: ⌘+⌥+L
- 37Add New Marker: ⌥+[Apostrophe]
- 38Jump Forward and Backward by 1 Bar: , or .
- 39Expand and Reduce Waveform View: ⌘+= and ⌘+-
- 40Export Track: ⌘+E
- 41Show or Hide Flex Time: ⌘+F
- 42Enable and Disable Groups: ⇧+G
- 43Capture Recording: ⇧+R
- How to Create a Custom Key Command in Logic Pro
- Make These Muscle Memory
Logic Pro is an incredibly capable digital audio workstation, packed with features. However, with so many different ways to do the same thing, it can take time to get used to how it works.
Shortcuts can dramatically speed up your workflow. Logic has a number of key commands for all its functions that are spread throughout several menus and not always easy to find. Here are some of the most useful Logic Pro shortcuts so you can work faster and more efficiently.
Before we begin, it’s worth mentioning that any version of Logic Pro is only compatible with Mac computers, so we won’t be including any shortcuts for Windows users.
For reference, as we go throughout the article, I’ll be using the mac symbols to explain each key command, so if you don’t already know, here is what each symbol means:
⌥ - Option
⌘ - Command
⇧ - Shift
⌫ - Delete
⌃ - Control
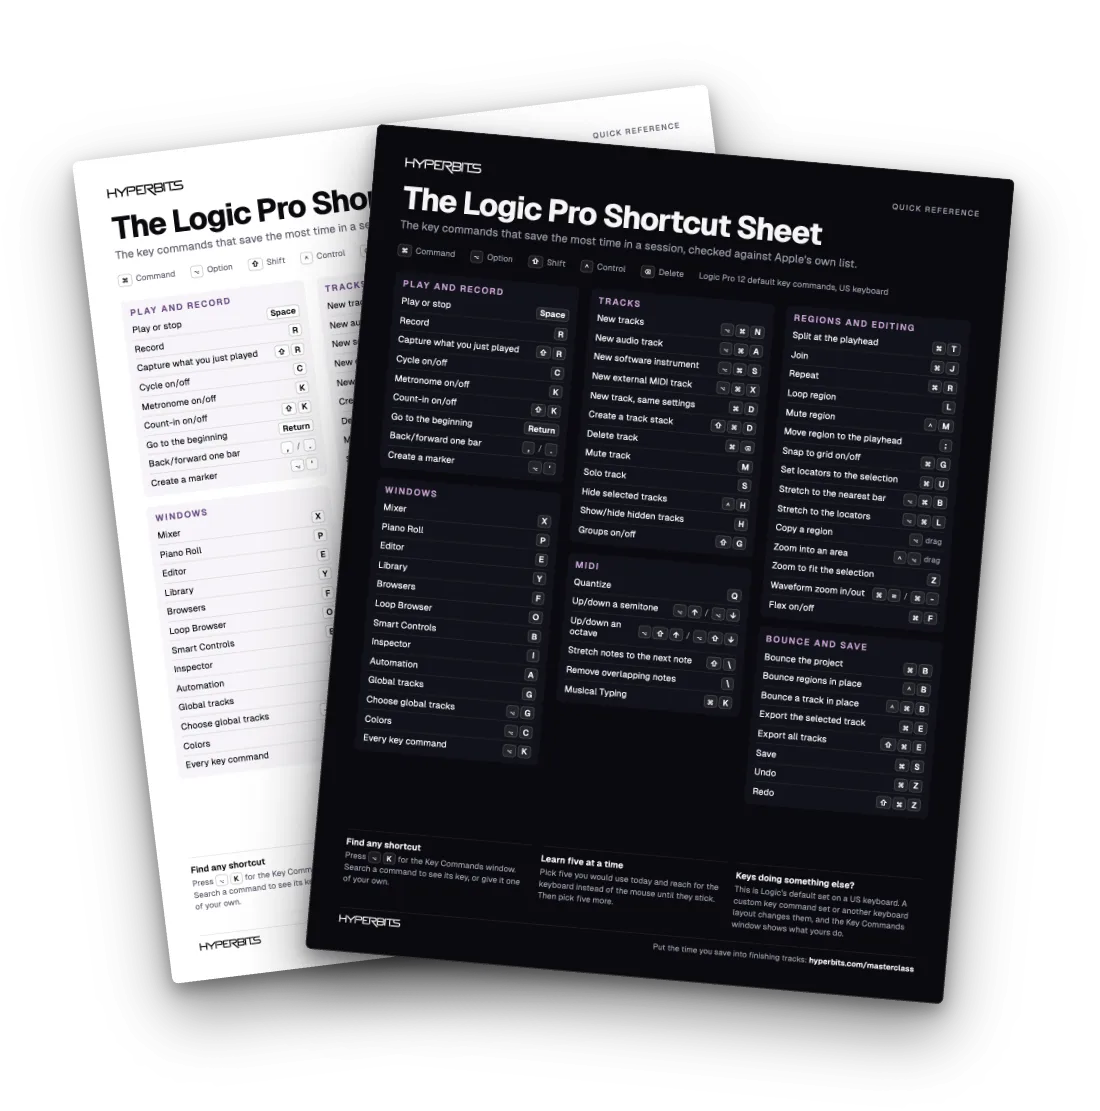
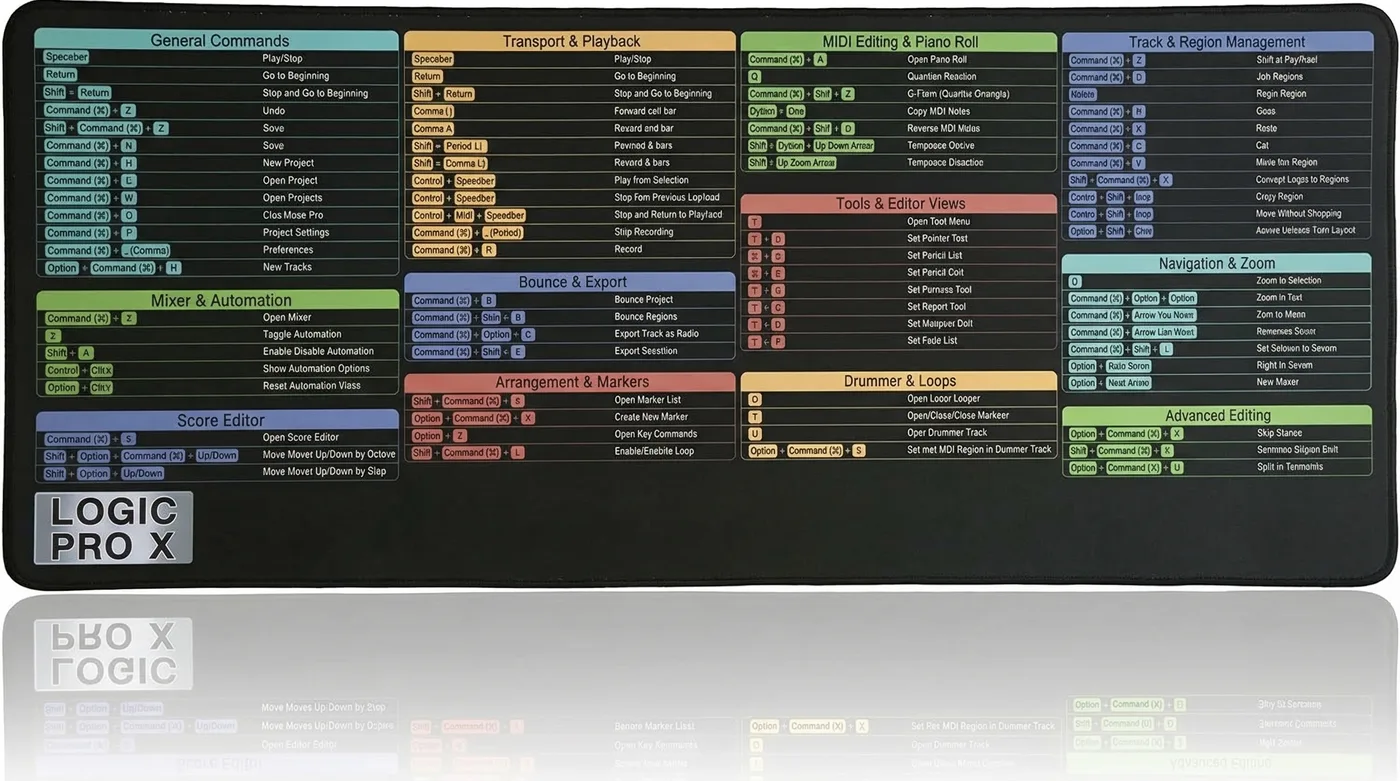
Pro Tip: You don’t need to search the internet for a comprehensive list of Logic Pro hotkeys. Logic has its own built-in cheat sheet that shows you every shortcut in the program. Simply open your project and hit ⌥+K.
Universal Mac Shortcuts
Before we dig into Logic-specific shortcuts and advanced key commands, make sure you know these basic Mac commands:
Save: ⌘+S
Copy: ⌘+C
Paste: ⌘+V
Undo: ⌘+Z
Redo: ⇧+⌘+Z
Select All: ⌘+A
Global Commands
1. Logic Key Commands: ⌥+K

First on our list is the key (no pun intended) to all other key commands in Logic. This will open up a library of every single key command available to you in the software.
This article only scratches the surface of the most important shortcuts, so if you need something more complete, ⌥+K will get you the full comprehensive hotkey list.
2. Record: R

Used all the time in any recording session, it makes sense that R would mean “Record.” In order for this key command to work, you must have your track selected and record-enabled in order for your track to start rolling.
3. Toggle Click Track: K

The Click Track in Logic Pro sits at the top of your session on the main window page. Instead of moving your mouse across the screen taking up valuable time, simply press K to toggle on and off Logic’s click track.
4. Play/Stop: Space

The spacebar is the key command I use more than any other. It plays and stops your session.
5. Split at Playhead: ⌘+T

Another command I use constantly is split. It cuts the selected region at the playhead, allowing you to move, edit, and process each section of your region individually.
I use this command on almost every track I record and nearly every sample I bring into my session.
6. Hide Track: ⌃+H

Logic has a great feature that allows you to hide certain tracks from the main window view. You can use this when you have certain tracks that you don’t want to view during any part of your workflow.
A great example would be when comping a vocal track in Logic, you may want to keep some previous vocal takes that you didn’t use. You can just mute and hide those unused tracks that you may want later. Press H to bring hidden tracks back into view, and H again to hide them.
7. Open/Close Mixer Window: X

The two main windows in Logic are the “Main” window, where you can view your regions, and the “Mix” window. The mix window is useful when working with different plugins on your tracks and is frequently used when working with auxiliary tracks and the stereo output. “X” allows you to switch back and forth between each window.
8. Open/Close Piano Roll: P

If you’ve worked with MIDI in Logic Pro, you’re familiar with the piano roll. As the main MIDI editing window in Logic, this is where you’ll be adjusting any specific notes and velocities in your project.
9. Open/Close Audio File Browser: F

“F” for file is easy enough to remember. This key command allows you to pull audio files from your computer into the Logic session, as well as view and adjust any audio files that are already in your project.
10. Mute: M

Muting your tracks is essential to anyone’s workflow. As you’re producing, you’ll be using this shortcut all the time to silence specific tracks.
11. Mute Specific Region: ⌃+M

”⌃+M” lets you mute a specific region instead of the whole track. If you have an instrument that you aren’t quite sure fits in with the verse, instead of deleting the region altogether, just mute it.
12. Solo: S

Solo is another essential hotkey that even beginners should know. This silences all other tracks and allows you to hear only the tracks you have selected. The track will be highlighted in yellow to indicate it is currently being soloed.
13. Toggle Cycle Mode: C

Cycle Mode gives you the ability to loop one section of your project. This is extremely useful when recording multiple takes of the same section or editing audio. As long as Cycle Mode is enabled, whenever you hit the spacebar, your playhead will automatically jump back to the beginning of your cycle and start to play.
14. Bounce Session: ⌘+B

When you’re ready to bounce out your track there are several ways to do it, but the fastest is to simply hit ⌘+B.
Main Window Commands
15. Set Locators By Region or Marker: ⌘+U

A quick way to set locators by region is by pressing ⌘+U. This will open the Region Selector and select the nearest regions in the currently selected track. Once they are selected, they will be automatically set as locators.
This can be a quick way to set a range around specific content in your project if you don’t want to use the Selection tool. To set them by a marker instead, use ⌃+⌥+C.
16. Delete Track: ⌘+⌫

This shortcut deletes the currently selected track. To delete tracks via the keyboard, you have to select them first. You can select any track and press ⌫, or you can select multiple tracks and ⌘+⌫.
This command also works with track stacks, so you can delete all the tracks just by selecting the track stack.
17. Automation View: A

“A” toggles the Automation view on and off. This view allows you to see the automation data for all of the plugins and instruments in your project. Automation is important in every single track you create, and this key command makes it easy.
18. Global Track Lanes: G and ⌥+G

“G” opens your global track lanes including: arrangement, markers, time signature, tempo, and more. If you want to adjust which track lanes appear, hit ”⌥+G” and a window will pop up allowing you to select which lanes best suit your workflow.
19. Zoom with the Magnifying Tool: ⌃+⌥+Click & Drag

The Zoom tool in Logic Pro works in a similar way to many other DAWs. By holding ”⌃+⌥” and dragging across the screen, you can zoom into a specific section of your project.
20. Copy & Paste: ⌥+Click & Drag

You can select multiple clips, tracks, or a combination of both, and use the ”⌥+click and drag” command to copy and paste several items at once. Start the drag on the region or plugin you want to copy, and drop the copy wherever you want it.
21. Open Color Palette: ⌥+C

The Color Palette allows you to change the color of your tracks. While this doesn’t affect your audio, it can be incredibly useful to speed up your workflow if you assign a specific color to each track type. ”⌥+C” brings up the color palette so you can quickly get your session organized.
22. Bounce In Place: ⌃+B

To bounce a single track with its current plugin settings, bounce in place is the move. One great example is after tuning vocals. Melodyne overrides any adjustments you want to make to your regions in Logic, so bouncing in place is the fastest solution once you’re done tuning and ready to move on to processing.
Track Commands
23. Create New Tracks: ⌘+⌥+N

You can make multiple tracks in Logic by clicking the Create New Track button or pressing ⌘+⌥+N. You can create as many new tracks as you want, and you can also group them together in the track stack to create larger track groups.
24. New Audio Track: ⌘+⌥+A

These next few shortcuts look simple but they save you a massive amount of time over a full session. ”⌘+⌥+A” adds a new audio track to your session. You’ll always use audio tracks whether recording an instrument, a vocal, or importing a sample.
25. New Software Instrument Track: ⌘+⌥+S

”⌘+⌥+S” adds a new software instrument track to your session. Software instrument tracks use Logic’s built-in instruments with their plugins and settings preset.
26. New External MIDI Track: ⌘+⌥+X

”⌘+⌥+X” adds an external MIDI track to the session. This is also useful if you are using an external MIDI device or plugin that isn’t native to Logic Pro.
27. Create Track with Duplicate Settings: ⌘+D

Whenever you want to duplicate the settings of a track without copying the track itself, using ⌘+D is the most efficient way to get it done.
28. Create a Track Stack: ⌘+⇧+D

Track stacks are important for group processing in Logic. The quickest way to create one is to select the tracks you want to group together and hit ”⌘+⇧+D”.
Piano Roll Commands
29. Quantize: Q

Quantizing allows you to adjust the starting point of each MIDI note to start on the nearest beat. You can click the Q button on the left side of the screen or just hit “Q” to quantize.
30. Force MIDI Notes to Stretch to Following Notes: ⇧+\

Whenever you want a pad sound with chords that connect to each other, you’ll want to stretch each note to the starting point of the following note. Instead of clicking and dragging each note one by one, just select the notes you want to stretch and connect them using ”⇧+“.
31. Remove Overlapping MIDI Notes: \

If you have notes that carry over into the following note, your MIDI instrument can start to sound pretty crowded. The easiest way to clean up those overlapping notes is to select all of your MIDI notes and hit "".
32. Move Selected MIDI Notes Up or Down 1 Semitone: ⌥+Up/Down

Everyone makes mistakes when recording. There will almost always be times where you miss a note, so this key command makes it easy to move your note up or down by semitone until it’s placed exactly where you want it.
33. Move Selected MIDI Notes Up or Down 1 Octave: ⌥+⇧+Up/Down

Similar to the previous command, you can also adjust each MIDI note by octaves instead of semitones. This is really helpful when you want to quickly test out different octaves for your MIDI instrument.
Advanced Shortcuts and Key Commands
34. Move Region to Playhead: ;

This key command is super useful. How many times have you pulled a sample into your session and then had to drag every region to the drop of your song? Just position the playhead wherever you want to drop your region and hit ”;“.
35. Time Stretch to the Nearest Bar: ⌘+⌥+B

Once you have your sample positioned in the right place, you can easily stretch the region out to the nearest bar so you don’t have to reposition your playhead every time you want to loop or copy your region.
36. Time Stretch to Locator: ⌘+⌥+L

This shortcut does the same thing as the previous one, but you stretch to the nearest locator instead of the nearest bar. This is helpful when placing a loop sample in your project that is a different BPM. Once it’s in your session, you can stretch it out to match your project.
To go deeper on workflow and time-saving techniques, check out our 8 Audio Editing and Warping tips for Ableton Live and Logic Pro.
37. Add New Marker: ⌥+[Apostrophe]

Adding markers helps you keep your track organized and easily find each section of your song. By hitting ”⌥+[Apostrophe]” you can add markers even while you have a track that’s recording.
38. Jump Forward and Backward by 1 Bar: , or .

An easy way to move your playhead instead of clicking to find the exact position is by pressing ”,” or ”.”. No matter where your playhead is, this will allow you to jump forward and back to the beginning of each bar.
39. Expand and Reduce Waveform View: ⌘+= and ⌘+-

Whenever you’re editing regions or using Flex Time to adjust individual transients, ”⌘+=” and ”⌘+-” expand and reduce the waveforms. Makes precision editing dramatically faster.
40. Export Track: ⌘+E

If you want to export a track without bouncing your whole session, select it and hit ”⌘+E” to save it as an audio file. ”⇧+⌘+E” exports all of your tracks at once.
41. Show or Hide Flex Time: ⌘+F

Flex Time is one of my favorite Logic features. It allows you to adjust the timing of individual transients so that you can place your audio exactly on the beat you want. Oftentimes, this can clean up a song faster than any amount of mixing. The fastest way to show or hide flex time is ”⌘+F”.
Here’s Serik walking through some of his favorite time-saving production hacks that pair nicely with these shortcuts:
These shortcuts are worth drilling alongside that workflow because speed and creativity compound each other.
42. Enable and Disable Groups: ⇧+G

Groups are beneficial when you want to edit regions and tracks all at once. A great example would be if you recorded a live drum kit and wanted to edit multiple takes at once. Grouping those tracks is the fastest way to get it done.
43. Capture Recording: ⇧+R

Lastly, this has to be one of the coolest features in Logic that I haven’t seen in any other DAW. Capture Recording allows you to record something even though you didn’t previously start rolling.
In other words, Logic is listening to what you’re playing even though you aren’t officially recording. If you come up with a cool idea but didn’t hit record, just hit ⇧+R and it will pop up on your track.
How to Create a Custom Key Command in Logic Pro
There are three ways to create custom Key Commands in Logic Pro: Assign a Controller, Assign a Key, and Assign a Shortcut.
Assign a Controller - In this method, you can assign Logic Pro to use one of the MIDI controllers connected to your computer. This will let you create custom commands using the buttons/pads on your controller. To do this, first select the MIDI device that hosts the controller. Then go to the Key Commands menu, select Assign Controller, and choose the controller you want to use.
Assign a Key - This method lets you create custom commands by assigning any key to them. This is useful for repetitive tasks or commands that cannot be assigned to a MIDI controller. Go to the Key Commands menu, select Assign Key, and press the desired key.
Assign a Shortcut - This method is a combination of both of the above. It lets you assign a key and a MIDI controller to that key at the same time. Select the key you want to assign, go to the Key Commands menu, and select Assign Shortcut.
Pro Tip: When building your custom key command setup, assign only the most common commands to the keyboard. A custom keyboard command replaces the existing command for that key, so keep your custom list tight and avoid using the same key combination for multiple commands.
Make These Muscle Memory
There are many more shortcuts that are useful in Logic Pro and it is worth committing these to memory. Copy and paste them to your notes and just practice using them.
They’ll eventually progress into muscle memory and your workflow will be lightning fast. The best producers aren’t faster because they know more, they’re faster because they’ve automated the basics so their brain is free to focus on the music.