
Jump to a section8
There comes a point in every producer’s career when they realize how critical it is to choose great sounds. It’s an inflection point, and I see it happen all the time during the Masterclass. The one thing most new producers are missing is simple: a discerning ear.
When we start out, it’s easy to be careless with the samples we use. We’ll grab any synth patch that sounds cool, without thinking about how it fits the sonic landscape of the genre or, more importantly, our own production. The longer I make music, the more I realize that choosing great sounds from the start is the #1 most important skill for any producer.
With this article, I’ll arm you with the tools you need to return to your DAW with a discerning ear and an innovator’s mindset. I’ll share some of my favorite techniques, but it’s not enough to simply implement them and move on. You must uncover the thought process behind them and begin to innovate yourself.
Defining Sound Design
Before we get into the techniques, let’s create a new definition of sound design: Sound design is the choice and manipulation of sounds entering and exiting the sonic landscape of your song.
Notice that sound design covers three main decisions during the production process: First, you decide what sound enters your track. Sometimes a hard “no” is better than an easy “yes.” Be selective with the sounds. Choose only the best.
Second, you decide how to manipulate that sound through processing, volume, and panning. Finally, you determine how that sound enters and exits the production through automation and fades.
Sound Design Techniques That Actually Move the Needle
I’m going to focus on 4 areas where you can step up your game: layering, filters, wavetable synthesis, and creating otherworldly spaces. These strategies alone will transform your approach, but I’ll conclude with the most important part: The Innovator’s Mindset.
Harrington Emmerson wrote: “As to methods, there may be a million and then some, but principles are few. The man who grasps principles can successfully select his own methods. The man who tries methods, ignoring principles, is sure to have trouble.”
I want you to employ these techniques, but more importantly, I want you to understand the principles of thinking like an innovator.
1. Create Unique Sounds by Layering

Layering is one of the top workflows that separates amateur sound designers from the professionals. We go deep into layering during Week 4 of the Masterclass. Sure, it’s a big topic, but here’s the main point: layering more of the same will get you nowhere.
In order to layer sounds effectively, you must think about and utilize differences. Cymatics shows this with a technique called “topping and tailing.” By isolating the transient and body of a two different sounds, and then applying fades and glue compression, you can create an entirely new sound.
Let’s use an example of drum-layering to illustrate how to layer with differences. Maybe you love the sparkle and top-end of a snare. Isolate the high-end with EQ, shaving away the low frequencies. Now look for a tom sample, something with a deep and resonant low-end. Sculpt away the top of the tom, and layer it with the air of your snare.
By isolating what you love about each drum, and filling in the gaps with another sound, you have created something unique and custom-suited to your track. This same idea applies with synths: when layering your chords, be sure to use different octaves, different patches, and different ADSR envelopes.
Take a sound that you love, and ask yourself two questions:
- What do I love about this sound?
- What’s missing from this sound?
This 2-minute breakdown shows exactly how to think about layering sounds with contrast rather than redundancy.
Pro Tip: Always remember, when layering, it’s the differences that count.
2. Get Freaky With Filters

When designing synth patches, the choice of oscillators determines the fundamental tone, but it’s the filters and envelopes that bring sounds to life. Subtractive synthesis is what the first analog synthesizers were built on. Oscillators produce a tone, and a low-pass filter shaves away high frequencies to make the tone rounder and smoother.
The largest knob on a Moog is the filter cutoff knob, and it’s what gives Moog synths their distinctive, sought-after sound. Many synths default to a 24 dB/octave low-pass filter, which is fine for vintage tones. But if you’re here to innovate, you need to step up your filter game.
I love Xfer’s Serum for its intuitive interface, visuals, and power, especially its buffet of filter options. I’m a fan of the comb and flange filters.
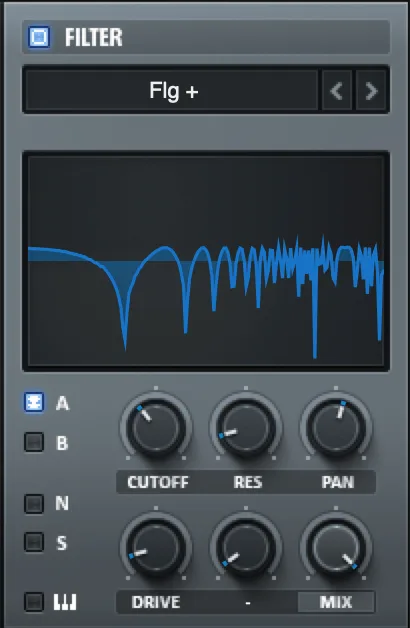
Assign a slow-moving LFO (over 4 or 8 bars) to the cutoff knob and watch your pad come to life. If you don’t have the Soundtoys bundle yet, get it (and Masterclass students get half off). Their Filterfreak is a beast, perfect for adding life and rhythm to any patch.
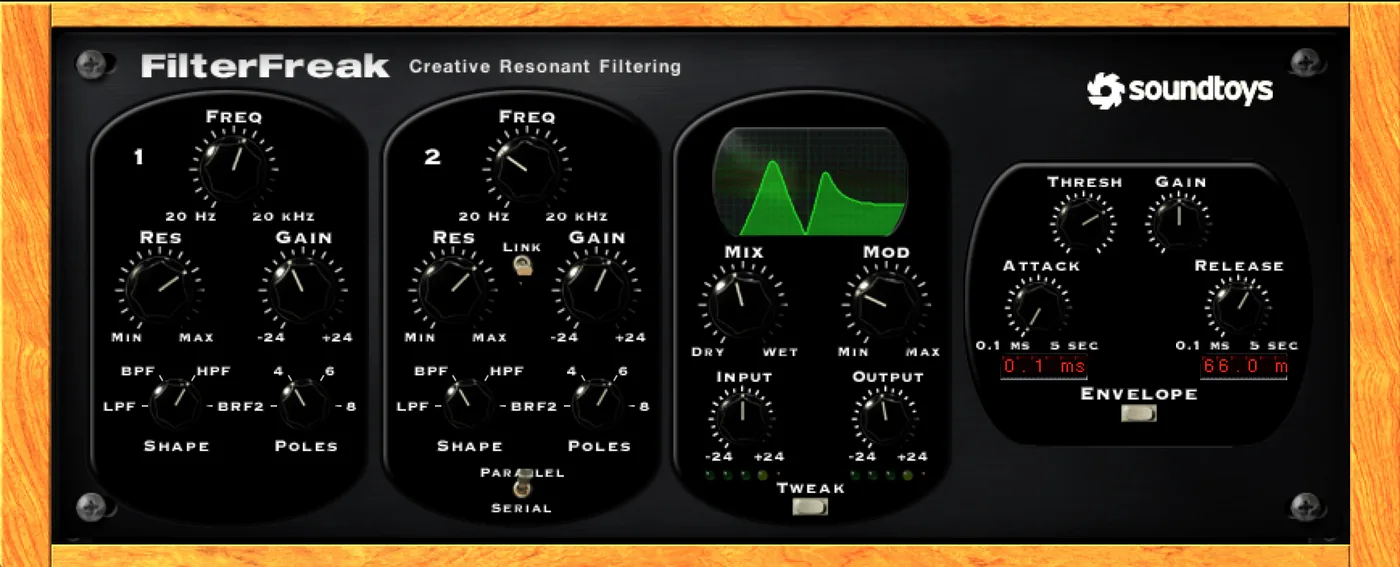
It doesn’t match Serum’s filter variety, but the analog warmth is unmatched for anything digital. Other solid options are Wow 2 from Sugarbytes and FilterShaper XL.
Go wild with these filters on guitars, aux sends, background vocals, and drum fills. You can even go Tame Impala style and automate them on your entire mix during special moments.
Pro Tip: Filters are one of the main entry points to unique color. Get to know them, and they’ll become invaluable tools in your studio.
3. Use Wavetables for Next-Level Synthesis
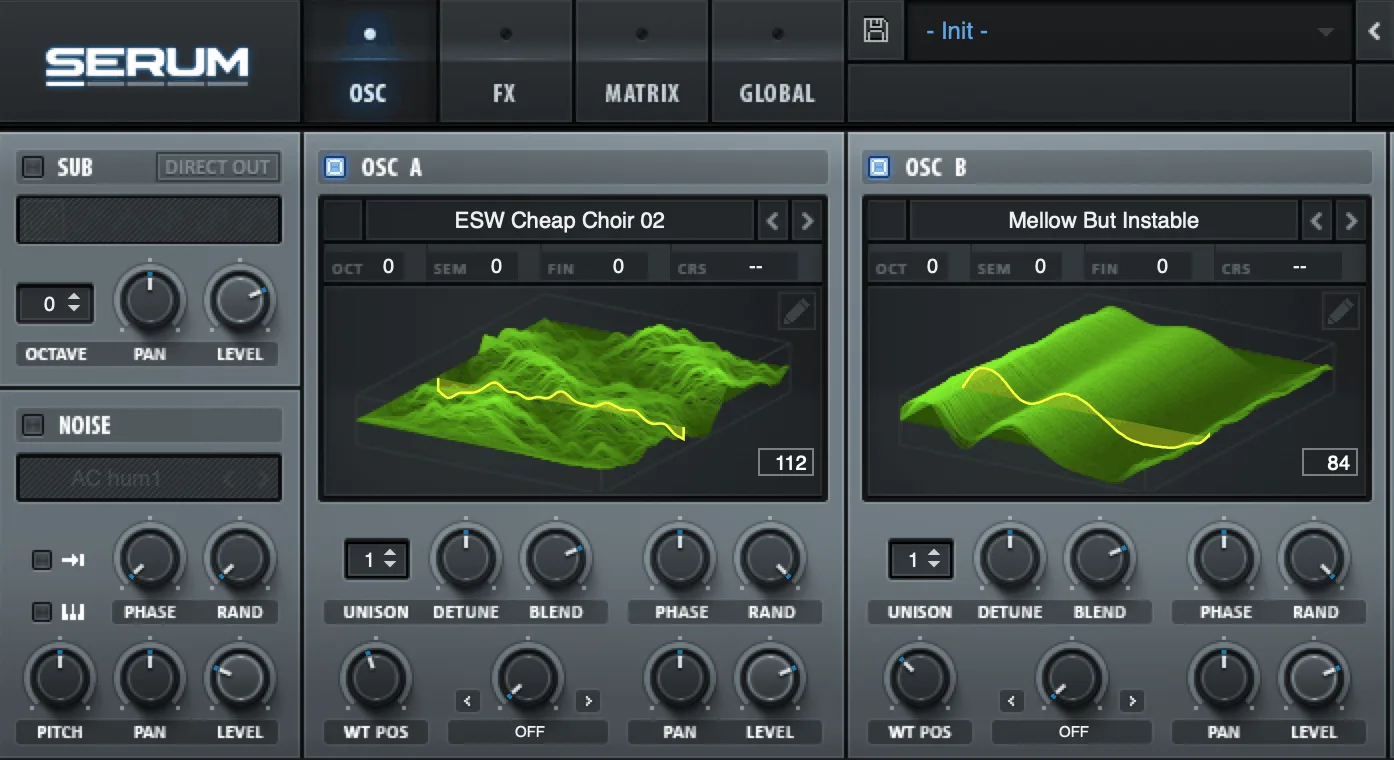
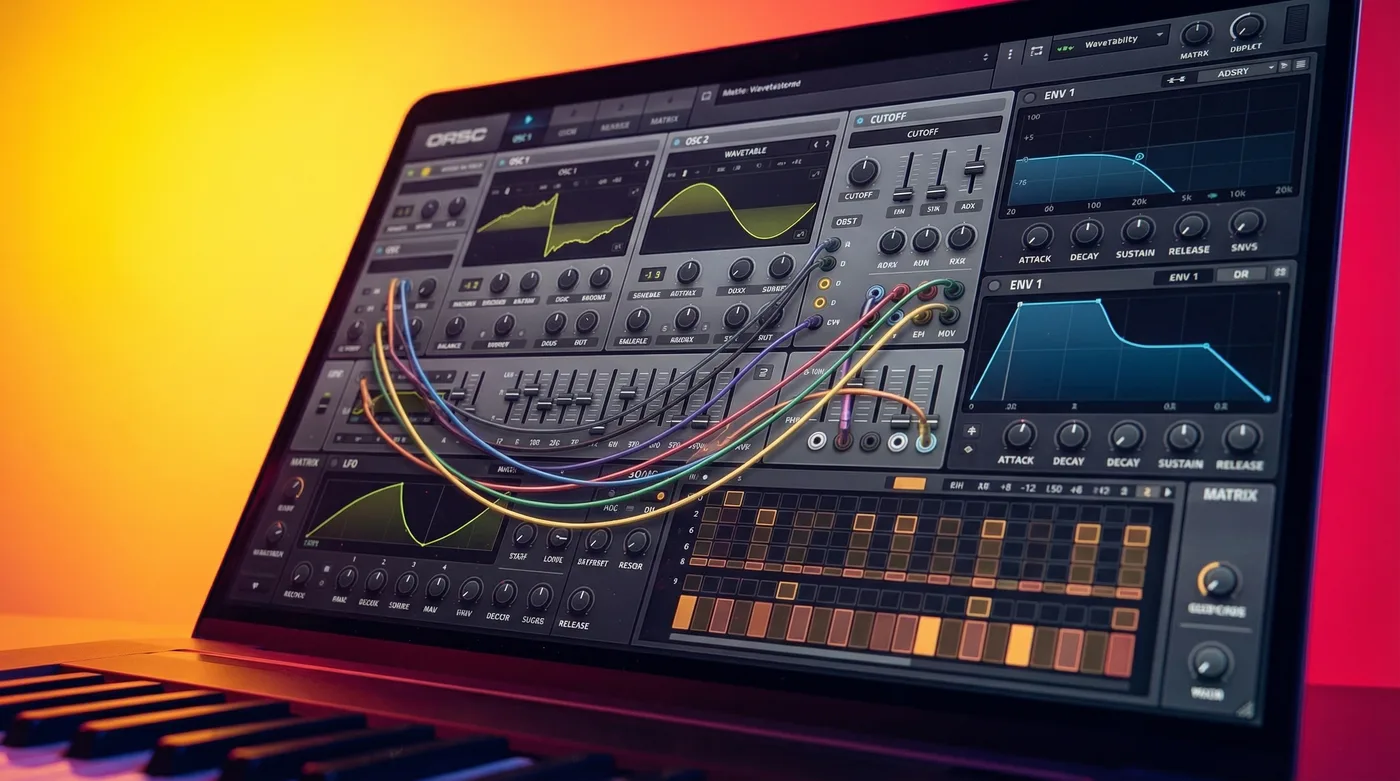
Classic synthesizers have a limited set of oscillator waveforms: sine, sawtooth, triangle, and square. With digital technology came a new type of synthesis: Wavetable synthesis, the secret weapon of any sound designer working in modern electronic music.
Instead of static waveforms, wavetables are snapshots of an entire waveform cycle that you can morph through with an LFO to create life and movement. In Serum, the “WT POS” knob controls Wavetable position (shown as a yellow line). Oscillator A might output from position 112 while Oscillator B pulls from position 84. This opens up entirely new possibilities for experimental sound design.
High-quality wavetable banks from Echo Sound Works and Cymatics are available, and you can even create your own custom wavetables. The combination of wavetable flexibility with creative filtering is what makes Serum such a powerful tool.
Pro Tip: To get the most out of wavetable synthesis, assign an LFO to the Wavetable position to morph through the sound and create movement. Without it, you’re left with a static digital sound.
4. Create Otherworldly Spaces

So far we’ve covered layering, unique filter options, and the power of wavetables to up your sound design game. I’ll round it off with my three favorite tips for creating new and unique spaces. This has to do with delay and reverb. If you haven’t already, brush up on our Ultimate Guide to Reverb. In particular, the tips about using it on a bus and sidechaining are essential.
Once you’ve got a groove going, you’ll be tempted to put your sounds in a space. Perhaps you’ve got reverb on a bus already, and you’re dialing in the send amount to taste. Time to start thinking about how you can create a space that is unique and custom-fit to your track.
Add Tremolos Before and After Reverb

One way to add instant vibe to your space is to place two tremolos on your reverb bus, one before the reverb, and one after. The tremolo after your reverb will add a pulse and rhythm to the tail (you can achieve the same effect with a visual sidechain plugin, like Kickstart by Nicky Romero). The tremolo before will give your source signal movement before it hits the verb.
Experiment with different phases, depths, and times. I like to set the post-reverb tremolo to be locked to half or quarter notes at the tempo of my track. That way, I set the tremolo before the reverb at 8th or 16th notes, and I keep the mix subtle. You’ll also notice that I cut the lows and highs from my reverb bus, this is the classic Abbey Road Reverb trick.
If you want to go deeper on reverb fundamentals before experimenting with these techniques, this video is worth 2 minutes of your time.
Once you’ve got a solid reverb setup, there’s another technique that completely changes how space feels in a mix.
Hard Pan Reverbs
Hard panned reverbs are a way to completely separate a sound from its space. It’s not every day you hear this in real life, which is exactly why it can be applied to create otherworldly spaces in the DAW. There are two ways you can go about this: First, take a sound (for example, a guitar) and pan it to the right. Then send that guitar to a reverb, and pan the reverb bus to the left. Instant reminiscence of early 60’s records, especially if you’re using a vintage reverb like a plate or a spring.
The second way is to take a mono track panned dead center, like a lead vocal. Send that lead vocal to two reverbs, one panned hard right, and one panned hard left. You want the decay times of the reverbs to be fairly close to one another, but not exactly the same (less than half a second difference). As a result, the stereo image for the reverb is wide and powerful.
The Reverse Delay Trick
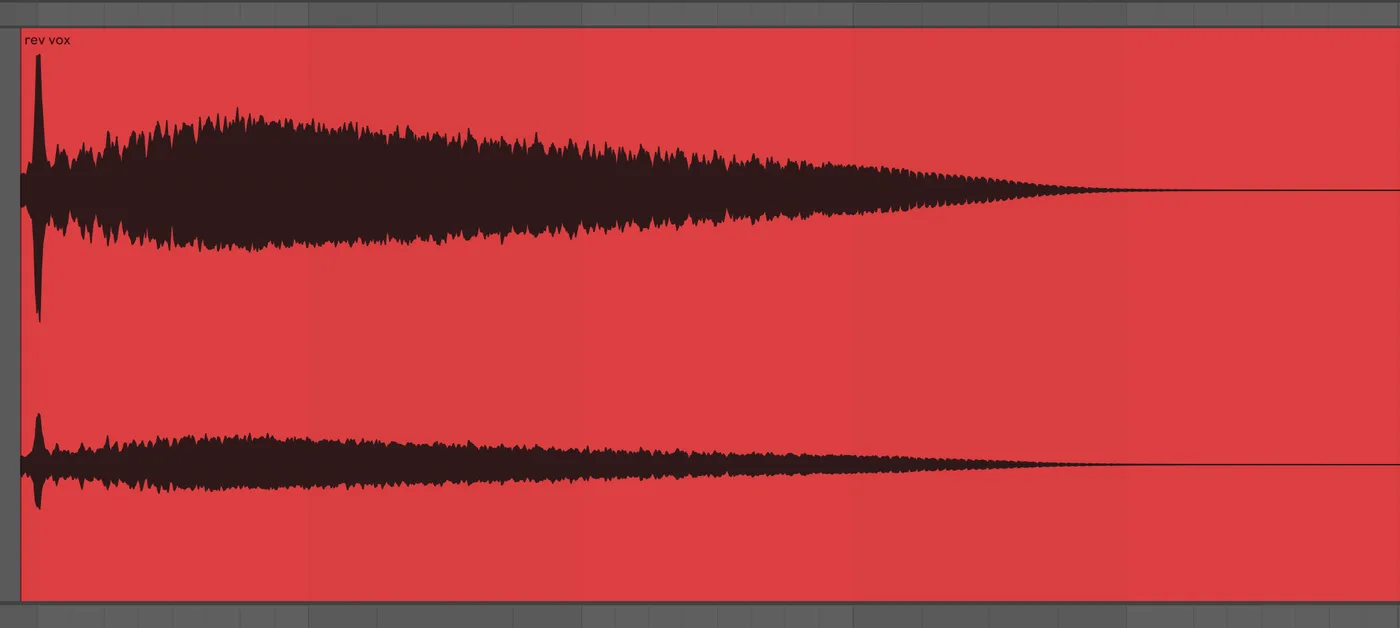
This is one of my favorite tricks for creating custom buildups, and I discovered it completely by accident. Take a short, atonal percussive sound. You can use a droplet of water, a breath, a snap, or some foley. Grab your favorite tape delay emulation, and get your automation ready because this requires some swift fingers.
Here’s the process:
- Send the short sound into the delay with low feedback and a long delay time (try 400 ms to start).
- Automate the delay time to smaller values, making the time between repeats quicker and quicker.
- On a second automation pass, increase the feedback as the delay time is shortening. The delay should now be self-oscillating, and all that’s left of your source sound after a few seconds is a washed out blur.
- Print the audio file.
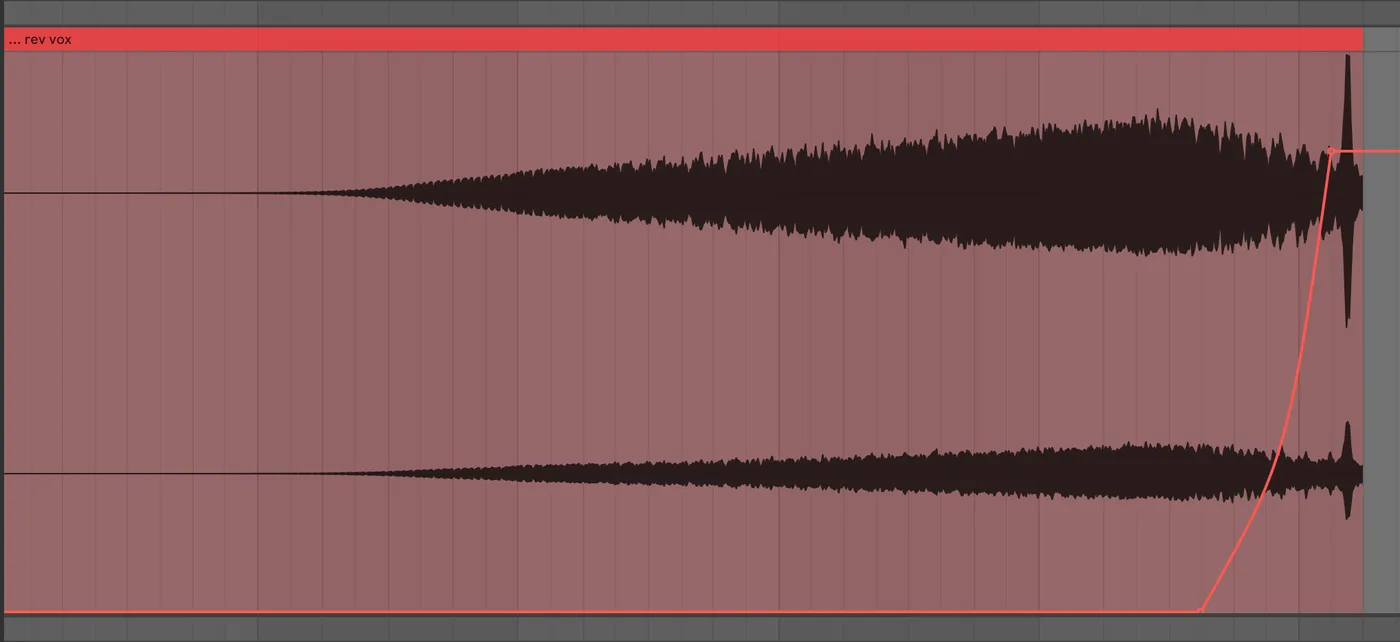
- Reverse the audio file, fade in, and send it to a ping pong delay at the end. Now you’ve got a build that goes from oscillation madness to your original sound cascading off in echoes during the chorus.
5. The Innovator’s Mindset
I could share my favorite new sound design techniques with you and leave it at that, but I want to give you the tools to create new and unique sounds on your own. And that requires a mindset shift from following the rules to breaking them.
If you want to innovate, it requires stepping outside the realm of convention. You must deliberately cross wires that people tell you not to cross. Be a child in a sandbox, just play. Let your imagination, intuition, and sense of curiosity take control.
Innovation, by nature, requires being a leader. Leaders don’t defer to others for their decisions. Leaders don’t ask for permission before stepping outside their comfort zone. It’s important to identify the most commonly traveled paths so you can know how to deviate from them.
There is no greater danger to innovation than believing that how you’re doing things must be right. So as a final bonus, here are the four things you can do to become a more confident innovator in the studio.
Take Inventory
Assess what you have in your arsenal today. Are there plugins you never use? Are there tools you always use the same way? As creatures of habit, we often find something comfortable and stick with it. You have to be aware of what you have, and how you use it, before deliberately moving in a new direction.
Chances are, your library is full sample folders you have never even opened. You wouldn’t be the only one. There may be new and fresh sounds at the periphery of what you already have available.
Leave no stone unturned. As a producer, the studio is your territory. You should know every twig and branch in the garden.
Once you have a firm idea of what you have, you can set arbitrary limitations. “Today, I’m going to use a kick from this old folder.” “For this song, I’m only using plugins I have never used before.” These limitations are the birthplace of creativity and innovation, because they’re requiring you to form new neural pathways instead of relying on ingrained habits.
Force Yourself to Do Something New
Innovation is always about doing something new. You don’t innovate by copying or recreating. You innovate by asserting yourself and sharing your own voice.
At all costs, force yourself to do something new. Use a new plugin. Use an old plugin for a new purpose. Reverse what you’ve never reversed before. Automate parameters you’ve never touched. Push the limits, and avoid the trap of feeling like you’re “doing it wrong.” In this world, you’re only as good as you are different.
So practice being different. Practice being yourself.
Rise to a Challenge or Deadline
It’s that remix competition you’ve always wanted to do. It’s a challenge from splice. It’s the date to play a show, or a bet with a friend. Put yourself out there. Commit to having something workable by a certain date.
The pressure of a deadline will force you to become scrappy, to work with what you have, and to avoid the trap of perfectionism. Embrace anything that requires you to have a track finished and out the door. Innovation can come from efficiency, from trying to find the quickest and most optimal route.
Reference the Sound Designers Doing It Best
If you know me, you know that I preach referencing at all stages of music production. At first, it might seem counterintuitive to reference when you’re looking to establish your own voice. But how can you know what genuinely fresh sound design even is without listening to work that inspires you?
Again, this is about looking past the techniques. You want to uncover the mindset that pushed the artist you admire to try something new. What did they do that nobody had done before? What about it strikes you as fresh and original? How would that artist approach your track?
Keep your ears open, and keep your mind unburdened by the sense that there is a right way to do things. Practice using tools in new ways. It’s like exercise: with time and practice it becomes second nature.
The World Is Your Studio
The world of sound design is vast, and I’m barely scratching the surface. Keep your ears open, keep your mind unburdened, and never stop asking what happens when you break the rules.
Related tool: Hyperbits Mighty: 40 house bass Serum presets with analog filter movement and custom macro controls.
Heads up: some of the links below are affiliate links. If you buy through one, we earn a small cut (costs you nothing extra). But we'd point you at this exact gear whether we made a dime or not.