

Jump to a section11
- What is stem mastering?
- Stem mastering vs stereo mastering
- Stem mastering is not a second mix
- When stereo mastering still makes sense
- How to prep stems for mastering
- The stem mastering workflow, step by step
- How loud should a stem master be?
- Hear it: before and after a stem master
- Common stem mastering mistakes
- Stem mastering FAQ
- Finish the master, then reach in
Mastering is cool.
But stem mastering is a lot cooler.
Why? Stem mastering is mastering, elevated. Instead of mastering one stereo file, you master from the stems the mix is built from. Let me explain…
Mastering one stereo premaster has a lot of limitations. And if I’m being frank, if you have the stems, there’s no reason in this modern era to master from one stereo premaster.
Here’s what happens when you master one file. Every move you make hits the whole song at once:
- You brighten the top end so the vocal shines. The hi-hats get harsher too.
- You push the limiter for loudness. The kick loses its punch, and so does everything else.
- You hear the kick and the bass fighting. Any EQ move that fixes it thins out the entire low end.
- The vocal disappears in the drop. Your only option is to carve a hole in everything around it.
You end up making compromise after compromise, because the kick, the vocal and the synths are all glued together in one file. Every fix costs you something somewhere else.
Stem mastering gets around that. You master from a set of stems (kick, bass, drums, vocals, synths, FX), all running through the same mastering chain. You still treat the song as a whole. But when something bugs you, you reach in and fix the one part that’s actually causing it.
The way we teach it in Mix Master Flow comes down to one rule, and I’m going to keep coming back to it: build a normal master first, then use the stems only for what that master can’t fix.

Related tool: Mix Master Flow: three full stem masters, start to finish, from three different producers. Plus the practice stems so you can do them alongside us.
What is stem mastering?
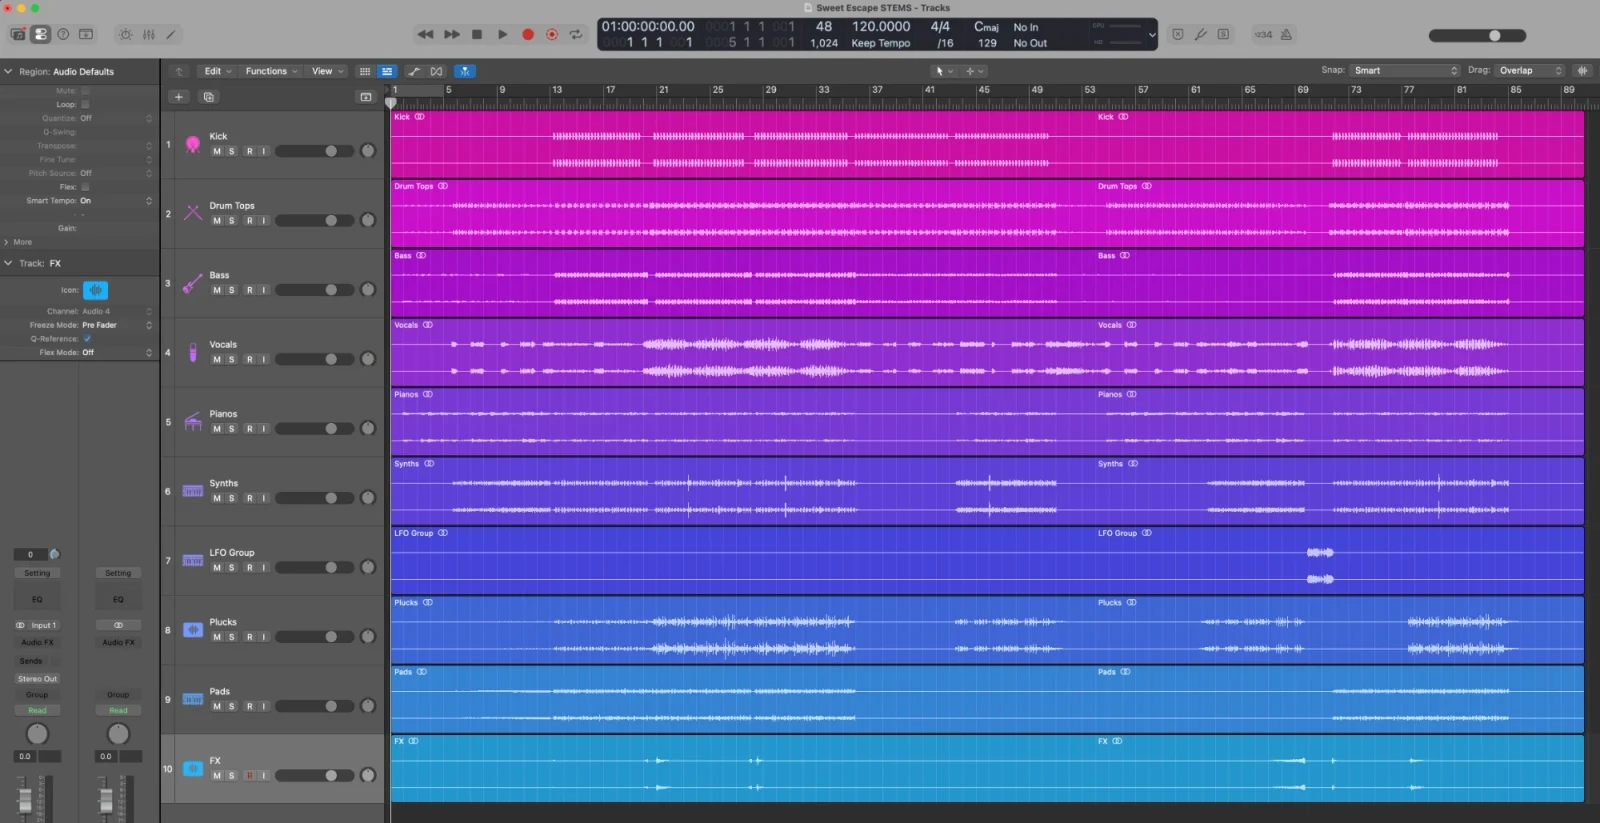
When you finish a mix, most people bounce one stereo file and master that. A stem master starts from a handful of grouped files instead. Each stem is one part of the mix, bounced on its own. They’re all the same length and all start at the same spot, so when you line them up and hit play, you hear the full mix.
Here’s an example of what a set might look like. It’s just an example. It’ll change a bit with every song.
- Kick
- Snare and claps
- Hats, shakers and cymbals
- Other percussion (toms, bongos and so on)
- Sub bass
- Mid and top bass
- Lead vocal
- Background vocals
- Vocal chops
- Main synths or chords
- Leads
- Pads and strings
- Ambience and textures
- FX, risers and impacts
- Other FX
A sparse track might only need 8 or 9 stems. A dense one might need closer to 20. Most songs land somewhere in between. You want enough to reach the parts you’ll actually want to fix, and not so many that the job turns back into a mix.
Stem mastering vs stereo mastering
It all comes down to what you can reach.
| Stereo master | Stem master | |
|---|---|---|
| What you start with | One stereo file | Roughly 8 to 20 grouped stems |
| What a move affects | The whole song | The whole song, or just one stem |
| Fixing a harsh vocal | EQ the whole mix around it | De-ess the vocal stem only |
| Kick and bass fighting | Compromise on the low end | Shape the sub around the kick |
| Time per song | An hour or two | Half a day, sometimes more |
| Who needs to sign off | Nobody, usually | The artist, for any bigger change |
A stereo master is a set of broad moves. A stem master is the same broad moves, plus a handful of precise ones you could never make on a single file.
Sounds like a clear win, right? It is. But there’s a trap, and most people walk straight into it.
Stem mastering is not a second mix
You open the stems. You can touch everything, so you start touching everything. Two hours later you’ve rebalanced the drums, re-EQ’d the synths and moved the vocal in every section.
Congratulations. You just remixed someone else’s song at the worst possible stage, with a limiter squashing every decision.
Do the normal master first, as if the stems were one file, and only touch a stem when that master can’t fix something on its own.
Think of it this way: if the artist didn’t want anything touched, you could stop right there and send it. Everything after that is icing on the cake.
The mix engineer and the artist made hundreds of tiny decisions to get the song where it is. Respect them. Your job is to finish the song.
When stereo mastering still makes sense
If you have the stems, master from the stems. Most of the time that’s your own music, and you can bounce stems in two minutes.
There are really only two cases where one stereo file still wins:
- You only have the stereo file. A client sends a premaster and the stems are gone, or the session lives on a hard drive that died years ago. Master what you’ve got.
- The mix itself is broken. If the vocal is buried everywhere or the whole thing is muddy, that’s a mix problem. Stems won’t save it, and neither will a stereo master. Go back to the mix (or send it back to whoever mixed it).
I know what you’re thinking: half a day per song instead of an hour? Yes. And the first time you fix a harsh vocal without touching the hi-hats, you won’t want to go back.
How to prep stems for mastering
I’ll be honest, stem prep is boring. It also decides how smooth the rest of your session goes.
Export them all the same way. Every stem starts at bar 1 and runs to the very end, even if the part only plays for eight bars. Export WAV files at the session’s sample rate, in 24-bit or 32-bit float. Pull the limiter and any loudness plugins off your mix bus before you bounce. Keep each part’s reverbs and delays printed into its own stem.
Here’s how to do it in the three most common DAWs:
- Ableton Live: put each stem’s tracks into a Group Track. Select those groups, open File > Export Audio/Video, set Rendered Track to “Selected Tracks Only”, start the render at 1.1.1 so it covers the whole song, and turn Normalize off.
- Logic Pro: put each stem’s tracks into a Summing Stack (or route them to their own aux). Then either solo each stack and bounce it with the same start and end points, or use File > Export > All Tracks as Audio Files. Leave Normalize off and include the audio tail so reverbs don’t get cut.
- FL Studio: route each stem’s channels to its own mixer track. Then go to File > Export > Wave file and tick “Split mixer tracks”, and FL bounces every mixer track as its own file.
Whatever DAW you’re in, drag the finished stems into a fresh session and press play before you start. If the summed stems don’t sound exactly like your mix, something didn’t export right.
Leave headroom, and don’t panic about it. Stems that peak well below zero are fine. If they come in really quiet, turn every stem up by the same amount before you start. Too quiet is easy to fix. A clipped stem isn’t fixable at all.
Keep the names short. “Kick”, “Sub”, “BG Vox”. Not “My Song Final v3 Stem Kick”. You want to read every name at a glance with the mastering chain open.
Colour-code them. Put contrasting colours next to each other so you find a stem without reading it. Order them the way you think about the song: drums at the top with the kick first, the sub right under it, then vocals, instruments and FX.
Set the tempo and check the grid. Every downbeat should land on a bar. You’ll be looping sections constantly, and a track that drifts off the grid makes that a nightmare. Drop markers on the sections (intro, build, drop) while you’re there.
Set up your references. Put your reference tracks on their own bus so one fader controls them all, line them up with your final drop, and route them so they skip your mastering chain. Now you can flip between your master and the reference without the limiter making the comparison unfair. Our reference tracks guide goes deeper on picking them.
The stem mastering workflow, step by step
This is the order I’d work in for any stem master. The plugins change from song to song. The order doesn’t.
1. Let the reference lead
Your reference track is the closest thing you have to a brief. It tells you where the finished song should land: the loudness, the brightness, the width, the weight of the low end. Every big decision in a stem master gets checked against it.
Before you touch a single plugin, listen to the song a few times, then to the artist’s reference. You’re tuning your ears to what the artist is going for, and that’s easy to lose once you start tweaking.
Then make the comparison fair. Commercial references are often crushed, sometimes around -6 LUFS or louder, so turn yours down until it sits at roughly the same loudness as your master. Otherwise the reference wins every A/B just for being louder, and you end up chasing volume instead of tone.
From there, flip back and forth constantly. Is your low end as full? Does the vocal sit as far forward? Is the top end as open? The reference answers those questions faster than any meter. Just don’t copy its EQ curve move for move. You want your master to feel like the reference, and an EQ curve can’t tell you that.
2. Build a normal master on the summed stems
Send every stem to one master bus and build your chain there, exactly like you would for a stereo file.
Set the limiter first, because it’s the most drastic thing in the chain and it shapes every decision after it. From there, a typical chain looks like this:
- an Oxford Inflator, so the loudness builds in stages instead of all at the limiter
- a mid/side EQ for small cuts, half a dB to a dB at a time
- an SSL-style bus compressor doing 2 to 3 dB of gain reduction
- a touch of tape saturation up top and a little extra width in the high end
Want the full chain explained move by move? Start with how to master a song. For a stem master, all that matters here is getting to a master you’d happily send before you open a single stem.
3. Master the busiest, loudest part first
Loop the final drop or the biggest chorus. That’s where the limiter works hardest, so it’s where problems show up first. Dial the chain in there, then check the rest of the song against it.
4. Work through the stems with the chain on
Now open the stems. But keep the whole mastering chain running while you work.
Trust me on this one. A vocal that sounds fine on its own can turn harsh once the limiter brings the quiet stuff up, and you only hear that with the chain on.
Where you start depends on the song:
- Vocal-led songs: start with the vocal. In a pop record it’s the most important part, so everything else fits around it.
- Drop-led electronic tracks: start with the rhythm and work up. Kick and bass first, then the drop instruments, then the rest of the drums and FX.
5. Fix the kick and bass
This is where stem mastering pays for itself most often. On a stereo file, the kick and the sub are welded together. On stems, you can pull them apart.
A few moves that work:
- Dip the sub where the kick lives. Put an analyser on the kick, find where it peaks in the low end, and cut narrow dips at those spots in the sub. The kick comes through and the sub keeps its weight.
- Sidechain the sub to the kick. Especially if your reference does it. Trimming a little off the top of the low end can also take a few dB of work off the limiter, and you get that back as punch.
- Saturate the bass so it shows up on small speakers. A little Decapitator on the sub goes a long way. Keep it subtle.
One warning. If the kick is thuddy and has no real note to it, you might be tempted to swap in a punchier kick that’s tuned to the song. That’s a change to the song itself. If you do it, send the artist both versions and let them pick.
6. Clean up the vocal
Things you can only do with the vocal on its own stem:
- De-ess the vocal alone. A few dB of reduction is usually plenty. Then fix the worst S sounds by hand with clip gain. If you start to hear a lisp, you’ve gone too far.
- Fake a double. You can’t ask for new vocal doubles at the mastering stage. A tape echo barely mixed in, plus a subtle pitch-shift widener, does the job.
- Give it room instead of volume. A small, narrow dip in a competing part (synths, keys, guitars) can do more than turning the vocal up.
- Ride it section by section. The limiter lifts the quiet parts of a song more than the loud ones, so a vocal that sits perfectly in the drop can poke out in the verse. Put a gain plugin at the end of the vocal chain and automate it per section.
7. Shape the drums
Drum moves are usually small. A bus compressor barely doing anything. Parallel compression to add punch without losing the snap at the front of each hit. A dB or two off the hi-hats once the limiter has pushed them forward.
A multiband compressor like the Waves C4 can tame a cymbal that jumps out in a breakdown. Sometimes the simplest fix is the best one, though: just turn the cymbal stem down.
8. Match the sections
Stems let you fix how sections sit against each other. Use the stems that play in both sections as your guide. A breakdown vocal, for example, often needs to feel as loud as the main synths in the drop, which can mean turning it (and everything around it) up a few dB.
Small arrangement touches live here too: cutting a reverb tail a sixteenth note before the drop so it hits harder, or filtering the sub on the last bar of a drop.
9. Take a break, then check everywhere
Recheck the limiter. It’s the first thing to go wrong after an hour of stem tweaks. Then go back to your reference one more time, at matched loudness. Then step away for at least a day.
Listen in the car, on headphones, on your phone and on a laptop. A metering plugin like Levels or a referencing tool like Reference keeps you honest when your ears are tired.
10. Send it to the artist, then revise
Before it goes out, send it to the artist and a couple of people you trust. They’ll catch things you’ve stopped hearing, like a sidechain pumping away in an intro where there’s no kick. After a few hours with a song, your ears just tune it out.
How loud should a stem master be?
There’s no single number you have to hit. Spotify, Apple Music and YouTube all turn tracks up or down to roughly the same level. So a very loud master just gets turned down, and a quieter, punchier one doesn’t lose anything.
My take:
- For club and DJ tracks, I still like a commercially loud master. Around -7 to -8 LUFS integrated is a great place to land. It holds up next to other tracks in a DJ set, where nothing turns it down for you.
- For streaming-first music, you can master a bit quieter and keep more punch. Spotify’s own guidance is about -14 LUFS, and if your master is louder than that, keep the true peak below -2 dBTP so it doesn’t distort when it’s converted for streaming.
- Don’t chase the loudest reference. Some commercial masters sit around -4 to -6 LUFS, which is crushed. Turn the reference down before you compare (step 1), and don’t be afraid to land a little quieter on purpose.
Want the full history and the math? Read our guide to the loudness war.
Hear it: before and after a stem master
Here’s a stem master I did on “Don’t Need You” by Weekend Rendition, a progressive house track at 125 BPM. Flip between before and after. They’re at their real loudness, so you’ll hear the extra level, plus the punch in the low end and the room around the vocal.
Common stem mastering mistakes
- Remixing instead of mastering. The number one mistake, and the reason step 2 exists. If you’re changing levels on every stem in every section, stop. Ask whether the song should go back to the mix.
- Working on stems with the chain bypassed. Your stem moves have to make sense through the limiter. Solo a stem if you need to, but judge the change with the full chain on.
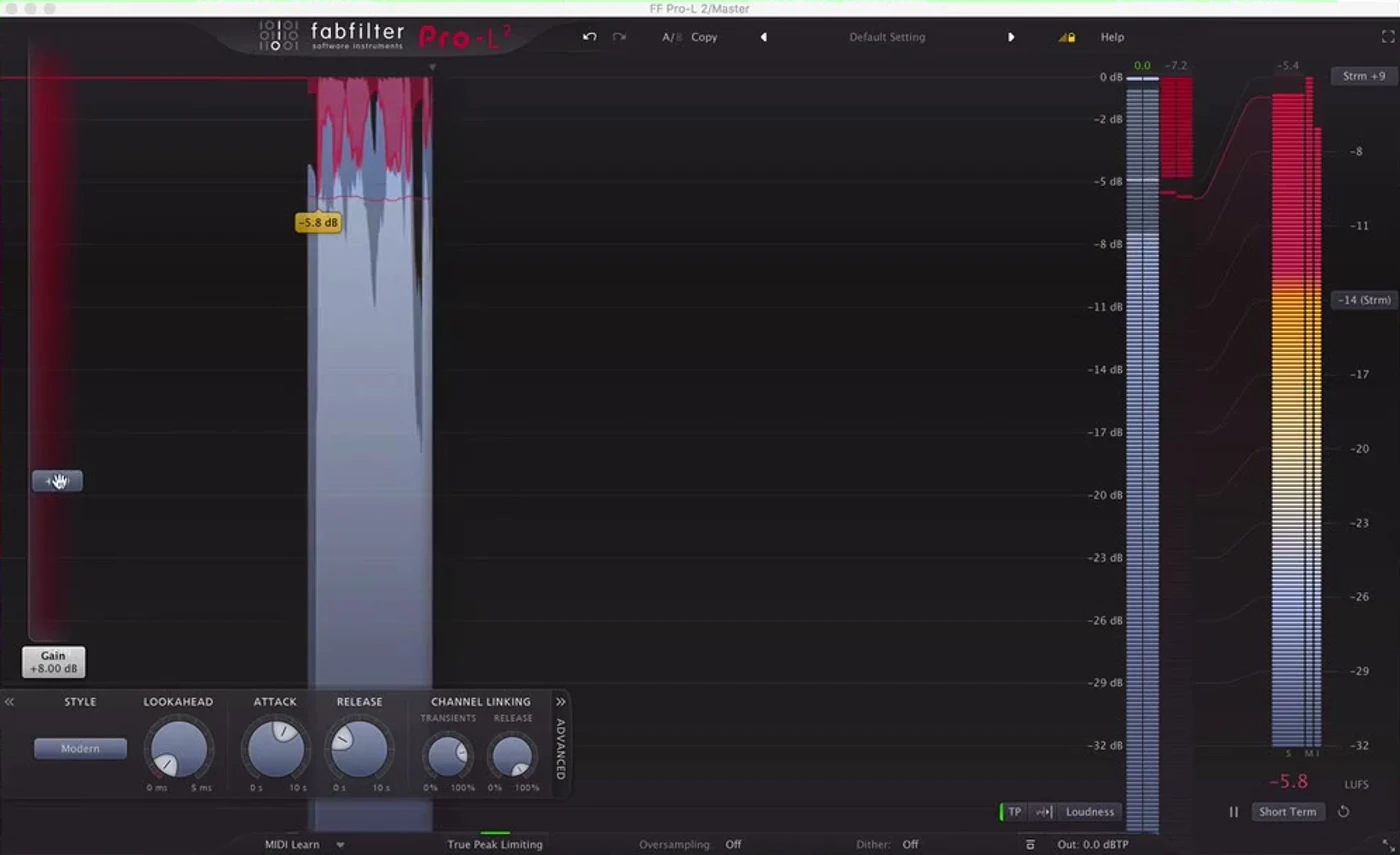
- Forgetting to check the limiter. Every stem move changes what hits the limiter. Check the gain reduction and listen for distortion after each change. Waiting until the end means hunting for which move broke it.
- Copying the reference’s EQ curve. Comparing your master to a reference with an analyser is useful. Rebuilding your EQ to match its frequency curve isn’t. Your ears make the final call.
- Making song changes without asking. Swapping a kick, deleting a part, cutting a section short: those are the artist’s decisions. Send both versions.
- Mastering in one sitting. After a few hours you stop hearing the problems. A day away does more than another plugin.
Stem mastering FAQ
What is the difference between stems and multitracks?
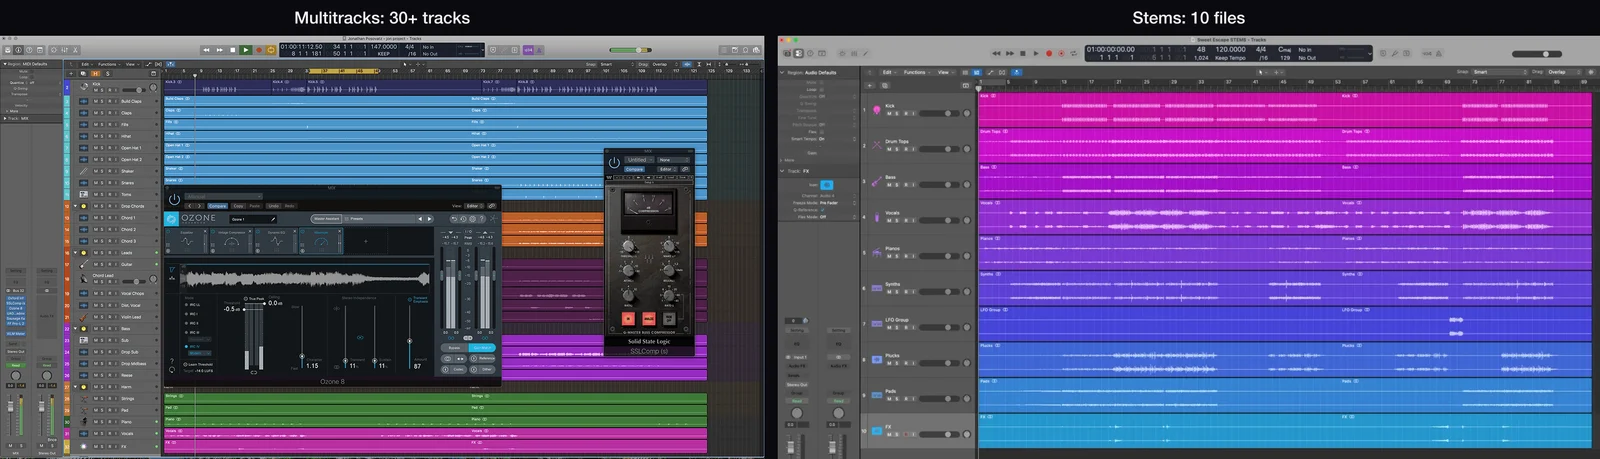
Multitracks are every individual track in the session: forty, eighty, sometimes more. Stems are those tracks grouped down into a handful of stereo files, usually somewhere between 8 and 20 for mastering. Mastering from multitracks is basically mixing. Stems give you enough control to fix problems without turning the job into a new mix.
Is stem mastering better than stereo mastering?
If you have the stems, yes. You get every move a stereo master gives you, plus the ability to fix one part without hurting the rest. The catch is discipline. An overworked stem master sounds worse than a simple stereo one, so start with a normal master and only reach into the stems when you need to.
How many stems do I need for stem mastering?
It depends on the song, but somewhere between 8 and 20 works for most. Fewer than that and you lose the control that makes stem mastering worth it. Many more and you’re mixing again.
Can I stem master my own music?
Yes, and it’s one of the best ways to learn. You know the song better than anyone, and you can bounce new stems whenever you need to. Just hold yourself to the same rule: normal master first, stem fixes second.
How loud should my stem master be?
For club and DJ releases, around -7 to -8 LUFS integrated is a solid, competitive level. For streaming-first music you can go quieter and keep more punch, since Spotify and Apple Music turn everything to a similar level anyway.
Should I hire someone or stem master my own music?
If you’re learning, master your own. You’ll understand your mixes faster than any other way, and you can fix things at the source. If it’s a release that really matters and you’ve lived with the song for months, a second set of ears is worth paying for, and a stem master gives that engineer far more to work with than one stereo file. Either way, the rules in this guide are the same ones a good engineer follows.
Is stem mastering the same as Native Instruments Stems?
No, and they get mixed up a lot. Native Instruments’ Stems format is a single file that holds four parts of a finished track (usually drums, bass, melody and vocals) so DJs can mute or remix them live. Stem mastering is a production step that happens before release, working from however many stems the song needs.
How many stems do I need for Dolby Atmos or spatial audio?
More than for a stereo master, because each part gets placed in three-dimensional space. Abbey Road, for example, asks for at least six stems for spatial audio and prefers more than ten. If an Atmos release is likely, export your stems with that in mind from the start.
Finish the master, then reach in
Stem mastering is the same master you already know how to make, with the option to reach into the mix when you hit a wall.
So build the normal master first. Listen through the limiter. Fix the two or three things only a stem can fix, and leave the rest alone.
If you want to watch it done start to finish, Mix Master Flow has three full stem masters (a pop record, a future bass track and a future pop track) from three different producers, plus the practice stems so you can master the same songs right alongside us. It’s the closest thing to sitting next to someone while they do it.
Heads up: some of the links below are affiliate links. If you buy through one, we earn a small cut (costs you nothing extra). But we'd point you at this exact gear whether we made a dime or not.