
Jump to a section13
- Shortcuts and Workflow Improvements
- 1“R” to Reverse Audio
- 2Visual Warping
- 3“0” to Mute Highlighted Sections
- 4Editing Multiple MIDI clips
- 5Quickly Duplicate Tracks & MIDI
- 6Groups within Groups
- 7Collections
- New Devices and Features
- 8Updated Utility
- 9Max for Live Updates
- 10Capture MIDI
- Is Ableton Live 10 Worth the Upgrade?
Ableton Live 10 brings some serious improvements to the table. I’ve spent a good amount of time testing the new features in my own workflow… and simply put? There are some updates that I can’t live without.
Live 10 breaches new sonic territory with the Wavetable synth, Echo effect, and fresh samples packs & collections. However, it’s the day-to-day workflow improvements that really make this upgrade worth it. You’ll see review after review listing out every new feature of Ableton 10, but we’re here to pull out the most impactful, important changes that I’m using most regularly.
Shortcuts and Workflow Improvements
These updates changed how I work every single day.
1. “R” to Reverse Audio
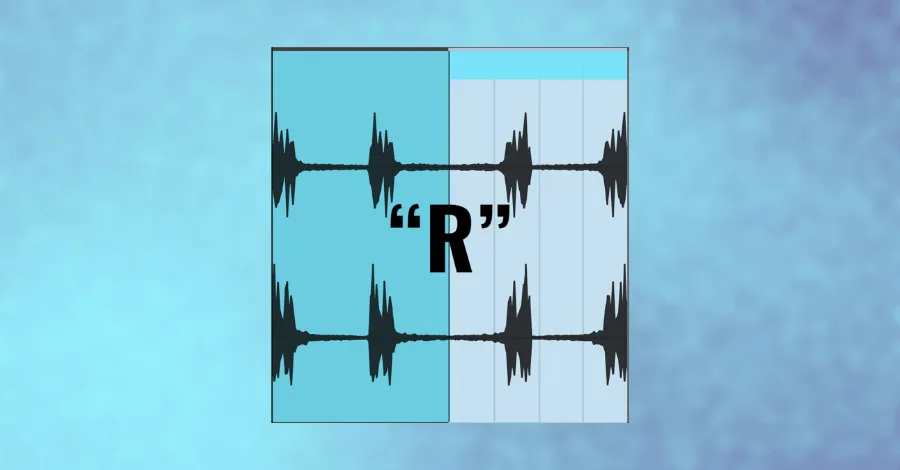
Using reverses is practically non-negotiable in today’s modern music environment. This shortcut saves so much time and allows you to experiment with ease.
Pro Tip: Generally, any sound with a long tail works well to reverse, like crashes, big claps, and downlifters. Synth stabs with a natural release can also be reversed and turned into swells. To smooth things out, add fades to the beginning of the clip by grabbing the fade envelopes and adjusting to taste (make sure automation is off by pressing “a” or function + “a”).
For more creative ways to use reverses in your productions, check out 5 Creative Composition Techniques Using Reverses.
2. Visual Warping
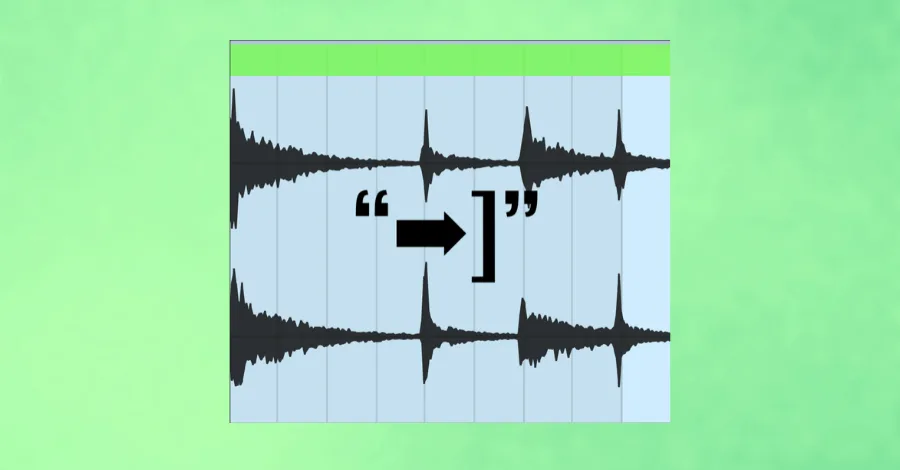
Warping is the secret sauce of Ableton, and in Live 10 it’s easier than ever. First, turn warping on for the clip. Now “Shift” and drag the outer brackets of the clip to warp directly in arrangement view. This allows you to visually warp samples to be in time with your song. I find myself using this most often to fit risers to a specific length, like 4 or 8 bars.
3. “0” to Mute Highlighted Sections
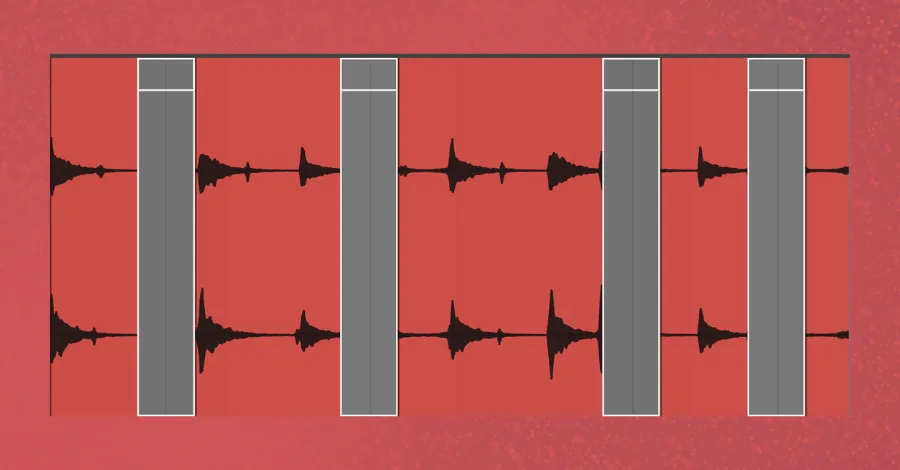
“0” is one of the most useful shortcuts in Ableton Live. It allows you to quickly mute and unmute clips. In Live 10, you can now mute sections of audio clips without having to cut the clip first. This is useful for chopping individual transients and notes out of loops, as well as cutting down on any background noise/unwanted hum during long sections of silence in recorded tracks.
4. Editing Multiple MIDI clips
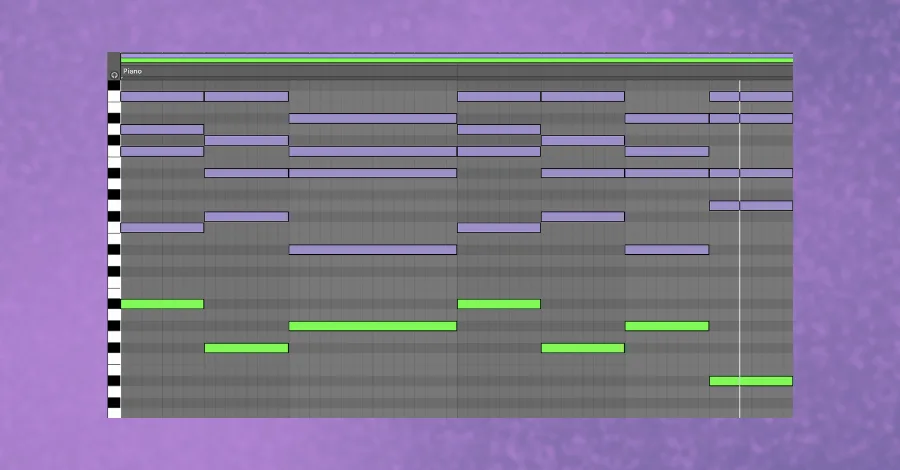
How much time do you spend editing MIDI? The reality is that it’s an inevitable part of electronic music production, though it can be tedious and time-consuming. This update might be my favorite from Live 10 because it’s geared directly at improving the quality and speed of MIDI editing.
You can now modify the MIDI for multiple tracks at a time without leaving the MIDI editor window. You can do this by selecting multiple clips (CMD + click) in the arrangement or session view. This used to be an exclusive Logic & Pro Tools MIDI feature and makes voicing chords and bass a breeze.
5. Quickly Duplicate Tracks & MIDI
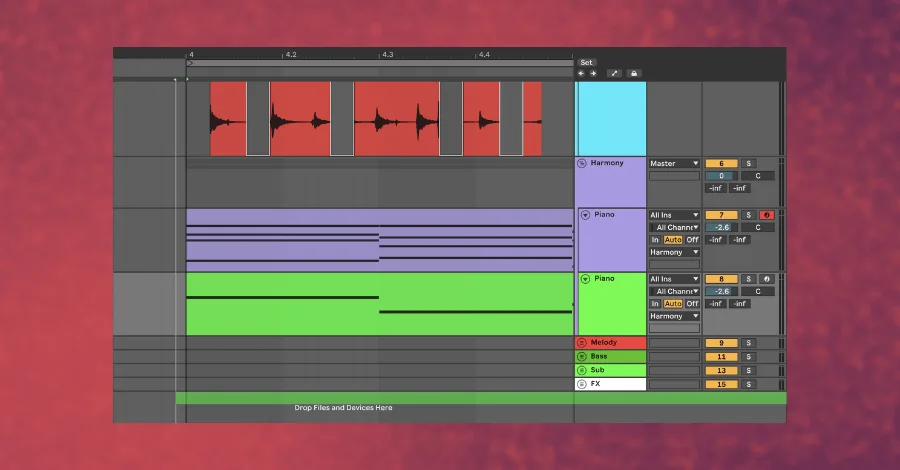
If you need to duplicate a track but don’t want all the MIDI and automation duplicated (maybe for a new layer that is slightly different, or a version of the sound that has slightly different sound design), all you have to do is drag a midi clip from one track to the workspace “Drop Files and Devices Here” below and it will create an identical track with that same MIDI clip.
6. Groups within Groups
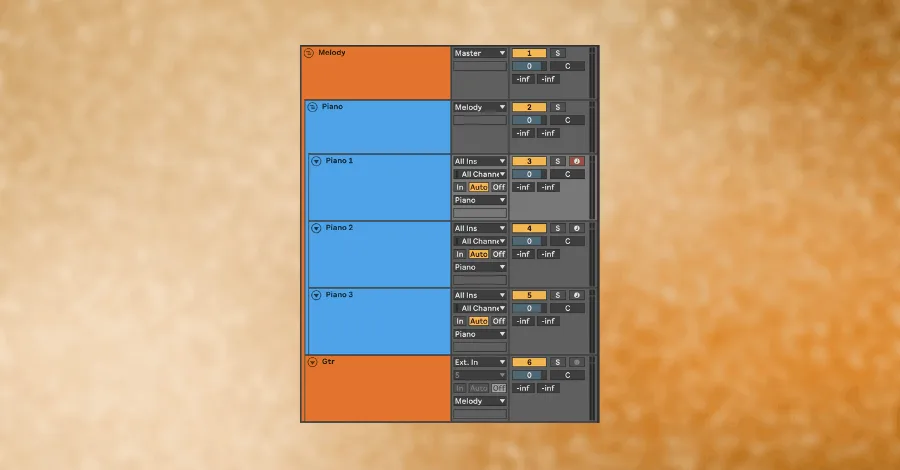
Ableton’s grouping is top-tier. It’s always been easy to create groups and apply bus processing, but in Live 10 you can now create nested groups. This is huge. It allows you to clean up your workspace and craft advanced routing options.
Note: Watch CPU spikes! Ableton cannot allow a single group to use multiple cores, so if you’re stacking tracks and virtual instruments, it’ll be taxing for your processor.
7. Collections
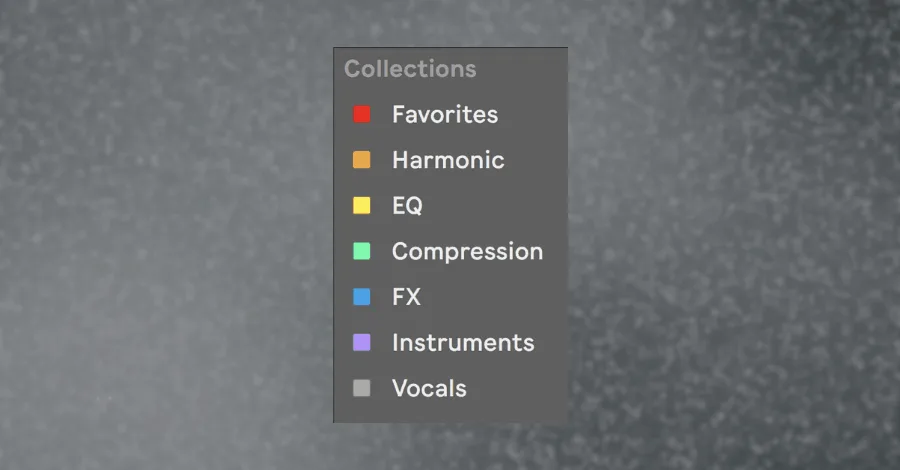
Collections are a big deal for the user interface of Ableton Live. They allow you to categorize ANYTHING (plugins, samples, images, racks, etc) into color-coded favorite folders. Organizing your library is a huge part of an effective workflow, and frankly, it’s never been easier. Collections clean up your searches and organize your creative mind.
The 7 categories that I’ve built are:
Note: they’re currently limited to 7 categories, so be strategic with naming and organization. Also, you can’t back collections up, they live on your computer, not your Ableton account. Once things are nicely organized, take a screenshot for future reference.
New Devices and Features
8. Updated Utility
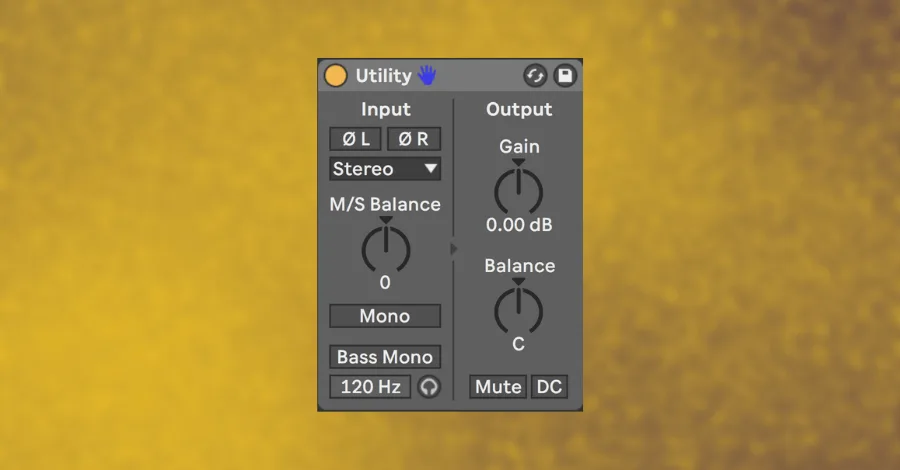
Ableton’s stock utility plugin went from handy to indispensable. It may seem small, but these improvements are some of the most useful in Live 10. We now have a lightweight and optimized plugin that offers Mid/Side Balance, Gain down to true zero (previously it was only -35 dB), panning. And a Bass Mono function (you can even solo the bass frequencies).
Utility is so indispensable that it’s included on my default Audio Track and MIDI tracks. To create default tracks of your own, set up a new audio track with a utility plugin, right-click the track header (on the name), and select the last option: “Save as Default Audio Track.”
9. Max for Live Updates
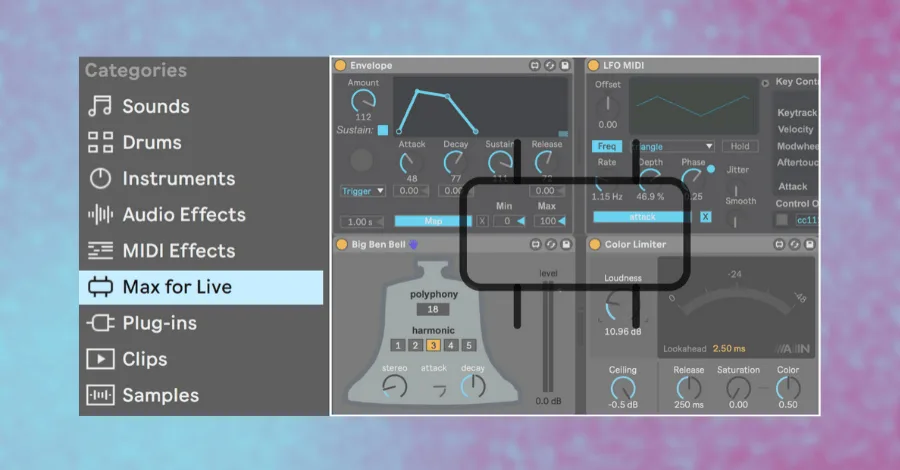
Max for Live is a third party platform for that allows anyone to create devices, instruments, and effects for Ableton Live. It’s been steadily growing for years. And this update cut the learning curve for end users and integrated Max seamlessly into Live 10. At a program level, there are integration improvements to reduce CPU usage. And many Max devices received such a profound facelift that they’re practically Ableton native devices.
There are some great-sounding new instruments (particularly the Poli Synth and Bass Synth), and the Drum Synths are easy to dial in and work especially well when layered with samples. There are also new audio and MIDI effects, like an envelope follower, shaper effect, and MIDI step sequencer.
The amount of Max devices can be overwhelming, so to narrow it down …
I find myself returning to the LFOs, Color Limiter. And Max Arp. The LFOs are top-tier for adding movement to your music because they can be assigned to any parameter in Live. It couldn’t be easier: just click MAP and then select your destination. Track panning, reverb depth, rate of another LFO… nothing is off limits. The Color Limiter is another great tool in Max, full of deep analog character. And you can adjust the saturation level and tone with two simple knobs.
10. Capture MIDI
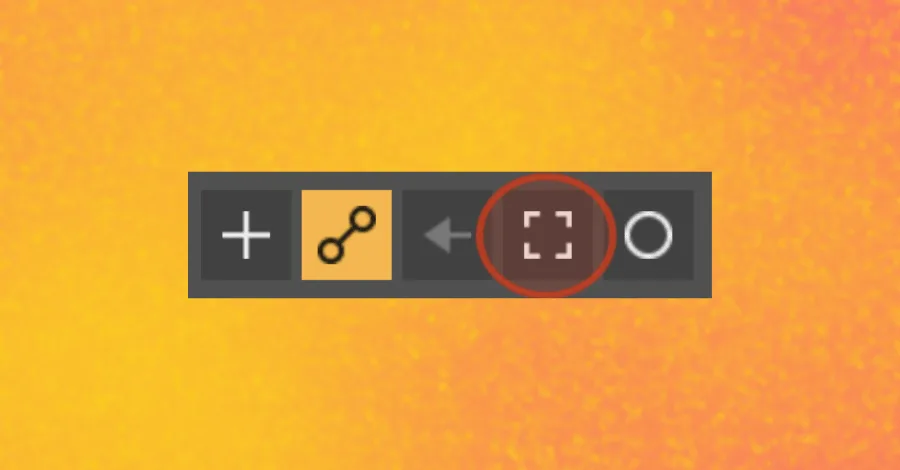
This is one of my favorite features in Live 10. Have you ever surprised yourself with a great riff while jamming, then tried to record it and failed? No problem anymore with Capture. Now you can just plug in a MIDI controller and play. Ableton is always listening, and can retroactively create the MIDI after you’ve hit your groove.
It takes the pressure off capturing a “perfect” pass of MIDI and makes it easier to get into a flow state. It’s saved me many times already and is also fun in sessions with instrumentalists to catch those happy accidents that make music production so fun.
Pro Tip: After using Capture MIDI, immediately quantize the result lightly (try 50% strength) to tighten the timing without losing the feel. Then duplicate the clip and use one for pitch editing and one as a backup, so you can always reference what you originally played.
Those are the 10 updates that have made the biggest difference in my workflow. Taken together, they represent a real shift in how Ableton thinks about day-to-day usability, not just sonic features.
Is Ableton Live 10 Worth the Upgrade?
The short answer is yes. If I had to go back to Live 9, the speed of my workflow and organization of my library would suffer.
The long answer is that it depends what you’re looking to accomplish, but it’s practically guaranteed that Live 10 will ramp up your workflow and offer a broad palette of new sounds, devices. And effects. For what it’s worth, the packs alone aren’t worth the price of the upgrade, as there are higher quality third party samples libraries out there.
Still, Ableton put forward a strong update and one that’s worth jumping on if it’s your DAW of choice. You can start a 30-day trial for free at the Ableton website.
Related tool: Hyperbits Elevate: 10 drag-and-drop Ableton effect racks that make your tracks sound finished, not fiddled with.