

Jump to a section21
- How to Make Your Songs Come Alive
- What Automation Means When the Song Arrives Finished
- The Six Most Important Effects to Automate
- 1Volume
- 2EQ
- 3Saturation
- 4Delay
- 5Reverb
- 6Stereo Width & Panning
- Making Your Instruments More Expressive
- 1Velocity
- 2Common Synth Controls
- 3ADSR
- 4Layering
- 5 Tips for Better Automation
- 1Keep Automation Clean
- 2Use your Hands
- 3Use Curves
- 4Copy & Paste
- 5Snap Automation
- Schedule 45 Minutes and Watch What Happens
How to Make Your Songs Come Alive
If you want people to move to your music, you’ve got to put the movement in first. Skillfully executed changes are the lifeblood of interesting music.
Movement can be harmonic (chord changes, key shifts, inversions) or production-based (parameter changes, effects automation, arrangement shifts). Today we’re focusing on production movement, all the life you add through mixing, arrangement, and automation in your DAW. Music is dynamic by definition, and movement is the arm of dynamics.
At every stage of production, ask yourself: “What am I working with?” and “How can this change?” A warm pad, a hi-hat, a vocal line, an entire section, all of it benefits from movement and change.
That’s where professional tracks separate from amateur ones.
Movement is automation. In your DAW, you can sculpt parameter changes over time. Automation exists in every DAW because without it, nothing sounds alive.
What Automation Means When the Song Arrives Finished
Type a sentence into Suno and you get back something that already sounds like a record. Arranged, and balanced enough to be convincing on laptop speakers. Sit with it a minute though and you’ll notice it plays about the same way at 2:30 as it did at 0:30. That flatness is the same flatness you hear in a track a person made and never automated.
The part no tool has gotten to yet is the decision about what should move, when it moves, how far it goes, and which element stays dead still while everything around it shifts. Those are calls about tension and release across four minutes, and they come from someone who knows what they’re listening for. Automation is where that judgment lands.
None of this is an argument about AI… use whatever gets you to a song. But whether you’re steering something a generator handed you or fixing a track of your own that just sits there, you’re reaching for the same lever. Here’s where to start.
The Six Most Important Effects to Automate

It’s easy to set a level and forget it. Sometimes that’s fine, like locking your kick volume. But some elements need automation to shine. If you’re not automating these six parameters, your mix isn’t professional yet.
1. Volume
This is #1 for a reason. It is the most widely used and powerful automation move at our disposal.
It’s common practice for mixing engineers with analog desks to “ride the faders,” which means adjusting the levels of individual tracks as the song moves through sections. When working in a DAW, it’s important to use a gain/utility plugin to adjust the volume of your track, leaving the faders free for setting the initial level.
Otherwise, the main volume control will bounce all over the place and make it nearly impossible to change the relative balance between instruments.
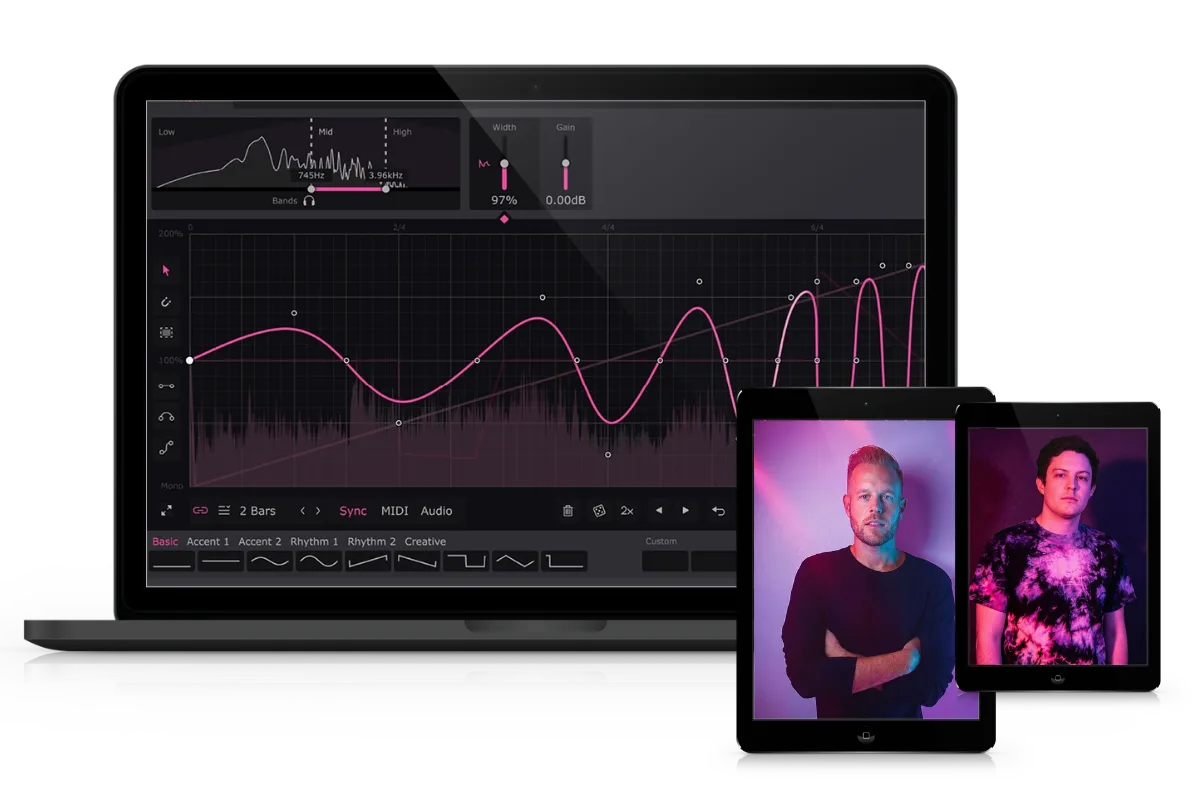
That covers riding levels. If what you want is rhythmic volume movement instead, Cableguys VolumeShaper lets you draw the shape and lock it to the grid, which is far quicker than drawing the same pumping curve by hand every eight bars.
Pro Tip: Getting the relative volume levels of each instrument correct is a more important task than EQing. New producers often prefer a sound after it’s been EQed and in many cases, it’s only because the levels have changed. (Porter Robinson said it, not us. But it’s worth repeating.)
2. EQ
Since EQ is really just a volume control for specific frequencies, it should make sense on this list. Filtering with high-pass/low-pass EQ can do wonders to make space in a mix, especially for low/mid-range elements. Try filtering out the lows over the course of a build, and bringing them back in once the drop hits.
The reverse effect (filtering out the high frequencies) makes a sound feel farther away, which you can use to pull sounds back in the mix for transitions and builds. A filtering plugin like RC-20 Retro Color is great for coloration and analog vibe. For clashing frequencies, Wavesfactory Trackspacer ducks one track’s EQ in response to another, and Smooth Operator rides out resonances dynamically inside a single sound. Short of those plugins, any standard DAW’s stock EQ will do the trick, though FabFilter Pro-Q makes a slow filter sweep much easier to see while you’re drawing it, and its dynamic bands cover most of the same ground.
3. Saturation
Saturation is king. It’s the ultimate mixing tool for making a digital signal sound warm, rich, and full. Saturation does so much to improve a sound that you might be tempted to set it once and leave it.
For a deeper look at saturation options, check out our Top 20 Saturation Plugins for Electronic Music.
But think about all the possibilities for automating saturation: you can bring in subtle warmth through the course of a verse, or hit that second drop at a higher drive setting.
You could automate the Dry/Wet to change the mood during an outro, taking it from fully clean to mangled and distorted. Automating the drive amount changes the character of the distortion, while the dry/wet (or mix amount) affects how much saturation is present.
Think about the growl you would get from twisting that drive knob while your synth grows in energy during a build.
That type of attention to detail will give your music an expressive edge over someone who sets a plugin and forgets about it.
4. Delay
Delay is the Ferrari of effects. It’s a thrill to crank up and has a ton of horsepower to give your mix energy. But it’s easy to get trigger happy and irresponsible with it. Delay is NOT a “set-it-and-forget-it” effect.
Shorter, slap-back style delays with low feedback can work as an always-on way to thicken your sound or add space. But anything with more than one repeat should be automated swell in between phrases. And then get out of the way once the lead comes back in.
Automating the feedback is a sure-fire way to draw attention to the delay, which can useful for dubbed out breakdowns. Vintage, tape-modeled delays have a characteristic pitch-shifting sound when the delay time is adjusted. And in combination with the feedback and mix levels, there are some spaced-out, psychedelic sounds at your fingertips through a little automation.
The PrimalTap and EchoBoy from Soundtoys are automation goldmines.
Here are the keys: remember, you drive the delay, it doesn’t drive you. Experiment and have fun.
5. Reverb
Like delay, the most common mistake with reverb is simply cranking it too high until it washes out the mix. Resist the urge to dime the send level on every track. Automating the mix will put your sounds closer or further back in the space. And can be useful during transitions or as swells between phrases.
Automating the decay times and pre-delays will change the character of your space. This is best in subtle doses, a hair below the noticeable threshold.
FabFilter Pro-R is built for this, with decay and character sitting on single controls that take automation cleanly. When you want the obvious version, a riser tail that swallows the whole track for a bar, Eventide Blackhole is designed to be pushed that far.
6. Stereo Width & Panning
The mono build trick is pure pre-drop magic. Automating the position of your sounds in the stereo field can get distracting if it’s too extreme. But it does wonders for adding a human feel in small doses. You can uses autopanners like the PanMan to accomplish this on individual tracks. And the SSL Fusion Stereo Image for affecting the stereo width of your entire song by making adjustments on the master bus.
Making Your Instruments More Expressive

Automating the six effects listed above should be core tools in your production arsenal. When you’re baking a cake, you know it needs flour, butter, and sugar. The goal is to get to a point where adding these automation moves becomes second-nature, another part of the recipe for creating a lively song.
But what about for software instruments, and the sounds you’re working with to start? Whatever DAW or synth you’re using, you have all the tools available to create expressive and dynamic sounds. It comes down to the heart of this post: you need to know what to modify. And then give it your best attention to detail.
These are the most important areas to pay attention to when creating sounds.
1. Velocity
When working with MIDI, there are only three parameters to consider: timing, pitch, and velocity. Velocity determines how loud the note plays, and it has a HUGE effect on the character of the sound. The original name for the piano was the pianoforte because it could play both soft (piano) and loud (forte). In other words: it has velocity sensitivity, where it’s predecessor the harpsichord did not.
In that sense, the piano is objectively a more expressive and dynamic instrument. If volume automation is the #1 effect to automate, velocity automation is the #1 MIDI parameter for the same reason.
I can’t say this any other way: editing the velocity of your MIDI to get the feeling you’re after is an absolute must.
2. Common Synth Controls
Apart from the oscillator and choice of a waveform, nothing has a greater effect on the sound of your synth than the Filter Cutoff. Set it low for a warm pad. Open it up all the way for a bright, in-your-face sound. Opening and closing the filter on a synth will significantly change the timbre of the instrument.
Try sweeping it open over the course of a build so that your chords hit with a satisfying, full-frequency sound during the drop. That slow cutoff climb is a big part of what you’re hearing when an Anyma record crawls out of a breakdown, one filter opening across sixteen or thirty two bars while the arrangement underneath barely changes.
The great news is that synthesizers have a built-in movement engine in the form of LFOs to create sweeping movements, rhythmic stutters. And triggered motion in just about any form you can imagine. An extremely subtle LFO assigned to the pitch of one oscillator will create pitch drift, where the notes go slightly in and out of tune. In small amounts, this creates a chorus-type warmth that’s associated with the nostalgic imperfections of vintage analog polysynths.
If your synth’s LFO section is limited, or the sound you want to move is audio rather than MIDI, FilterShaper XL gives you a drawable LFO you can point straight at a filter. It comes in the ShaperBox bundle alongside the volume, pan and time versions, which is most of this article in one window.
Stutters and gates are far easier to understand in motion than on paper. This video walks through four of the most useful ways to build them:
There are also delays and effects available in most synths, and the same logic as above applies to those controls.
3. ADSR
Understanding how Attack, Decay, Sustain and Release work is the key to making your synth sound the way you want. The most common ADSR envelopes are used for the main volume of the instrument, as well as the filter cutoff. Yeah, those old familiar two.
To give your performances an expressive edge, you can automate the release times to extend the length of notes for legato phrases. And tighten it up for quicker passages.
Automating the decay time to introduce variance will make the performance feel more human and lifelike.
Pro Tip: Try automating the filter envelope Amount on your synth during a build. As the tension rises, increase the Amount so the filter opens more aggressively on each note. It’s one of the most satisfying ways to add energy without touching volume.
4. Layering
When producers start layering, their songs come alive. In fact, we have an entire week dedicated to layering in the Masterclass. For those already layering sounds, or looking to get started, there are some ways to apply these automation and movement philosophies to your stacked tracks.
First, not all layers need to hit at once. In fact, it’s more effective to add layers to the more important parts of your track to increase the power of those sections when they hit. It’s also possible to have a big, full sound that feels static.
Stacked sounds need movement too, so try filter automation on individual layers to carve away conflicting frequencies while creating motion and space in the mix.
Here’s a quick breakdown of how to think about layering from a sound design perspective before you start stacking automation on top:
The key is thinking of each layer as a frequency zone, not just another sound to pile on.
5 Tips for Better Automation
Creating movement in music begins in the composition stage. However, it normally ends with a dedicated block of time devoted to bringing your mix to life. After you’ve finalized the arrangement and basic levels of your track, set a timer for 45 minutes and start getting hands-on with automation.
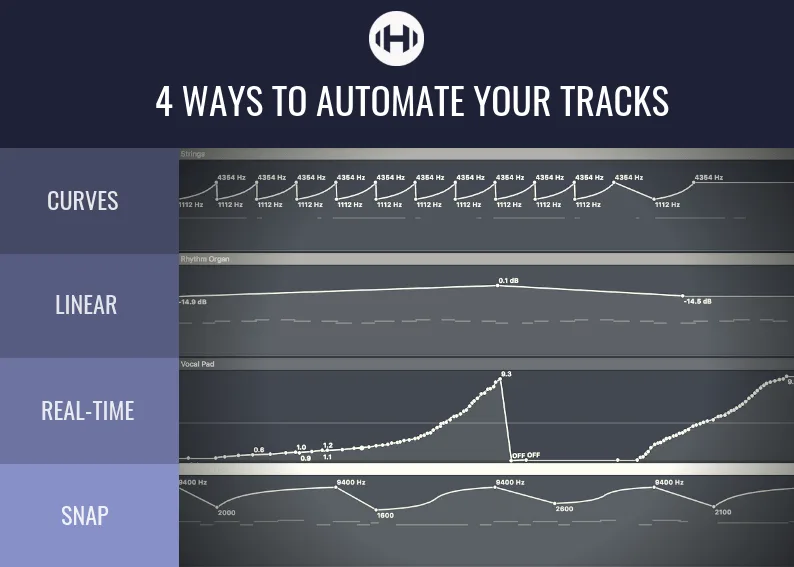
Here are the top five ways to improve your automation session.
1. Keep Automation Clean
Don’t try to get too crazy with filter movement or effects. Subtle changes are usually best. Movement shouldn’t be distracting, it should be a series of smaller motions that add up to create life.
Think leaves rustling in a breeze. If it feels like too much, back off.
That being said, don’t be afraid to explore the outer limits of effects and make extreme changes if you’re going for some type of new or unique advanced sound design. But I’d advise this as the exception to the rule.
2. Use your Hands
The easiest way to get a human feel in your tracks is to modify parameters in real time using your hands. It’s both more effective and more fun than clicking on a screen (unless you need precise, perfectly timed automation as an effect).
If you have a MIDI controller, modern DAWS make it quite easy to map the knobs and faders to parameters in your session. This approach is the winning automation strategy for many reasons: you’ll discover new ideas, be able to automate multiple parameters at once and get physically involved with the changes in your song.
3. Use Curves
Real life isn’t linear. Neither is convincing automation. By using automation curves, you have more fine tuning over the speed and feel of your changes. To create an automation curve in Ableton, hold Alt while dragging the automation line. In Logic, hold Shift + Control to achieve the same result.
4. Copy & Paste
Use technology to your advantage! When editing automation lanes in Ableton, good old-fashioned Ctrl + C and Ctrl + V will allow you to duplicate the movement you’ve created. In Logic, Option + Dragging the automation will do the same.
5. Snap Automation
For those times you want slightly less organic movement, you’re able to snap automation points to the grid to get exactly the changes you need, synced in-time with your tune. Using snap automation along with the copy and paste functions will allow you to create rhythmic gate and stutter effects quickly and easily.
Snap automation is the foundation for all of it. Once you understand the grid-locked version, the organic variations become a lot easier to control.
Schedule 45 Minutes and Watch What Happens
Creating a song that feels alive and full of movement comes down to details. Velocity edits, filter movement, stereo width, riding the faders (figuratively speaking, it’s worth repeating that you should be using a gain plugin for volume automation)… These subtle changes add up to create a mix that’s energetic and dynamic in the right ways.
There’s a concept every producer learns after some time: it’s better to make several small moves than one overblown gesture.
Automation in music is simply too important to overlook. You know how important writing a chord progression is for your composition? It’s inseparable. You wouldn’t have a song without it.
That’s how important automation is to the mixing and production stage. You wouldn’t have a mix without it. You would have something, but it would be a long ways away from what it could be.
The automation stage of production is also one of the most fun. It’s where you can experiment, get hands on, and bring your track to life. So I’m asking you this: for your next production, schedule 45 minutes to focus on automation.
You’ll have more fun, and I think you’ll be surprised at just how much your song comes together in that session.
Heads up: some of the links below are affiliate links. If you buy through one, we earn a small cut (costs you nothing extra). But we'd point you at this exact gear whether we made a dime or not.