Layering Music: 20 Ways to Layer Sounds
“Layers. Onions have layers. Ogres have layers. Onions have layers. You get it? We both have layers.”
— Shrek
Everybody talks about layering sounds in your music, but I’ve seen plenty of misleading advice around the internet on how to actually do it. Layering music is essential if you want to sound professional.
But improper layering is a sure-fire way to make your music sound muddy and cluttered.
In this article, I will show you 20 ways to layer sounds in your music (with examples for each!). There is no one-stop-shop layering strategy that you can always use. Instead, producers who are great at layering have many tools in their arsenal and layer methods in versatile ways.
What Is Layering?
Layering is when you combine multiple individual sounds to create a single, more complete sound. You might layer multiple synths to create a supersaw chord stack, three snare samples to make one massive percussive hit, or cymbals and white noise to create a textured downlifter.
Why Do You Want To Layer Music?
Layering serves two purposes: size and uniqueness. Layering for size makes your productions sound bigger, more full, and complete. When we add multiple layers to a sound for size, we fill in the gaps that any one layer is missing, making for a more complete final result.
You can also layer for uniqueness. Some standard supersaw chords or an 808 bass are popular sounds for electronic music, but you don’t want your chords and bass to sound the same as everyone else’s. Adding unique layers can make your productions sound different and ultimately contribute to a more unique sound.
Which Sounds Are Good to Layer?
As I’m sure you’ve discovered, some layers go great together, but others do more harm than good. How do we pick good layers?
Good Layering: Good layers serve distinct purposes. Effectively, you should layer sounds that sound different and play a unique role in the final sound.
Bad Layering: Poor layering occurs when multiple sounds try to do the same thing. Adding two very similar supersaw layers, for example, won’t help you with size or uniqueness — it will only clutter up your mix and eat up headroom!
One final key point: it is usually a good idea to have one layer make up most of the final sound. That primary layer should be in the direction of the final result you want, and the additional layers fill in the gaps in what the primary layer is missing.
I’m giving you 20 layering tips, including types of layers, some unique production tricks, and some processing strategies. Master these, and you will have everything you need in your toolkit to add size and uniqueness to your productions with layering.
Tips For Different Types of Layering Sounds
Here is a simple chord layer that we’ll start with. We’re going to be adding layers to these chords below:
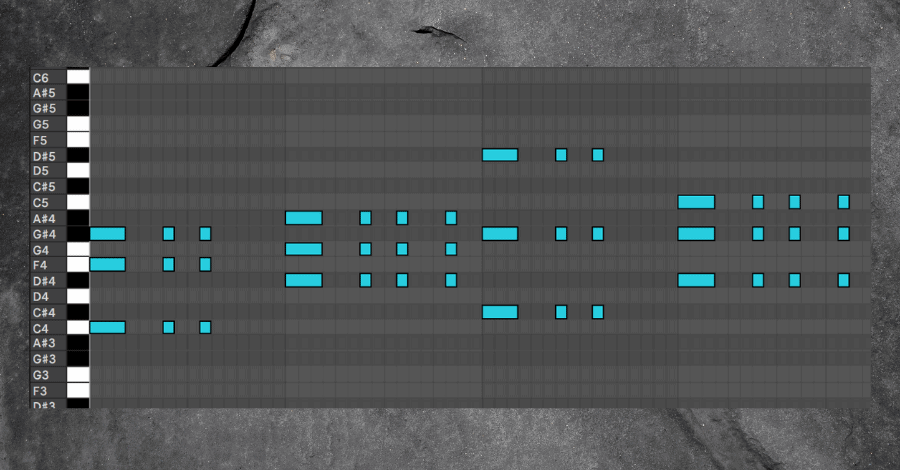
Listen to a simple, amateur-sounding chord progression
1. Add a Detuned Layer
This might be the most common type of layer. Add a layer that is detuned from the original “main” layer. You can do this by detuning the oscillators in a synth or manually pitching the sound anywhere from +-10 cents. A detuned layer adds tons of size to a sound.
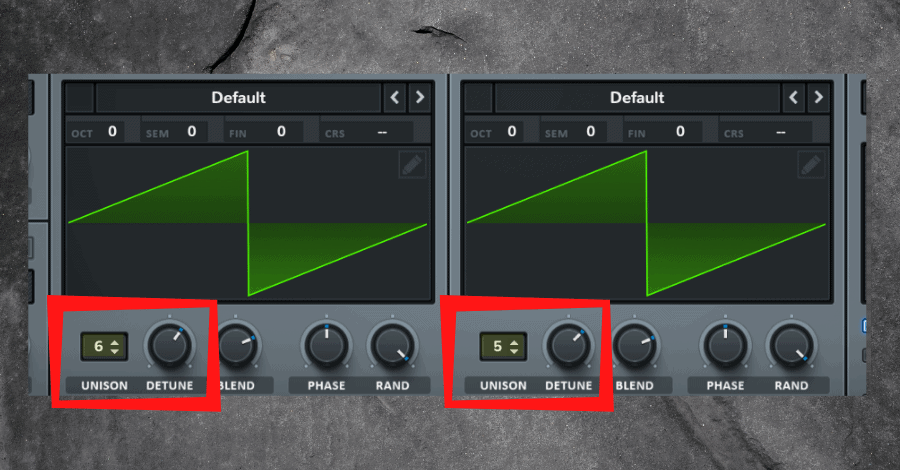
Listen to a detuned layer in isolation.
Listen to how wide the sound is when the two layers are played together.
2. Add a High Lead Layer
When you’re dealing with chords, adding a layer that plays a single note from that chord can accentuate the melodies of the chord itself. Pick the most important notes from the chord progression and find a unique lead-synth patch. Shoot for envelope settings that are similar to the primary layer.
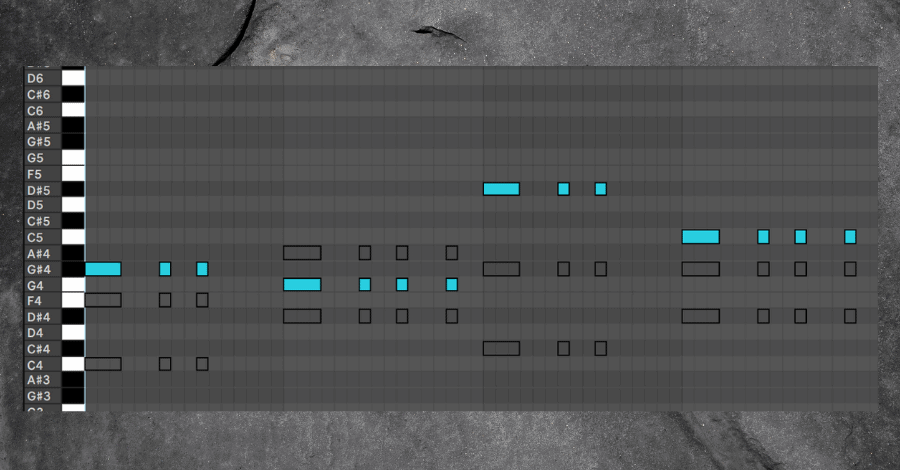
Listen to this monophonic lead layer.
Listen how it adds brightness and clarity when played as one.
3. Add a Bass Layer
The idea here is similar to the lead layer. Pick notes from a chord stack that feel like a bassline, drop them 1-3 octaves, and pick a bass patch. This will add body to the low-end of your sound, plus the higher harmonics from a bass synth can add richness through the mids and highs.
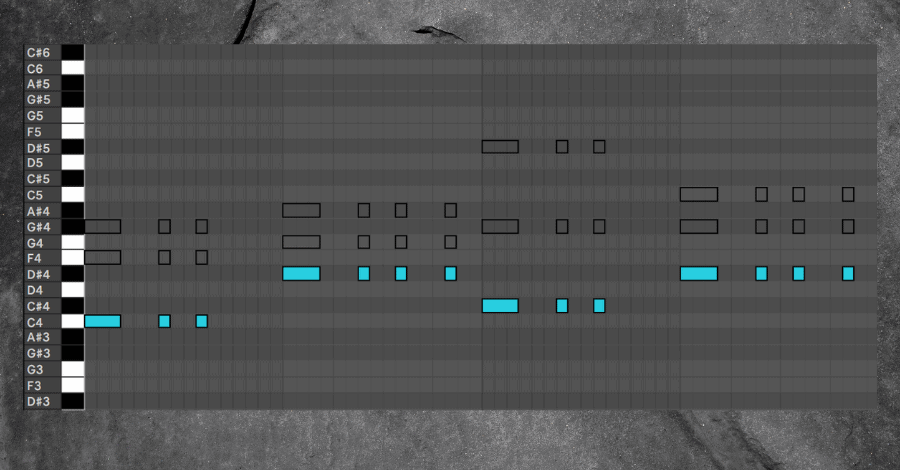
Listen the the same principle applied an octave lower
Listen to the weight and power it adds to the chord stack.
4. Add Another Octave
Layering sounds across multiple octaves is an essential practice for a full and rich sound. While adding extra octaves can help with uniqueness, this strategy also gives us a wider and more massive-sounding result. Unlike most other layering strategies, I like to go for a somewhat similar sound to the main layer but sits in a different octave. Check out my example below:
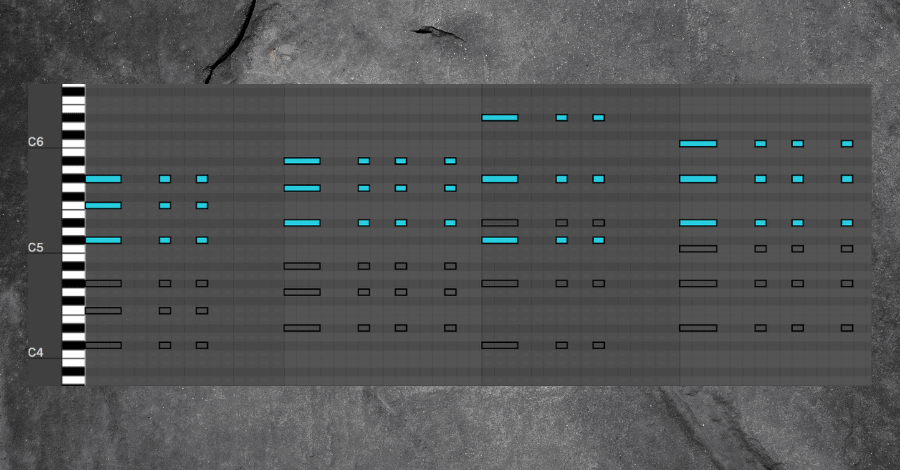
Listen to how a different octave that will compliment the end result
Listen to the fullness of a multi-octave sound
5. Add an Attack Layer
The next three strategies talk about your sound's temporal aspects (how they change over time). Add a layer that beefs up the initial attack of your sound. Any short, stabby sound can work great, or even something as simple as a white noise tick can do the trick to help a sound punch through the mix.
Notice how, in the image below, the short and snappy transient layer matches a similar timing and cadence to the original chord layer. This results in a punchier chord stab with more attack.
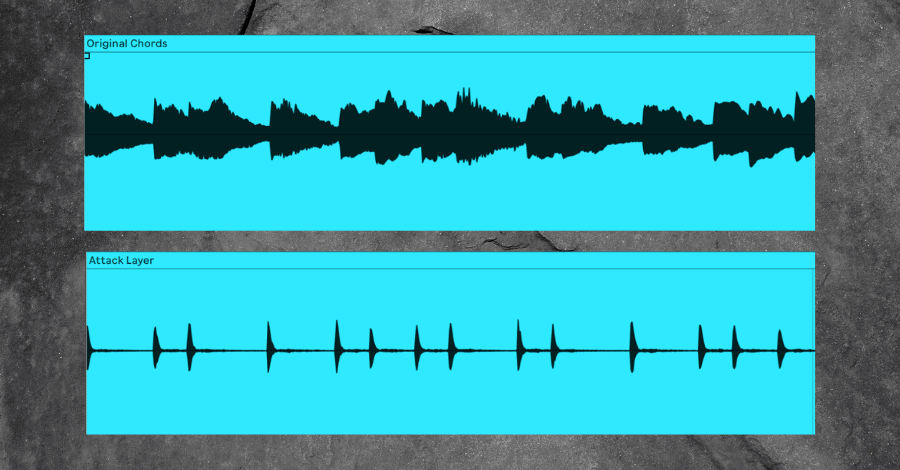
Listen to a short and snappy layer in isolation
Listen to the crisp pluck this layer adds to the chord stack
6. Add a Sustained Layer
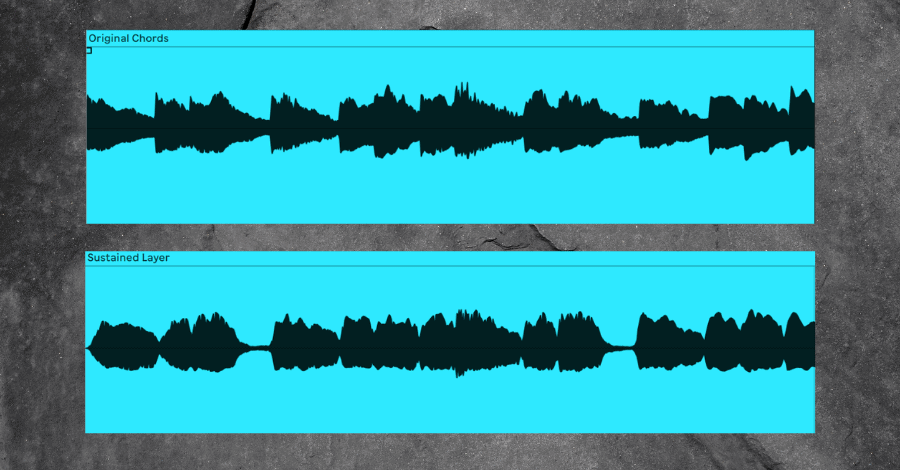
The idea with the sustained layer is somewhat similar to the attack layer — we add a layer with a slower attack that grows throughout the main sound's duration. This strategy is beneficial for sounds where the main layer already has a defined attack.
Notice how, in the image below, the sustain layer swells just when the original layer begins to taper off. This makes for a fuller and more comprehensive end result.
Listen to how this layer evolves over time
Listen how the layers work with, not against, each other
7. Add a Release Layer
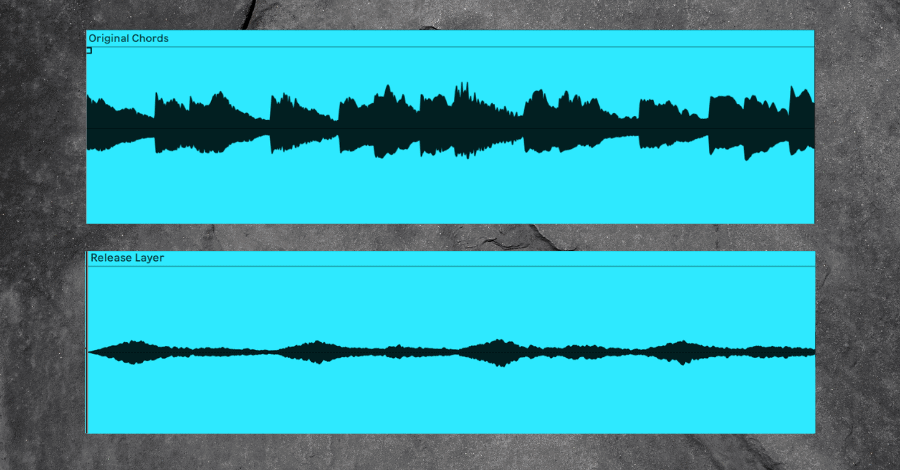
Finally, a release layer can add a unique spatial dimension to a sound. This layer pops up just as the sound is fading away, giving it a lingering reverb or tail that is unique from the main body of the sound.
Notice how, in the image below, the tails of the original layer begin to fade just as the release of the new layer takes its place. Which results in an evolving and dynamic sound.
Listen how this layer fades out in a unique way
Listen to how much more unique and interesting the chord stack now is
8. Add a Vocal Layer
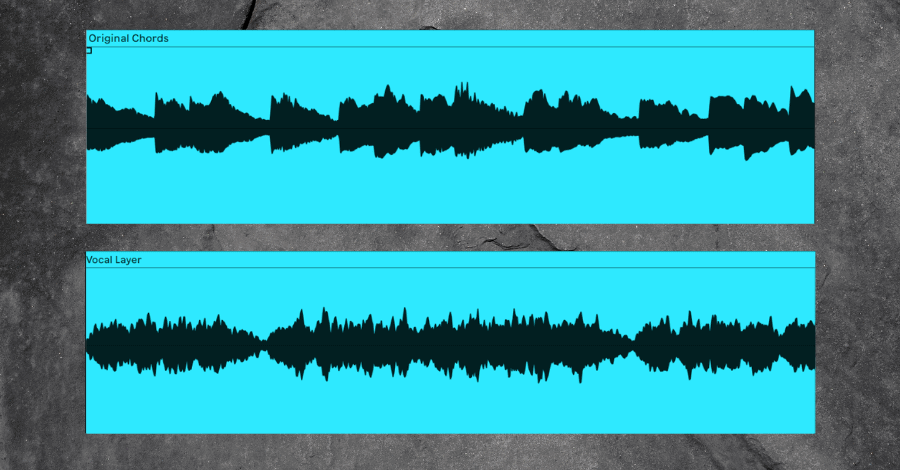
Here at Hyperbits HQ, we LOVE blending the digital with the analog and organic. Take your sound, and add a vocal recording layer. There are plenty of synths that do this, or you can do it yourself by layering in an audio recording. Usually, some “Oooo” vowel sound will work great.
Look at the waveforms on the image below, and notice how the second layer creates a humanized bed of sound for the primary layer to be existing in. As a result, the entire stack of sounds more authentic and nuanced be comparison.
Listen to the nuanced textures an isolated choir contains
Listen to how organic the chord stack now appears
9. Add a White Noise Layer
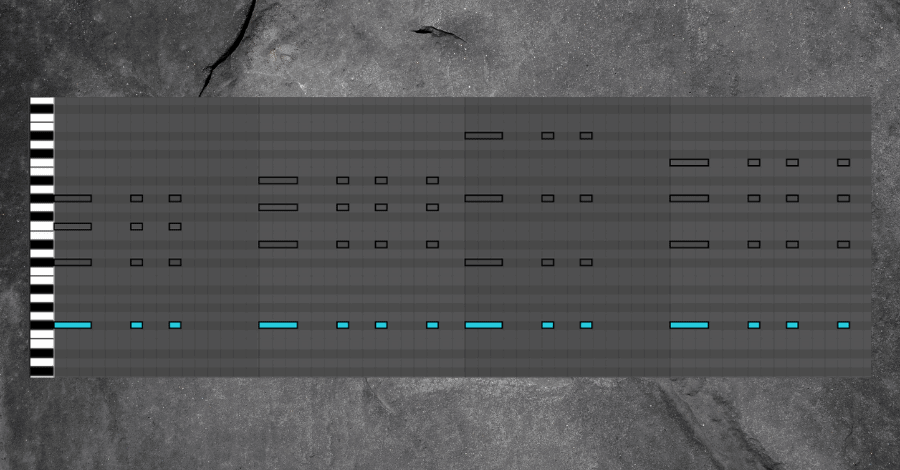
White noise layers can help almost any kind of sound. White noise fills gaps in a sound and adds some unmistakable high-end glimmer to otherwise dull layers. Use white noise on everything from basslines to chords, leads, and even percussion sounds.
Remember, white noise (usually) doesn’t need to be tuned, so you can pick any note to generate the noise. Notice how the white noise is being triggered off of an F# note, which is certainly not in key with the rest of the progression.
Listen to a few simple blasts of white noise
Listen how this layer turns the chord stack into a full, bright, and cohesive sound
10. Add an Arp Layer
Arp layers are beneficial for chords. Take your chord MIDI and run it through a fast-moving arpeggiator. This strategy will add movement within the chord itself without adding additional notes.
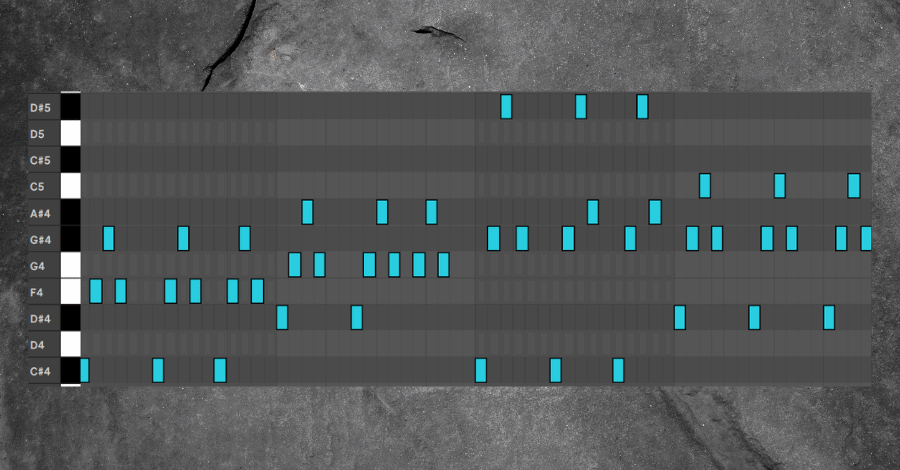
Listen to the notes of the chord played through a typical arpeggiator
Listen to the energetic movement these single note sequences add to the chord stack
11. Add a Percussive Layer
Adding a percussive layer can be especially helpful for lead synths. Usually, this can help with the attack and punch of a sound, but tuned percussion can also add a unique tone to melodies. I recommend experimenting with punchy percussion for the beginning of a note and tuned percussion of a note's main body.
Similar to adding a staccato pluck layer, this strategy can add even more unique textures and transient tones to your sounds. Look at how the pitched percussion shown in the image adds a tonal snap to the chord stack.
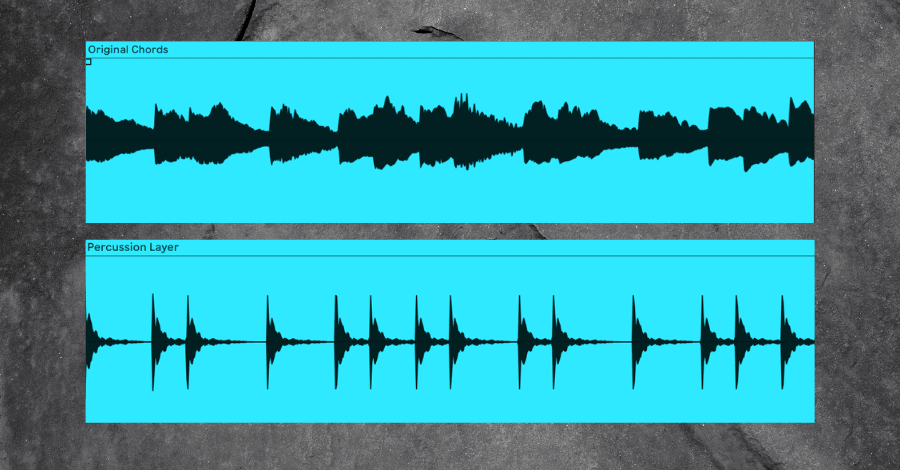
Listen to the exaggerated attack an isolated percussive layer can introduce
Listen to how the percussive layer makes the chord's transients pop
12. Add an Acoustic Instrument
Once again, we want to blend the analog and the acoustic. Have a lead synth? Layer in a horn recording or a piano. Put strings into your synth chords. Add a distorted guitar layer to a bassline. The key is to combine a synth with a real instrument.
Organic instrument VSTs are often modeled after the real things, which means velocity and expression affect them differently than on a synth patch. Notice how the dynamics and texture density varies throughout the progression pictured below, which helps add interest and spontaneity to the synth-based progression.
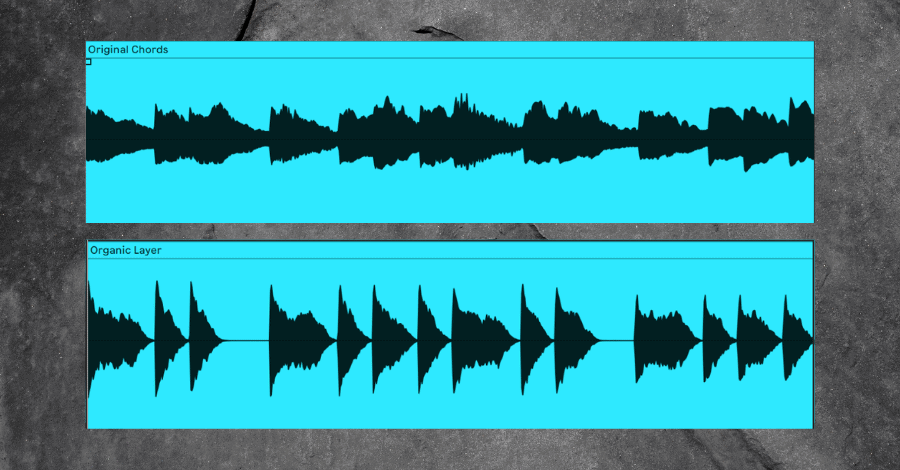
Listen to a humanized piano play the established chords
Listen to the warmth and authenticity the piano brings to the synth stack
Unique Layering Strategies
13. Add an Organic Recording
This is where things truly get crazy. Layering in organic, field recordings can create some of the most unique sounds available. Have a white noise splash? Layer in a recording of glass shattering. Have some stagnant percussion sounds? Play the beat against your stomach, record it on your phone, fix the timing, and layer it into your drum group.
In the image below, two wildly different percussion hits are recorded at once to create a truly unique crash effect. Layering sounds like this can make predictable stock effects become truly unique.
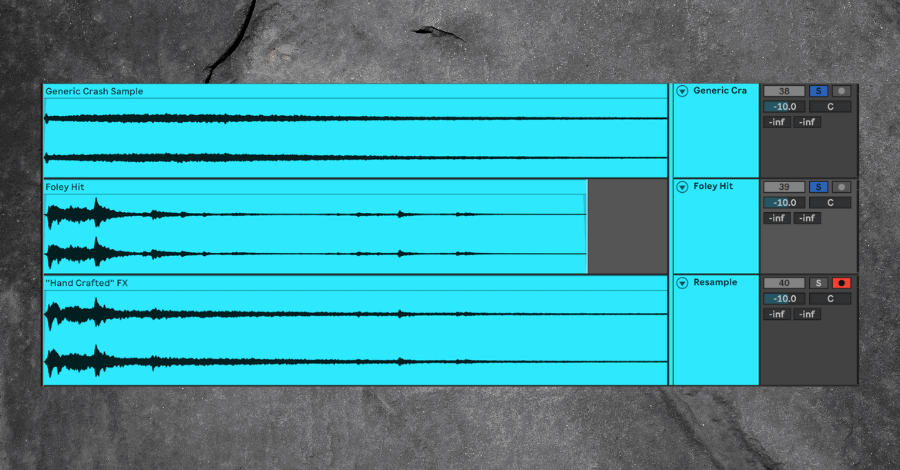
Listen to a sample of a standard crash cymbal
Listen to a percussive foley recording
Listen how unique the two sound when played together
14. Modulate and Copy/Paste
One way to add size to a sound is through these five steps:
- Introduce modulation to the source sound.
- Print the recording to audio.
- Further tweak the modulation.
- Print to the audio again.
- Layer the two audio files.
We love using tape machine plugins to do this, but you can use something like a chorus too. I recommend using a different modulation plugin for each layer. This will help manage possible phase cancellation — if you can avoid phase cancellation, this technique is fantastic.
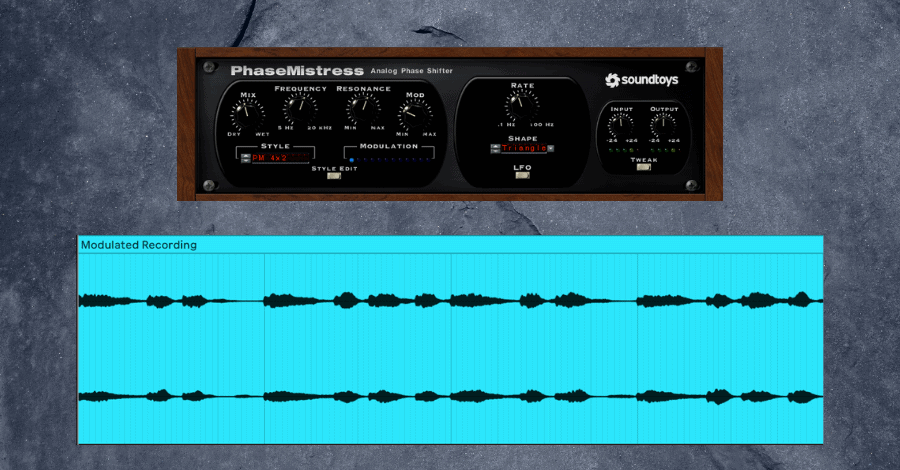
Listen to the subtle movement introduced by modulation
Listen to how the differences between the two layers brings added width and fullness
15. Duplicate Two Takes of Acoustic Recordings
Building off the idea of instrument layers, try adding two different live takes of the same instrument to your sound. Make sure you have two separate live variations with subtle differences, pan one hard left and one hard right (or at least mostly left, and mostly right) to add extra width and size to your final sound.
Here, we have two takes of the same performance — in this case, it is the same chords played on a piano.
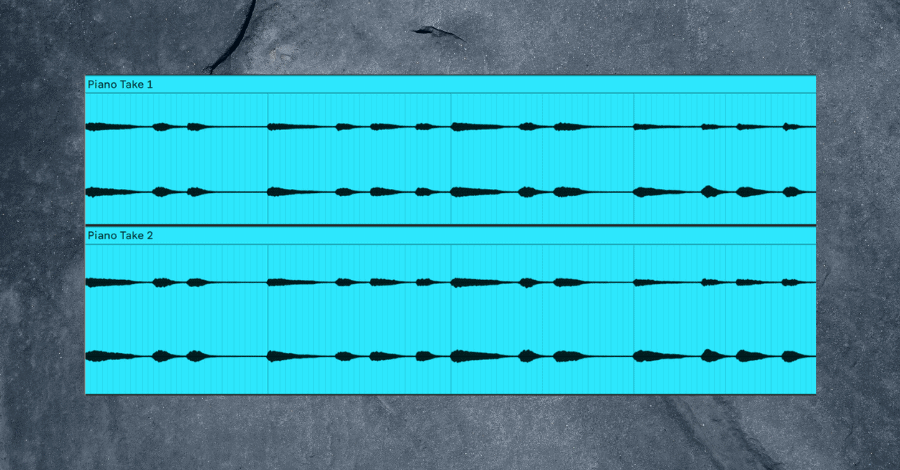
Listen to a single take of a piano recording pictured above
Do not assume that you need a full piano or live recording room to achieve this effect. Recording yourself playing directly on your MIDI keyboard is a fantastic way to replicate a live recording.
And while many of these takes may appear quite similar at first glance, I can promise you that they are much different. In fact, it is in these minute differences that give the impression of it being a single, wide take. Notice the timing and transient differences in the image below. They may seem small, but you can hear the massive impression it brings.
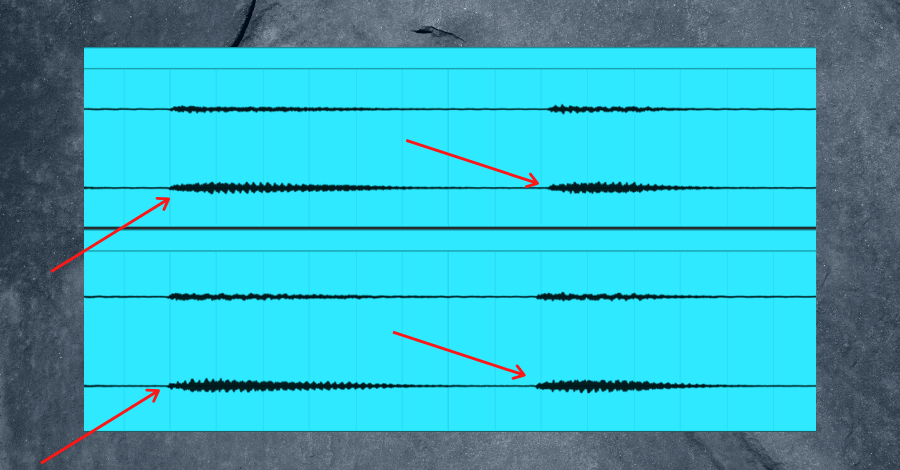
Listen to how wide the single sound appears when different recordings are played together
Unique Layering Strategies
16. Group Compression
These final tips focus on processing techniques for all of your layers. Start by sending all your layers to a bus, and add some subtle compression. We usually want to go for a slow to medium attack and a slow to medium release. Subtlety is key: 1-3 dB gain reduction is usually an excellent spot to hit. You can read more about compression with our guide HERE.
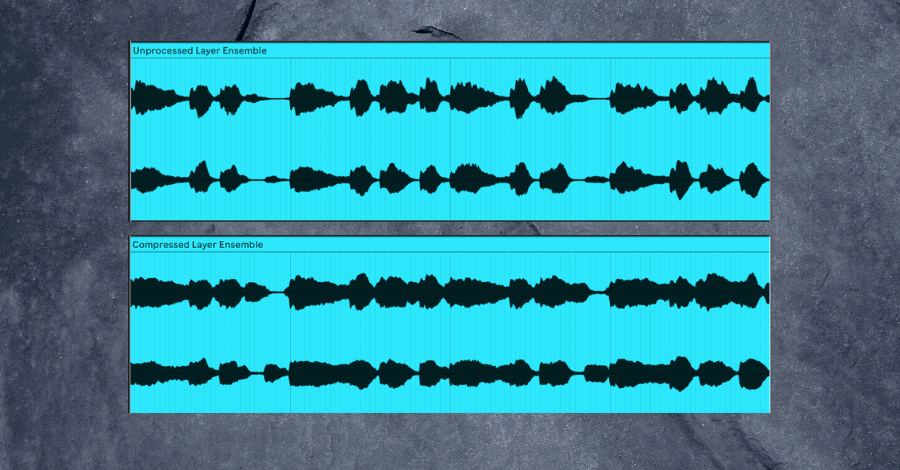
Listen how easy it is to distinguish each layer in an uncompressed sound
Listen how a compressed stack of layers all appears as a single sound
17. Group Multiband Compression
With a similar goal in mind, we can also apply multiband compression to all the layers' bus. Here, we again go for subtlety, and we can even try both multiband compression and regular compression on the same bus. Not comfortable with multiband compression? Start HERE.
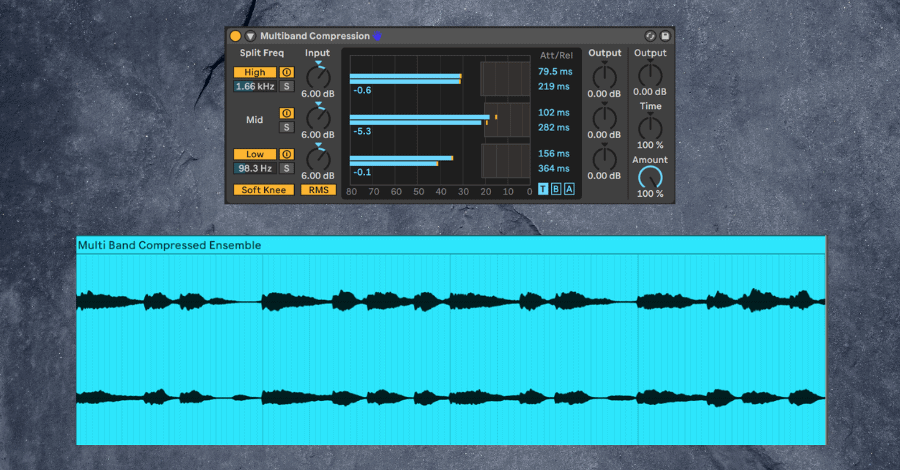
Listen how multiband compression brings further control to the shaping of the chord stack
18. Group Saturation
Saturation helps us achieve both size (through added harmonics) and uniqueness (through tasteful distortion) in our layered sound. We love Soundtoys Decapitator, but Fabfilter Saturn or even your stock DAW saturation and distortion plugins can be great too. Learn more about saturation with our list of top plugins HERE.
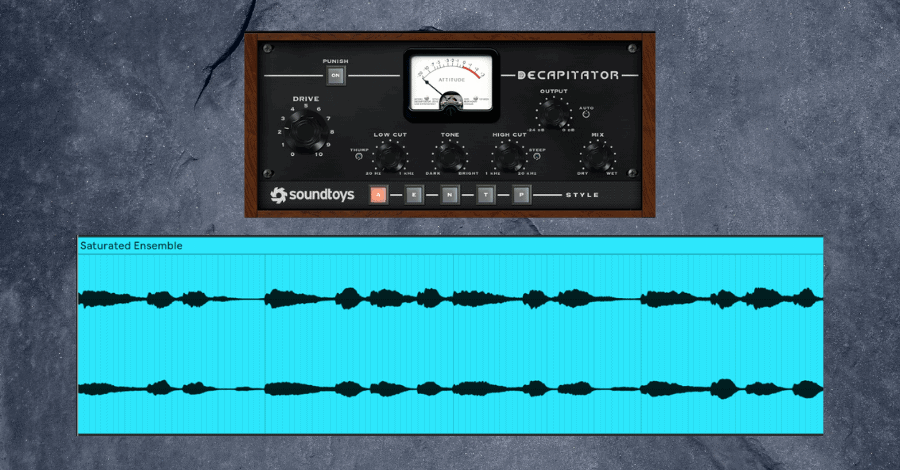
Listen how group saturation blurs the space between each layer, adding fullness and cohesion
19. Group Additive EQ
Analog-style EQs can add subtle saturation and warmth to a signal. I love doing a little additive EQ with an analog-style plugin to help glue together a layered sound. Not sure which EQ plugin is best for the job? We also have a guide for that, right HERE.
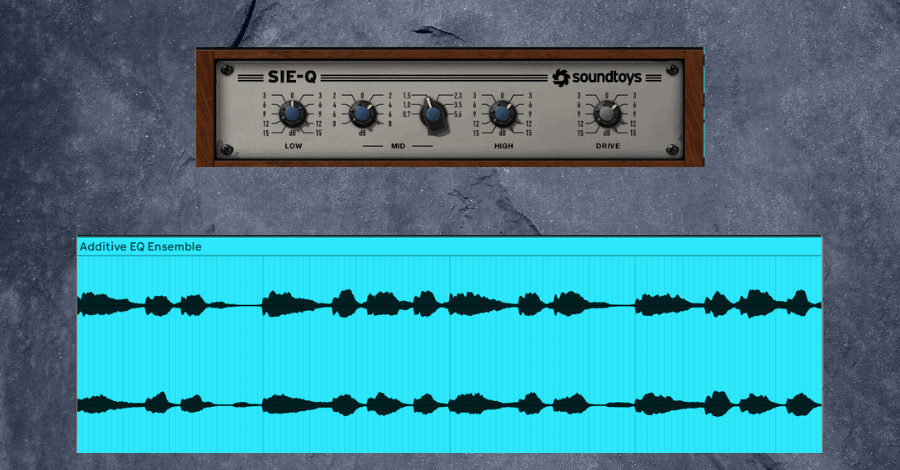
Listen how group addictive EQ shapes the sound as a cohesive whole
20. Using a Common Reverb
Last tip: adding a little bit of reverb to your layers will glue them all together. In effect, you are putting them in the same “space,” which creates the perceived togetherness you want a layered sound. Again, keep it subtle: short decay times and less than 15% wet. We have loads more detail on reverb in this article HERE.
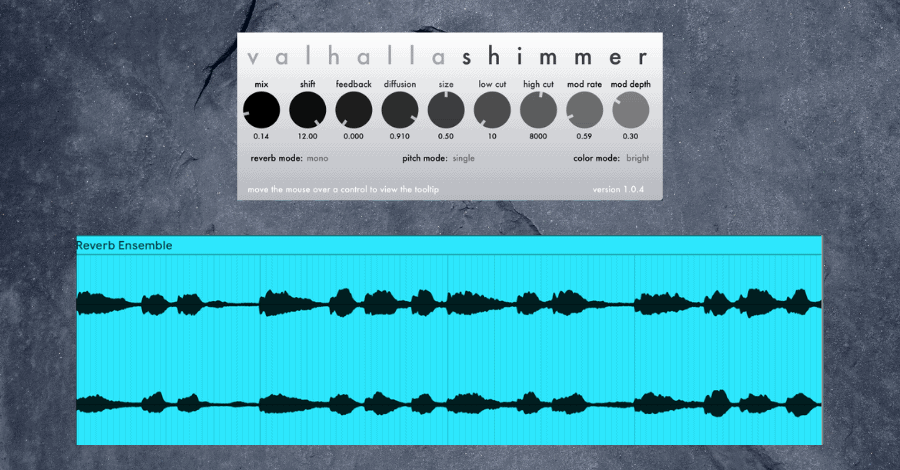
Listen how reverb places the chord stack in a unifying space
Final Thoughts on Layering Sounds
Remember, there are two goals with layering: adding size and adding uniqueness. Be sure to check both boxes when you’re layering sounds: this often means addressing both by adding multiple layers. Once you master the art of layering music, I guarantee your songs will feel more professional, polished, and unique.
Making professional music is damn hard, and knowing how to layer sounds together is only one of the many skills a professional procure must master. If you are wanting to start producing music that is as good, if not better, than the artists you look up to, the Hyperbits Masterclass is the perfect solution. Enroll instantly, and start leveling up your music today.
These Might Also Interest You:
8 Creative Ways to Use Sample Packs & Soundbanks


