SoundToys Plugins: An Unrivaled Guide
“If it sounds good, it is good.”
— Joe Meek
Soundtoys plugins are some of the most widely used tools in audio, and for a good reason. This is because Soundtoys plugins are more than just mixing tools; they can be used for sound design, inspirational tools, and powerful audio processing tools.
In fact, at the Hyperbits Masterclass, we deem the Soundtoys plugin bundle as one of our three desert island plugins. They are just that damn good...
That's because the Soundtoys plugins offer a ton of value right out of the box. Just drop something like Decapitator or Echoboy onto a channel and start scrolling through presets, and you'll instantly see their potential.
But therein lies the problem. It's too easy to get good results with little effort that too many producers gloss over the details hidden under the hood of every Soundtoys plugin.
Well, we've used these plugins A TON, and we know them like the back of our hands, which is why we decided it's finally time somebody wrote the unrivaled guide to the Soundtoys plugin bundle. You'll learn what they do, you'll know why they do what they do, and you'll even learn some of their most powerful features are often the most unassuming bits of their under interface.
So whether you're into sound design, audio processing, inspirational tools, or dirty, messy, analog emulation, you'll find that Soundtoys plugins do it all. Here's a key to the buckets below.
Who Uses Soundtoys Plugins?
It can be easy to assume that grammy-level artists are all hiding their production secrets behind the walls of their million-dollar studios, but that couldn't be further from the case. In fact, most of them are using the exact same tools you have right now – the Soundtoys Bundle.
Zedd - Zedd needs little introduction, but what DOES is what goes on behind the scenes throughout his productions. Zedd is a producer who doesn't speak too often about his production process, but when we heard he uses the Soundtoys plugins bundle in every one of his tracks, we were not surprised.
Decapitator was a defining part of the processing chain that gave Ke$ha's vocals her signature forward punch in her track True Colors, which you can watch below:
ODESZA - Few artists in the game can match the texture and authenticity of sound that ODESZA brings to their productions. They admit these textures are entirely attributed to the Soundtoys Radiator plugin (with a few dashes of Decapitator for flavor).
The duo states that they run almost every signal through at least one instance of these plugins to add grit and resolution to their sounds. Small amounts across dozens of channels culminate in an end result that feels so real you could almost grasp it.
Mija - The core of Mija's sound comes from grit-soaked atmospheres and an in-your-face attitude that is as ephemeral as it is apparent. She notes that these iconic qualities stem from using Soundtoys saturation plugin, Decapitator, and a healthy dose of Crystallizer.
The latter of these two plugins, Mija notes, is a fantastic tool for adding a sparkling and ethereal quality to tones and being an inspiration machine to generate entirely new ideas (more on this later on).
Tycho - While admitting that hardware is integral to his creative process, Tycho states that Soundtoys plugins' emulations of classical hardware are actually more than perfect; they often lead to other compelling results unobtainable to those only using hardware.
Hearing him talk about the Soundtoys plugins makes you think that he loves them even more than we do. See for yourself:
How to Use Soundtoys Plugins
When first unboxing the Soundtoys bundle, it can be easy to be overwhelmed by the number of buttons, knobs, and parameters on each. Sure, each of the Soundtoys plugins is incredibly unique, but that does not mean that they don't also share some common features.
The Soundtoys bundle is made up of a TON of plugins. But if you just bought or are thinking of getting the bundle, there are a few crowd favorites that you should familiarize yourself with first. Quickly introduce yourself to the seven most powerful plugins in this bundle by watching our latest video on how to use the seven best Soundtoys Plugins:
Many of the tips, methods, and uses outlined in this article and the video above focus on the individual parameters that are unique to the specific Soundtoys plugins (such as the Freeze function on Primaltap), but that does not mean that you can't take all these methods to the next level by introducing added parameters common throughout all of the plugins.
Once you get the hang of the general signal flow and basic parameters (such as the Tweak menu, Envelopes, and Input/Output drives) the whole workflow becomes much more intuitive and an incredible amount of creative potential is brought to light.
Now let's dive into the details, minutia, and power of the Soundtoys bundle...
Soundtoys FilterFreak
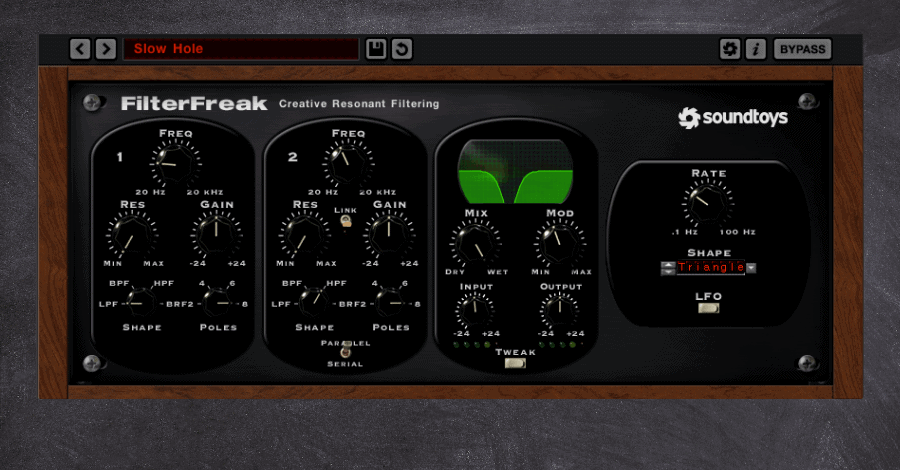
Every plugin bundle needs a classic filter, but Sondtoys' FilterFreak is anything but conventional. This filter can provide anything from squelchy resonant sweeps to warmly driven low-pass filtering. And it's all built on analog modeling.
This is an excellent tool for standard filtering but can open up extraordinary creative potential in just a few clicks through some of its more unconventional features.
What Makes FilterFreak Unique
These features mentioned above are what make FilterFreak stand out amongst an endless sea of filter VSTs. The modulation sequencer and the double-filtering options (both series and parallel) are complete game-changers, and the eight different emulation models give you more finessed control over your filtering than any plugins I've encountered.
The Rhythm and Groove section of the FilterFreak is what really makes this plugin something special. It allows for filter and resonant modulation to add a pulsing groove to your otherwise stagnant signals.
The second feature isn't uncommon, per se, in filter plugins, but FilterFreaks dual-filter option is still one of my favorite parts of this plugin. It allows for truly unique sweeping effects and squelchy modulation that is unrivaled by any other filter I have found. And when coupled with the groove sequencer mentioned above, it can really bring life and movement to any channel.
On this note, the Soundtoys bundle actually comes with two versions of the FilterFreak; 1 indicating there is only one filter in the chain, and 2 allowing for the dual-filtering option.
How I Use FilterFreak
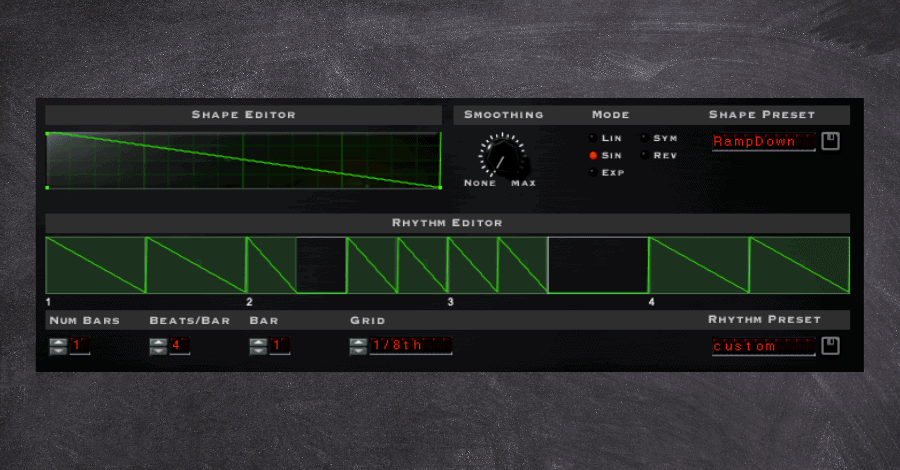
Listen to how the pad sounds. It's cool, but isn't adding much to the groove
Listen to how an entirely new vibe is created through modulation
1. Pads have the tendency to take up a lot of space in the arrangement without offering much other than ambient backdrops and softer harmonies. But with the Rhythm and Groove feature, we can introduce some movement into the pad and have it work WITH the rest of the music instead of simply underpinning it.
It achieves a similar effect as gating the signal. Still, gated pads have become synonymous with specific genres. Having another, smoother way of injecting similar rhythms into your track's elements can set your track apart from the competition.
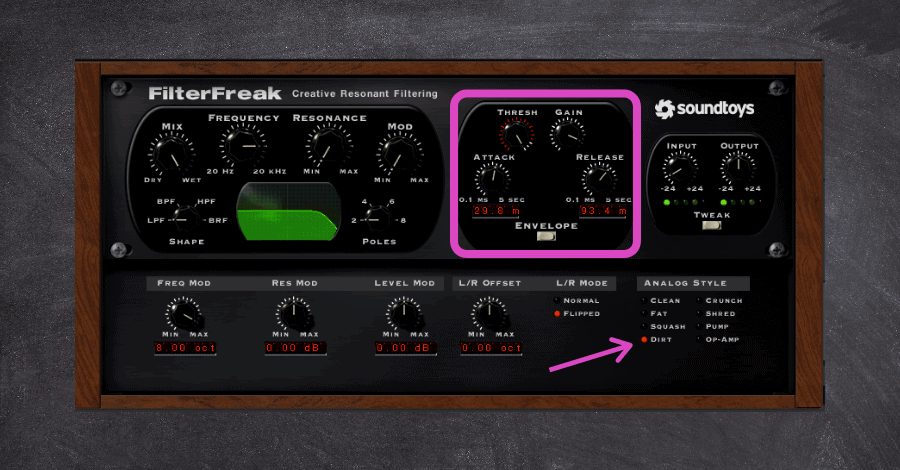
2. By taking full advantage of FilterFreak's threshold knob, we can introduce different distortion types and saturation to targeted transients in the signal.
My favorite filter modes to add desirable grit and texture to drum transients are through the aptly-named Dirt model and also the op-amp model. Dialing in the settings just right will introduce incredible artifacts into the dense transients of percussions, synth plucks, and guitars.
The threshold-dependent functionality of FilterFreak means that it can often be a better option than more constant-state saturation offered by the likes of Decapitator or Radiator.
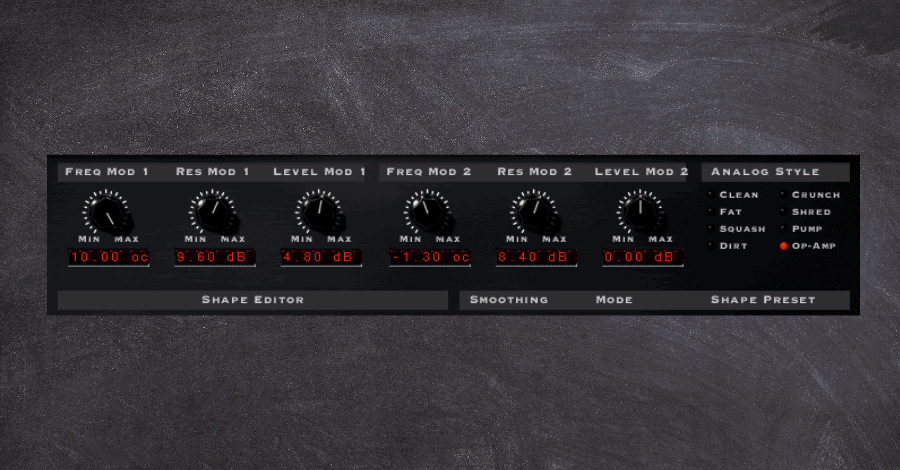
3. This plugin's modulation potential is unheard of and can help bring life and character to digital instruments by giving them the impression that they were made with expensive analog gear.
By setting the modulation trigger based on the input, each squelching bass note will trigger a different modulation amount (defined in the Tweak menu). This results in varying input drives, cut-off amounts, and other parameters slightly changing upon each hit, which gives a warm and random quality that is often only seen in hardware units.
Soundtoys Little Plate
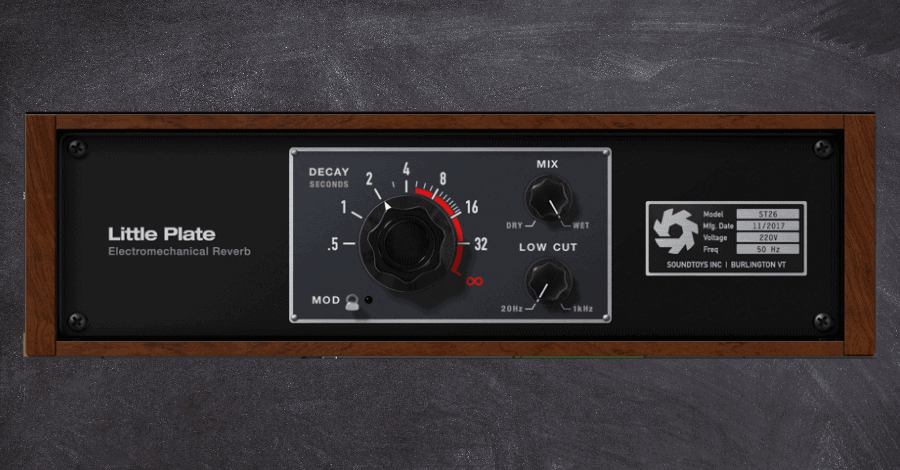
Reverb is vital to making your track feel authentic, intimate, and humanized. And Little Plate does this amazingly by being inspired by the original EMT 140 plate reverb that had a signature warmth and musicality.
What Makes Little Plate Unique
Reverb plugins are a dime a dozen, it seems, and every one of them has its pros and cons. What this plugin does well is it provides a unique and warm tone that simply sounds great. The downside is that the minimum decay parameter is still quite long, and it can be hard to dial in shorter reverb tails without a bit of further tweaking (but hey, that's what gates are for).
How I Use Little Plate
1. The Mod switch adds a bit of modulation to the tail and can be great to smooth out longer decays, especially on instruments that ring out in dynamic ways like guitars or vocals.
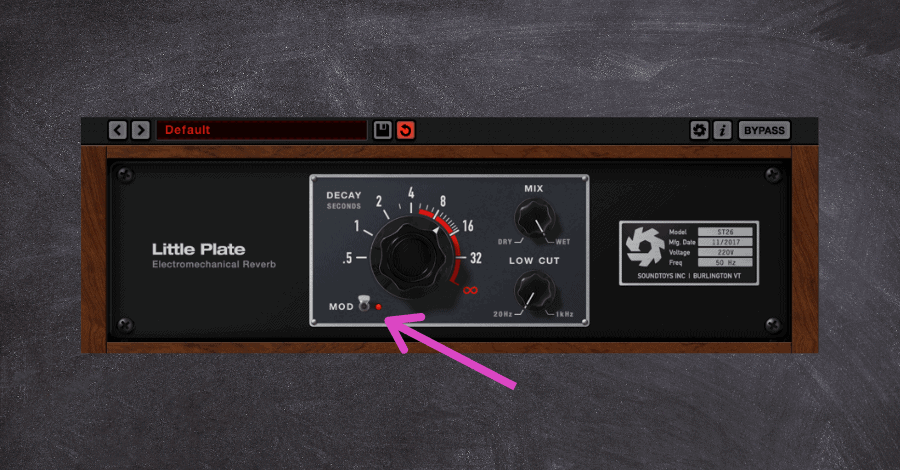
Listen how the reverb fills the space, but does not offer much else
Listen to the warbly character of the reverb now that the Mod switch is turned on
2. I know that it can be a faux pas at times, but I LOVE placing this reverb as an insert effect on individual percussion. Often, the texture and tone of the reverb contrast against my auxiliary reverb busses, which makes the single percussive layer stick out even more.
Below, you can see that I separated the backbeat hit from the rest of the groove in order to process it separately. Once separated, I applied a fair amount of the Little Plate to the snare to give it its own unique space resulting in a more pronounced hit.
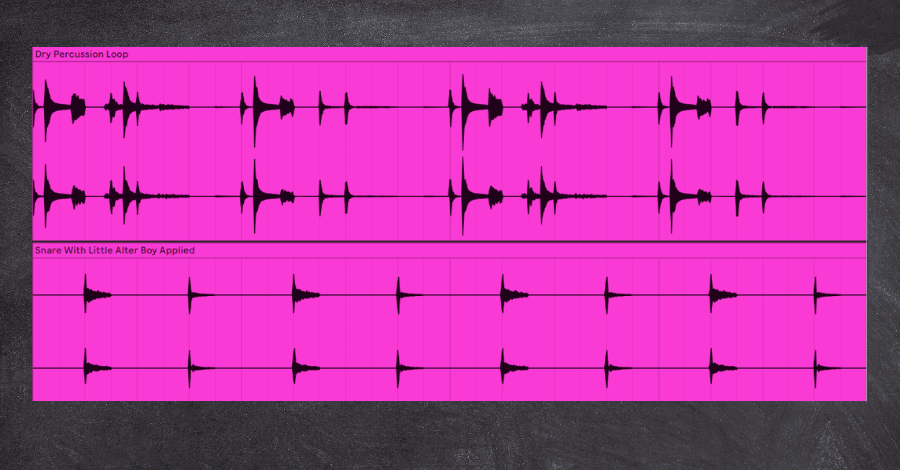
Listen to the unassuming drums and notice how they are sitting
Listen how a touch of plate reverb makes the backbeat pop a bit more
Soundtoys Decapitator
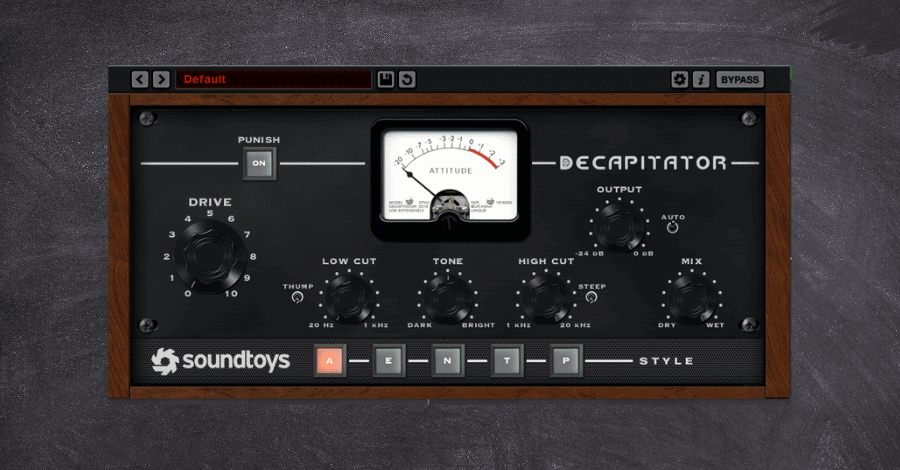
Saturation is an essential part of getting a clean and professional mixdown. It can take a sterile, digital source signal and inject warmth and bite associated with expensive hardware units. Some form of saturation is on almost EVERY channel of EVERY project that I do, but that is not to say that every saturation plugin is the same.
What Makes Decapitator Unique
Saturation introduces harmonic frequencies to the signal it affects, which rounds and shapes a sound in ways precise and algorithmic VSTs cannot do. This is a purposely broad definition, as it puts the onus on the plugin to dictate how it introduces its additional frequencies. As such, every saturation plugin is wildly different from its competitors.
Decapitator stands out from the crowd simply because it sounds damn great. It can be used in small amounts to add a slight amount of bite to a high hat or egregiously distort a lead guitar to achieve that iconic garage-punk tone.
Between the five different saturation models, contour shaping of the saturation, over-the-top distortion modes, and more, this saturation plugin easily deserves its spot on my shortlist of desert-island plugins.
How I Use Decapitator
1. Because saturation introduces new harmonics to a signal, it can be great for fuzzing the boundaries between different layers. While this can work on chord stacks or guitar busses, the most notable application is on the drum bus itself.
Because we program our drums using samples from various sources and styles, they can often feel out of place or incohesive unless we process the group as a whole. I usually dish on presets, but when it comes to Decapitator, they have some fantastic options that only take a few clicks to dial in properly.
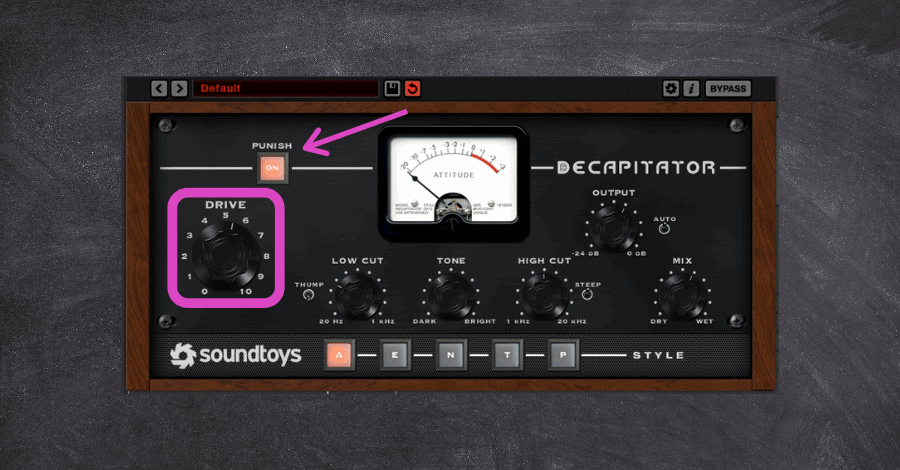
The favorite style here is the "T" model, an emulation of the Thermionic Culture Vulture unit. It adds even harmonics to the signal, which introduces pleasing, warm, and punchy tones, and is perfect for adding just that little extra attitude to your drum bus.
Pictured below is a great starting point to add glue and cohesion to the drum bus. But if you're feeling overwhelmed, the Drum Thickener 2 preset is an absolute gem and can be a perfect starting point to achieve a similar effect; the only thing left for YOU to dial in is the perfect amount of Drive.

Listen to the same percussions used before. Notice a lack of cohesion?
Listen how saturation adds a gloss over the drum group, bringing all the sounds together
2. I won't lie; I listen to a ton of less-than-professional music from producers emailing in. The biggest reason their lead melodies sound like it does is that it lacks the brightness, sizzle, and punch that really makes professional tracks pop out of the speakers.
Model "E" is the move when you want to add some analog warmth and presence to elements you want to grab your listener's attention. This style is based on an older model used commonly in the iconic Abbey Road's studio and adds both a beefier low end and a light top-end sheen to the signal.
These two frequency bands are essential to giving an element a more perceived presence in a mix, but a little can go a long way, so don't add this effect when the channel in solo.
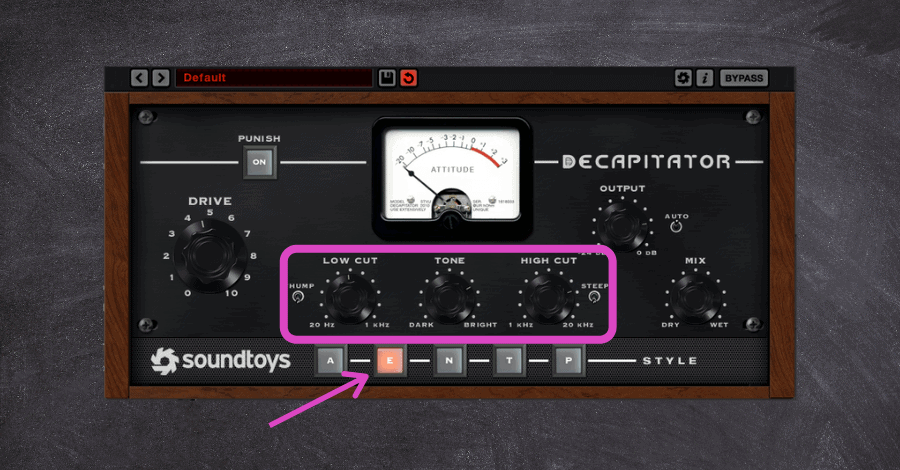
3. Softer and more subdued basslines can often lose their punch once more elements are added into the mix; low pads and vocals soon cloud the upper frequencies needed for the bass to cut through the mix and be audible on smaller speakers.
But Decapitator can add just enough sonic beef to help those tones cut through no matter what. Here is when I reach for the "A" model, which replicates the dustier mixing consoles popularized in the Motown era. This model packs some serious gain while retaining a high-fidelity in its saturation – just the thing you want for warm and juicy bass lines!
This is another instance where you should avoid the solo button. Driving these plugins hard can make the sound appear gross and displeasing in isolation but allows for good clarity when the sound listens in the entire mix context. This is especially true when you decide to use the Punish feature, which has the ability to crush a signal in a very pleasing way.
Soundtoys Echoboy
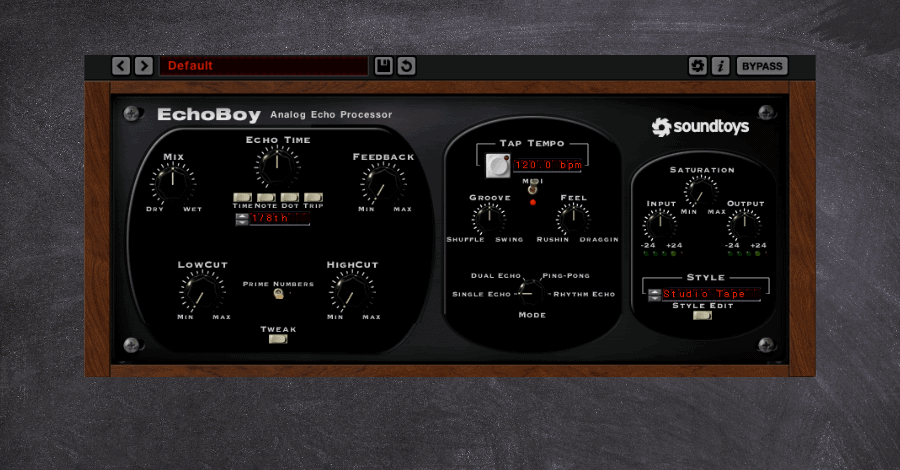
Simply put, Echoboy is the best delay plugin on the market today. It bundles decades of echo and delays technology into a tiny little device with loads of possibilities.
Modeled after some of the most prized hardware delay units over the past half-century, Echoboy is the Swiss Army knife of delays. With precise customization options, 30 different delay styles, and even groove adjustments through their groove and accent knobs, there truly is nothing you can't do with this plugin.
What Makes Echoboy Different
The defining aspect of the Echoboy is that it is made with the producer and musician in mind, not a technical audio engineer. This means the functions are easy to access and affect the sound much more musical way.
This is never more evident than in the step-pattern delay mode, allowing precise control over exactly when the delayed signal is played. This creates a rhythmic and accented movement unobtainable in almost any other plugin.
The Style menu also allows for fantastic customization options, including options to adjust the diffusion for reverb-like echoes, wobble amount for tape-like modulation, and even saturation amount for amp-style distortion of the delayed signal.
How I Use Echoboy
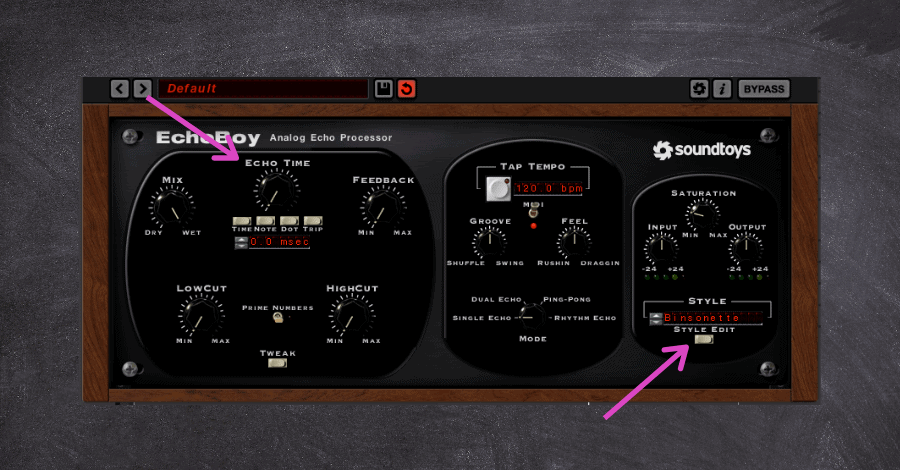
1. The 30 different modes offered in the Echoboy don't only need to be used for DELAYING the signal. We can be left with unique ways of coloring the sound by removing the delayed aspect of the signal and adding further analog warmth and character to our signal.
Simply bring Echoboy's delay time to 0ms, and cycle through the many different modes on the Echoboy. Each will color the sound in its own unique way, some quite subtle and others more drastically. Then pull back the Dry/Wet amount until you have something you like. Driving the input signal or the saturation amount can introduce added distortion to the effected signal at this stage as well.
2. The rhythm mode on Echoboy is excellent for creating soaring leads with precise and intricate delay timings. But this same feature can also be a great way to add even more groove to your percussion.
Add an instance of Echoboy to a very minimal drum track (with only a two or three-note sequence). Dial in your rhythmic delay so that the delayed signal is working with the rest of your drum channels in exciting ways. Add a slight groove to the delayed signal by further adjusting the Accent, Groove, and Feel parameters. This should turn your simple percussive pattern into something more rolling and rhythmic (duh). Now for the clever part...
Convert the delayed signal to audio by either resampling or just flattening the track. Then extract the groove (if you're in Ableton, that is) from the newly printed audio. This new groove template can be applied to the rest of your drums or even your leads to create a truly unique swing throughout your entire project.
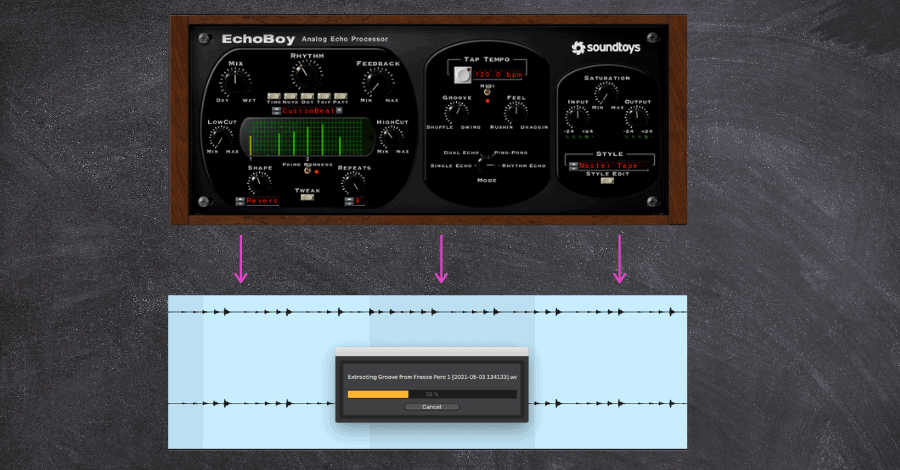
Notice how the Freeze function can be used for more than just saving CPU
Soundtoys Tremolator
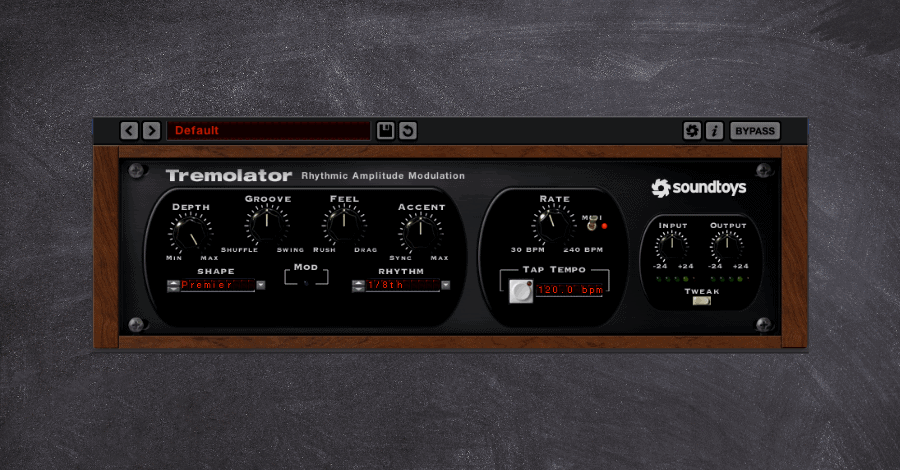
Tremolo has been a classic device on guitar-pedal boards for decades, but it seems as if it's only been recently that it's reared its head in the electronic dance music world. The warbly and almost gated effect that it brings to the table can be used for so much more than just rhythmic leads, and it's time more producers start taking full advantage of this powerful tool.
What Makes Tremolator Different
The Soundtoys team has an absolute obsession with modeling their plugins after the hardware unit's emulation. This obsession is evident in their LFO waveshape editor found in the Tweak panel, which they used to perfectly match the waveshapes created by some of the most popular hardware units.
But this plugin is so much more than just a tremolo. It actually is a highly customizable auto-gate unit that allows for stuttered and rhythmic gating. This feature becomes even more powerful by adding the Groove and Accent feature standard across many other Soundtoys plugins but applies here to the rhythm of the volume automation.
How I Use Tremolator
1. The most apparent use can frequently be the most effective, which is why I reach for this plugin for all those classic trance-like gated pads. Instead of adding ghost triggers and tediously mapping out the gate patterns, Tremolator allows quick and easy gated pads with more control over rhythmic, swing, and overall groove.
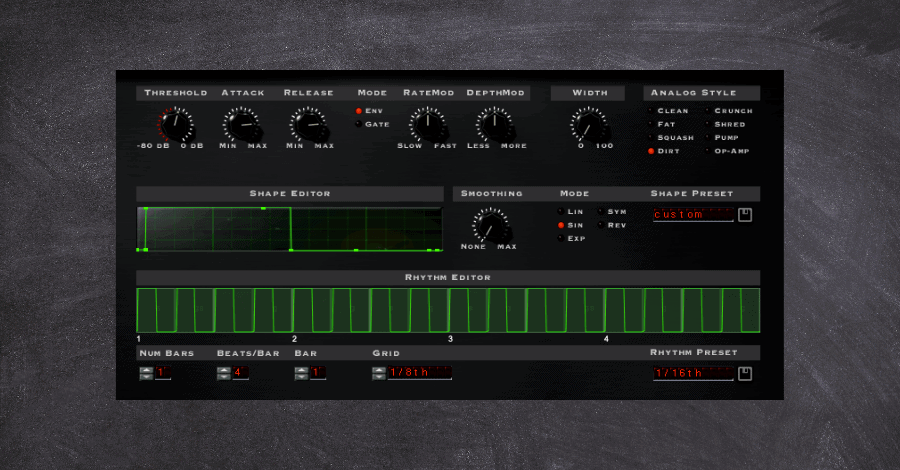
Listen to that same pad line we were using before
Listen how the gate adds a classic trance-like vibe to the sound
2. Because Tremolator allows for really long envelope times, it can be used to create exciting and unique movement in your spatial effects such as delay and reverb.
Long and cascading delays can quickly get out of hand, even when placed on auxiliary buses, but adding a semi-gated pattern can keep the delayed signal on the beat in a rhythmically pleasing way.
Adding a light touch of delay after this effect helps smooth out the volume automation and creates a silky-smooth texture.
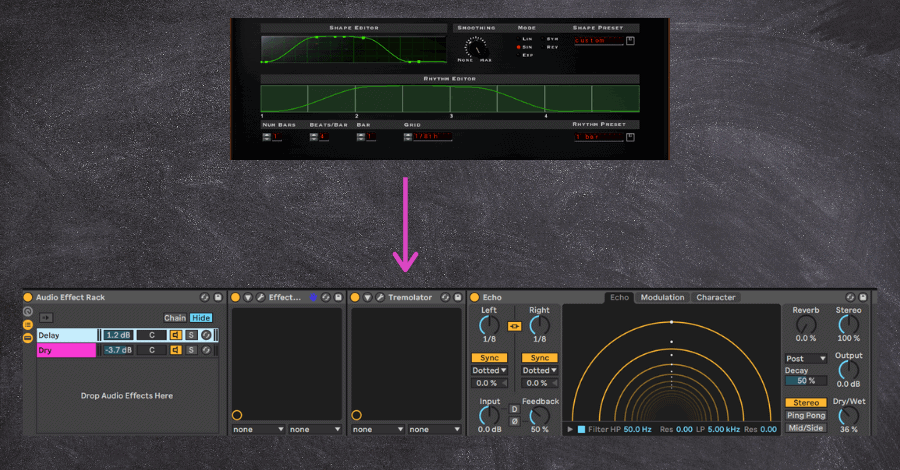
Listen to the above FX chain in action and note the static quality of the delay
Listen how the slow-moving automation adds a cosmic quality to the delay
Soundtoys Devil-Loc Delux
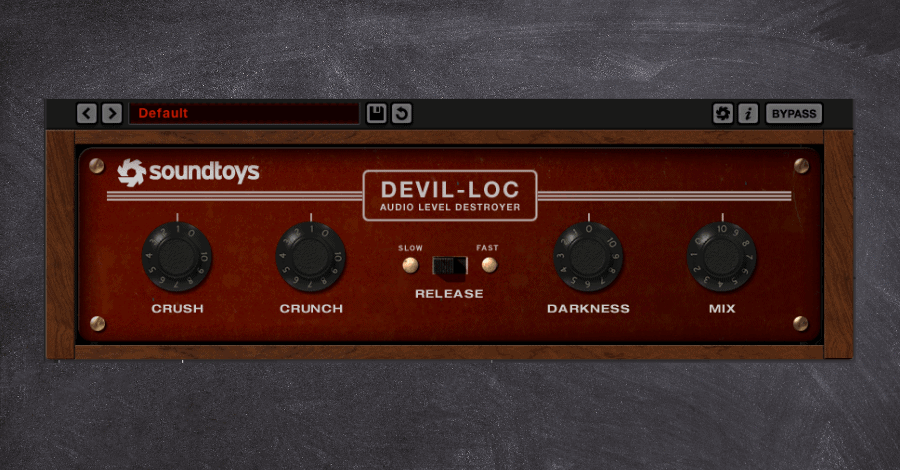
As with most of the Soundtoys plugins, the Devil-Loc Delux is modeled after an iconic hardware piece: the Shure Level-Loc, popularized in the 1960s. The hardware unit was a brick wall limiter that offered extreme compression and introduced a gritty sound quickly identified as the secret sauce for mix engineers and producers throughout that era.
This aggressive compressor is terrific at creative massive drum sounds and room mics by bringing up the noise floors to create truly larger-than-life tones. The limited amount of control features gives little room for error when dialing in the amounts of each knob.
What Makes The Devil-Loc Different
The simple user interface on this plugin belies just how much is going on under the hood. The most defining unsung feature is the dynamic attack and release of this compressor, which responds to the input volume than to static settings that most compressors have.
This can introduce massive fluctuations in how much of the already aggressive compression is being applied, which often leads to this unit's iconic pumping/sucking movement that it brings.
This compressor stands as arguably more of a creative tool for sound design and tonal shaping than for actually dynamics control, as the gritty timbre and overall attitude that this unit brings can completely change the vibe of any channel it's placed upon.
How I Use Devil-Loc
1. This compressor is seen on every drum bus in every track I make (that's what it is made for, after all). The aggressive texture and tonality that it brings, even in small amounts, can make drums positively pop out of the speakers.
I always advise students to never apply this compressor to a channel in solo mode. On its own, this effect may sound overly dirty and displeasing to the ear. But when listened to in the entire song's context, it indeed can be a defining link in your drum-processing chain.
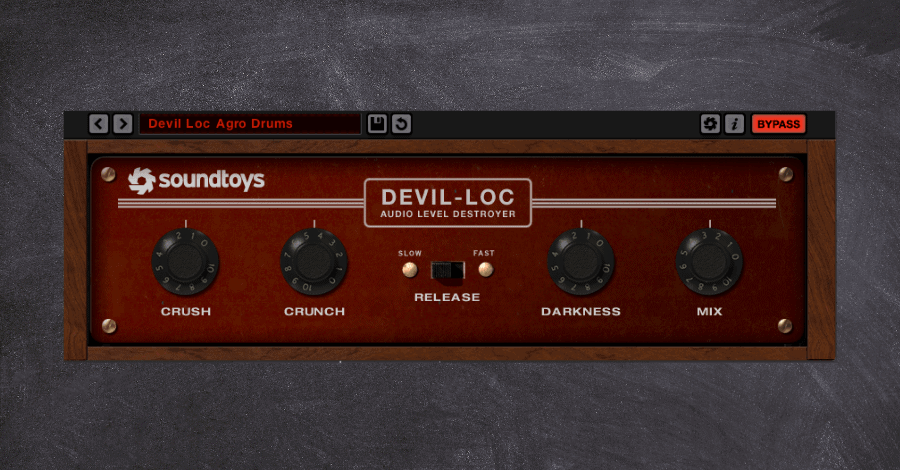
Listen to the compression applied over time in solo. It is easy to assume you're adding too much
Listen to the same compression applied in context and hear that it was just the right amount
2. While this compressor is designed for drums, that doesn't mean it can't be applied to other instruments. By leaning into its dynamic attack and release settings, applying this compressor to any fast-moving instrument that benefits from a bit of room noise can use light amounts of the Devil-Loc.
Immediate candidates in my mind are fast-moving woodwind instruments such as staccato strings and saxophones. The fluttering nature of these instruments can be further brought to life. Just watching your gain staging here, as the Devil-Loc can quickly add a ton of gain to the plugin's output.
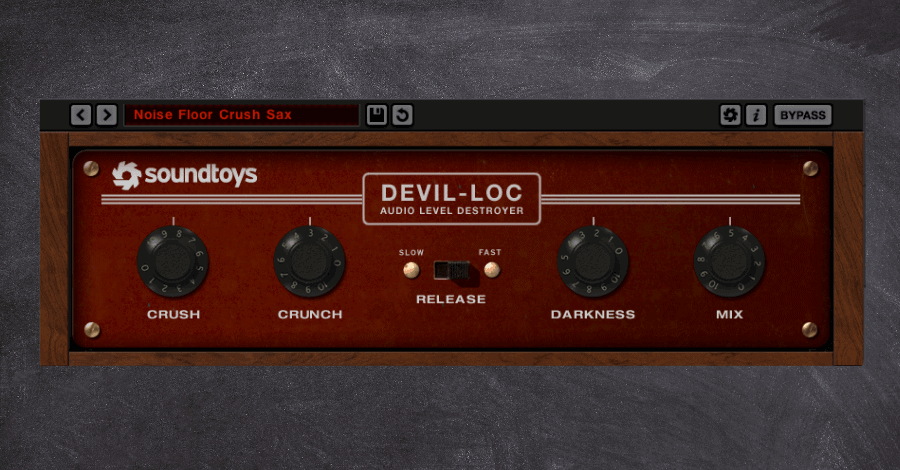
Listen to the softness of the sax as it competes against the drum break
Listen how the compressed reverb makes it feel massive, and how the reverb rings out at the end
Soundtoys Radiator
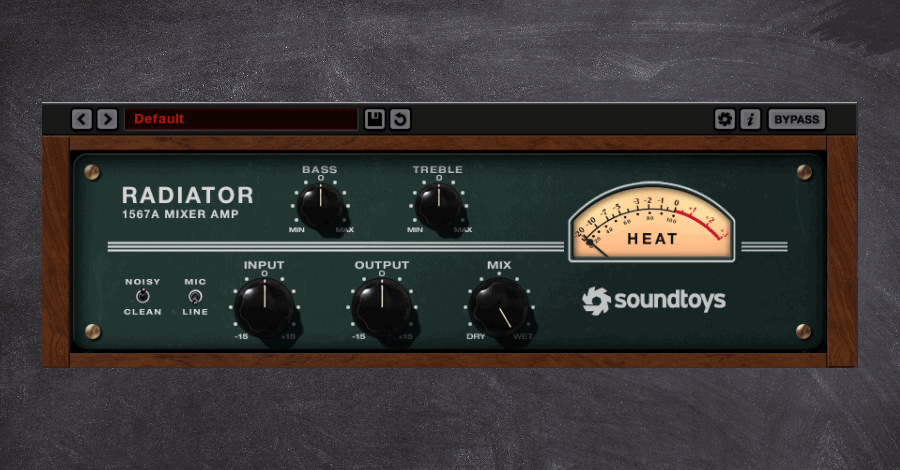
The Radiator is a classic dual-drive tube amp emulated after the traditional Altec 1567A tube mixer popularized in the '60s and throughout the Motown era.
The warm coloration introduced back then is considered almost gritty by today's standards but can be regarded as desirable when dialed in properly (this step is made easy through the two-knob EQ).
What Makes Radiator Different
The Radiator stands apart from the hundreds of other tube amp distortion units through its near-identical emulation to its hardware, which allows the different circuits to interact in dynamic ways, which introduces incredible functionality within only a few parameters. On top of that, the mix knob allows for better parallel processing than many other tube amps that lack this essential feature.
A lite version of the plugin, named Little Radiator, is also available and allows for this amp simulator's core functions.
How I Use Soundtoys Radiator
1. Because so many tube amp plugins don't have an option for Dry/Wet, many producers get in the habit of setting and forgetting their settings. But Radiator's parallel option allows for more dynamic warmth as your track evolves.
Automating the Dry/Wet knob to introduce more grit and warmth during the more energetic track sections can add impact and fullness to your productions' emotional climaxes. Set a low amount during your verses, a medium amount for your chorus/drop sections, and remove the effect entirely for your breakdowns. This creates contrast in textures between sections that can make elements come alive.
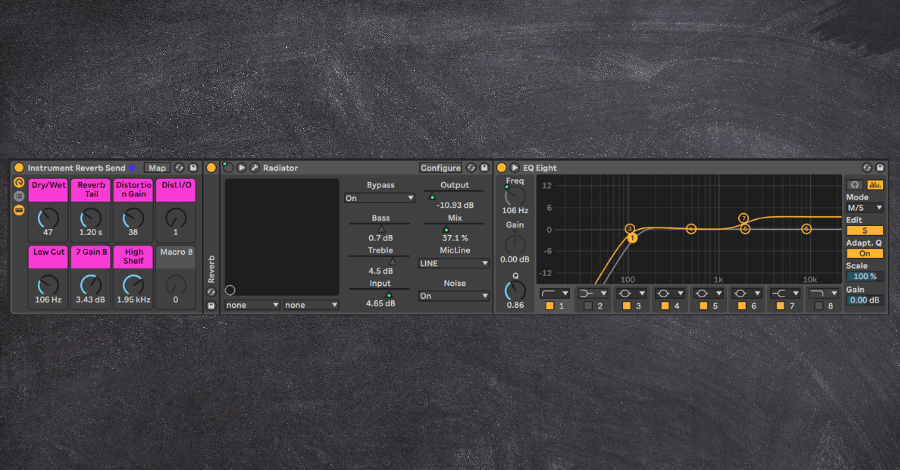
Notice how the macro knobs allow even send busses to change over the length of a song
2. The authentic tube distortion Radiator brings is a go-to tool for making anything seem less digital and can really shine when applied after spatial effects in a chain. Try adding just a light touch to your auxiliary delays and reverbs to achieve a warmed, dated space. Using the above technique in tandem with this can yield genuinely excellent results.
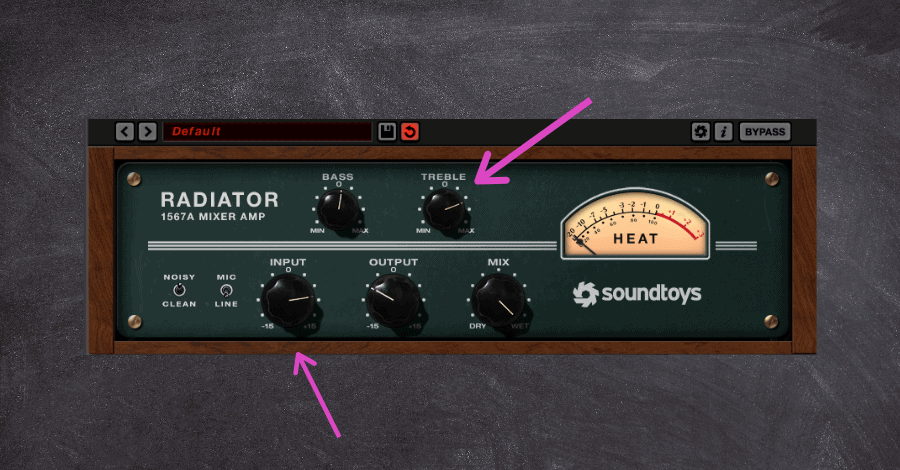
Notice how the Input Gain and Treble will both help introduce brighter, more energetic frequencies
Soundtoys Microshift
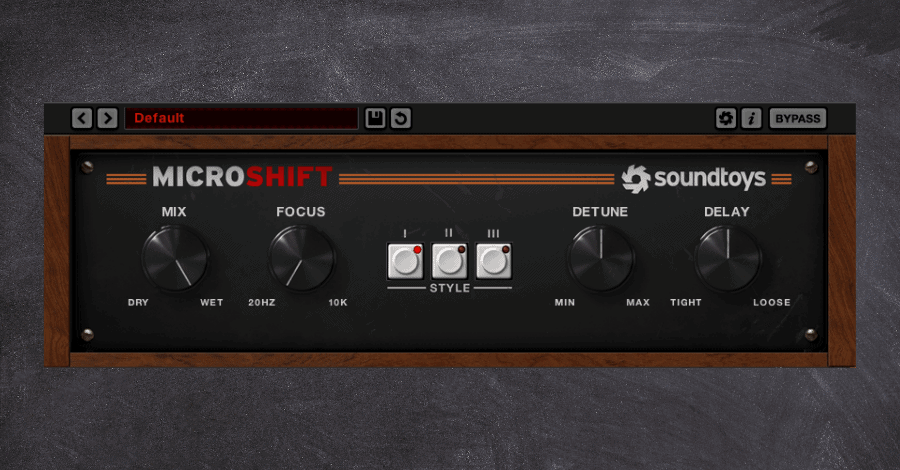
Soundtoys Microshift is a powerful pitch-shifting tool that introduces width and slight delays to its signal. Taking inspiration from hardware units such as the Eventide H3000 and the AMS DMX 15-80, layering in the Microshift is an effortless way to make things larger and, thus, more tangible.
We perceive width through the difference between the signals affecting the left and right channels, and Microshift offers this all in a deceptively simple UI. Saturation, pitching shifting, delay, and de-glitching are all on the table to achieve a thick and full sound.
What Makes Microshift Unique
Producing music at the highest level all comes down to the minute mix decisions that most people will never notice, and the Microshift is an essential tool for getting the most from even the smallest layer.
It won't single-handedly carry a track but nestled under lead synths, and harmony layers can bring a mix to life and draw your listeners in.
How I Use Microshift
1. There is no better instance to use the Microshift than mixing down a stack of vocals, complete with leads and harmonies and ad-libs. Dial-in different settings on the supporting elements of the vocal stack. Thus, your lead, which will be directly in the center of the stereo field, will feel even more enormous by comparison.
This effect can be heightened by applying different instances of Microshift, all with different settings, to separate channels in your vocal stack. The subtle modulation introduced by the plugin will create more width than just applying it to a single track.
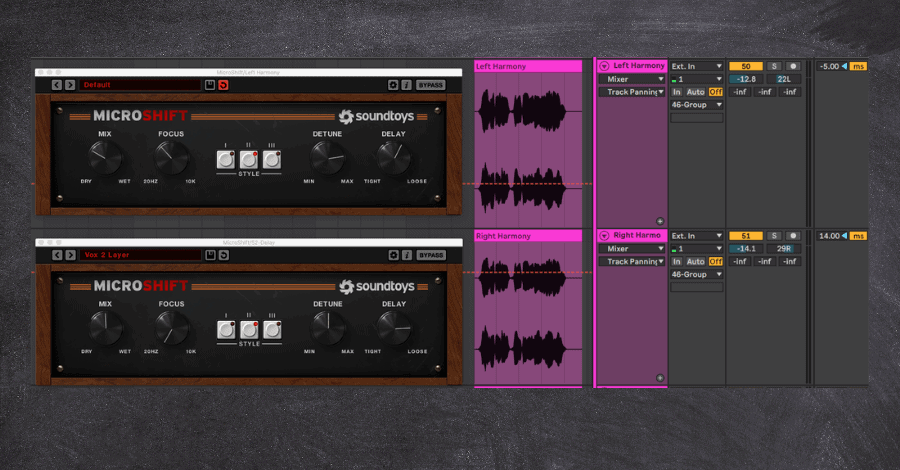
Listen to the vocal stack lacks depth and intimacy, despite the harmonies and delays
Listen how a few instances of Microshift brings the vocal performance to life
2. I am a massive fan of my hardware synths, but many only produce a monophonic signal. I often drop a Microshift directly onto my input channel to instantly widen up the raw signal from my hardware even before any other processing is added.
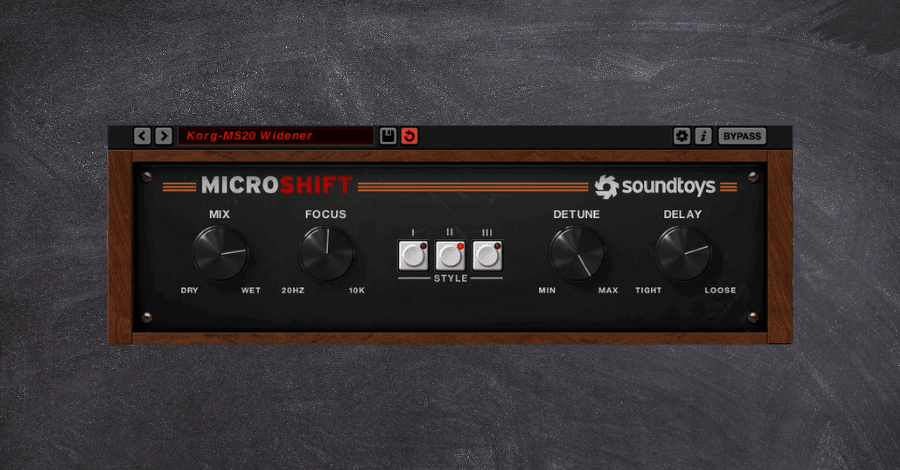
Listen to the monophonic recording of a hardware synth
Listen to the width and stereo treatment just a single Microshift can bring
Soundtoys PrimalTap
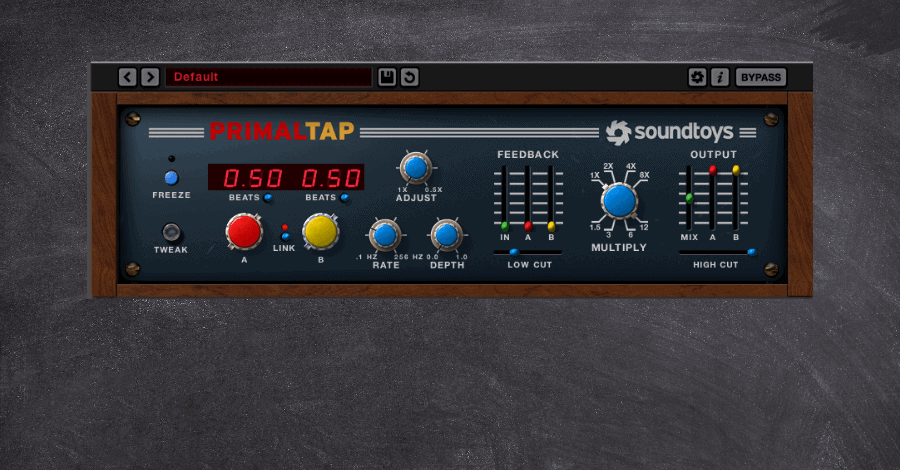
Soundtoys' PrimalTap plugin is both a powerful performance looper and an incredible delay unit. Modeled after the iconic Prime Time delay popularized in the 80s, it shines with its semi-digital and semi-analog sound.
The old-school vibe of the graphic user interface offers functionality rarely seen in other delay units and is where the majority of the true power of this plugin lies...
What Makes Primaltap Unique
Primal Tap's modulation features are unrivaled, deeming it both a delay unit and a performance tool. Its modulate feature affects the motion and variation of the modulated delay, creating anything from fluttery and pitched delays to washed out and flanged results. This feature is then coupled with the Multiply feature, which can turn clean and perfect echoes into warbly and unconventional delays.
But all of these incredible features are more to tee up the real magic of this plugin, found in its Freeze parameter. Freezing delays isn't completely unheard of; Ableton's delay has a similar feature. But Primal Tap's minimalistic GUI belies how much is going on under the hood. In truth, the Freeze captures large swaths of audio which can be mangled, cut, and adjusted further when you begin changing the Time, Modulate, and VCO Settings in real-time.
How I Use Primaltap
1. Try capturing the final hit or phrase of an instrument or vocal just before the breakdown comes in using the Freeze function. Then spontaneously adjust the Time and Modulate features on the tiny sliver of audio, resampling the wild and crazy results produced.
Do this a couple of times until you get some randomly good audio bits and further affect this delayed signal (with more delay, reverb, or bitcrusher sweeps). This will create an entirely unique transitional effect and help transition between sections fluidly and cohesively without relying on third-party FX samples.
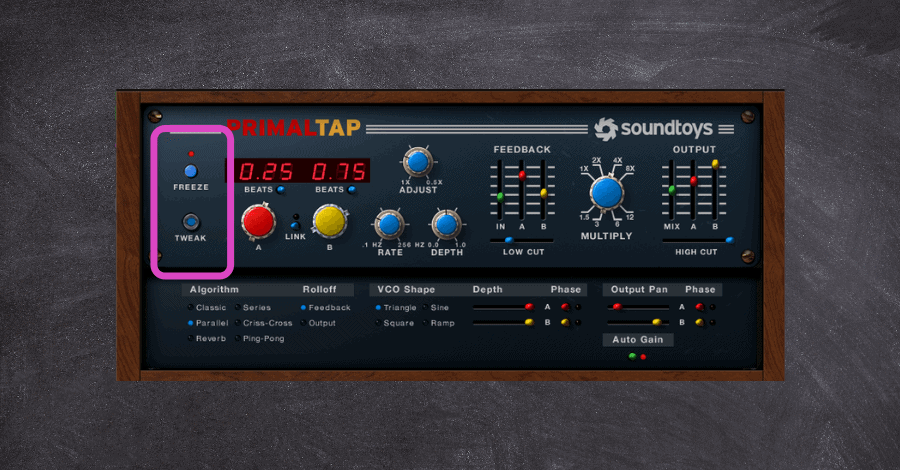
Notice how PrimalTap's greatest features are its two most unassuming ones
2. The less you can rely on stock sweeps and riser samples from packs, the better, and professional producers are constantly looking for ways to create similar FX using inherent elements to their project.
Create unique buildups in your own projects by Freezing elements and then affecting the Time parameter. This will create a rising pitch effect that will sound more natural than a random sample found on Splice.
Pro Tip: Take this trick one step further by adding a reverb after the delay signal and focus on the reverb's Size parameter. Adjusting this parameter in minimal amounts as the delay fades out will further add a pitching effect to the already rising/falling signal.
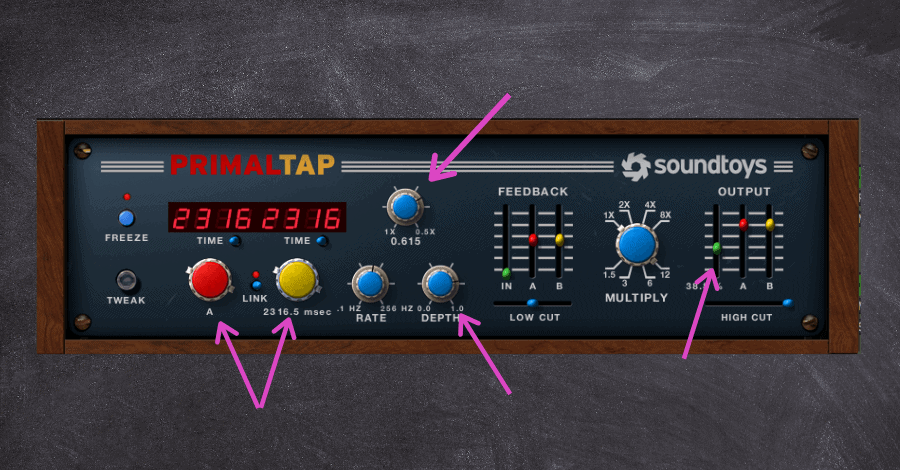
Listen how automating multiple parameters mangles the frozen signal
Soundtoys Phasemistress
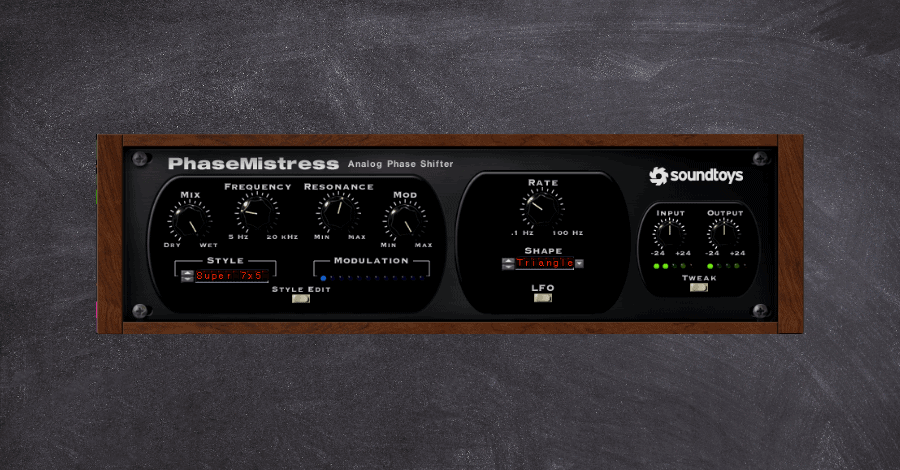
Phasers and flangers can be excellent tools to add life and movement to a sound, but adding even a microscopic amount more than you need will quickly lead to a result that sounds too, well, "phasey" or too "chorusy." This is because so many phasers sound cheap, sterile, robotic, and just plain wrong. But not the Phasemistress...
The Phasemistress recreates the silky, funky, and warm phasers associated with iconic groups like Queen and Pink Floyd. Its exacting emulation of the most famous hardware units makes this phaser an effective creative and mixing tool.
What Makes Phasemistress Unique
While this plugin doesn't necessarily have any defining feature that makes it completely different from its competitors, what it does, it does exceptionally well.
The washed-out and modulated signal simply sounds natural, which means it sounds great on almost any instrument or channel. And as is the case with most of Soundtoys' plugins, the Tweak menu adds a nearly infinite number of customization options to allow precise (or pleasantly random) modulation.
How I Use Phasemistress
1. Slow-moving, crisp modulation can be an excellent way to bring life and energy to high-end percussions like shakers and hats. Light amounts of phasing on these channels can keep even a generic hat loop interesting while also adding a bit of width and warmth to the signal.
Where stock phasers may be able to achieve a similar effect, the brittleness and sterility that more standard phasers offer just don't cut it. This is why the Phasemistress is my go-to phaser when I don't want the end result to sound blatant and obvious.
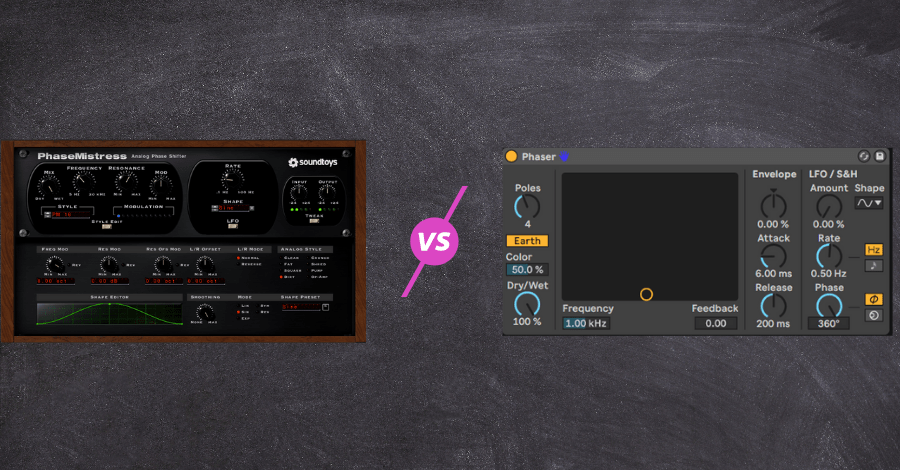
Listen to that old delay and notice the drastic different between modulators
2. Too few producers give enough attention to their auxiliary send channels, but professional producers treat them almost as if they were an instrument all their own.
Having long reverb tails slowly modulation can bring an incredible vibe to a send channel. A little bit goes a long way here, but you can add a crisp and warm liveliness that might just make your mixes stand out.
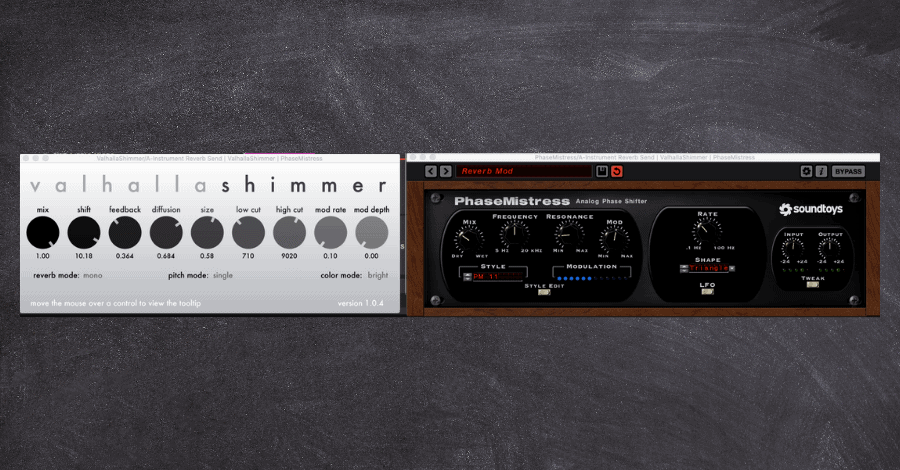
Listen to the subtle movement and character the Phasemistress brings to the reverb
3. Our previous blog posts mentioned using modulation to help avoid phase cancelation when you're laying synths together. The Phasemistress is a necessary plugin to achieve this end.
Check out layering strategy #14 of our article on layering music for a more in-depth look at this
Soundtoys PanMan
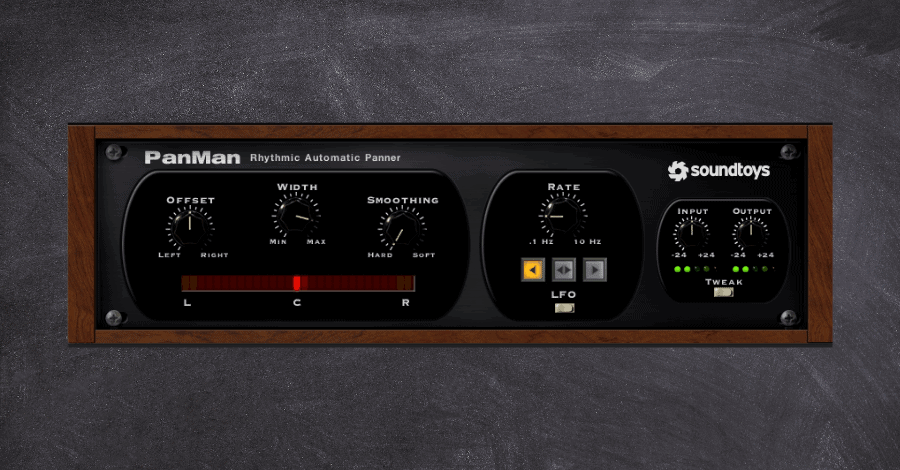
Auto panning is easily one of the most neglected production tools in a producer's arsenal. It brings life, movement, energy, and so much more to any signal it is applied to, and it always boggles me how few producers are using the full power of this simple effect.
PanMan is based on the classic auto panning units such as Spanner and the PanScan, and Soundtoys broke down many other popular auto panning units to see what makes them unique.
What Makes PanMan Unique
This plugin shines with its exacting modulation options that are unrivaled in any other auto-pan plugin. Being able to dial in the movement of the sound based on tempo, input triggers, unsynced LFOs, and others really allow the sound to almost take on a life of its own as it moves across the stereo field.
How I Use PanMan
1. It is easier for listeners to perceive a mix as wide when they have benchmarks to compare it against. This is to say, it's easier for elements to appear front and center when there are softer elements placed on the furthest reaches of the left and right channels.
Panman is a brilliant tool to help establish these forms of boundaries. You can set the maximal amount of width to make a good move across the entire stereo field, making mono elements like a lead synth or bass line appear that much more focused by comparison.
Try this trick on lighter percussions, delicate arpeggiators, brittle guitars, and more. Just make sure to have this effect move slowly, as rapid movement detracts attention from your lead elements.
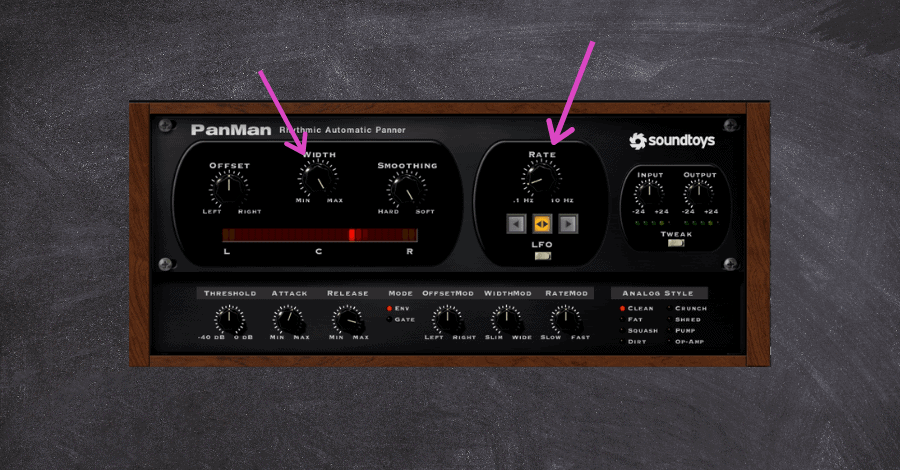
Listen how wide the mix sounds when the pad is put in mono and the arp moves side to side (headphones required)
Soundtoys Crystallizer
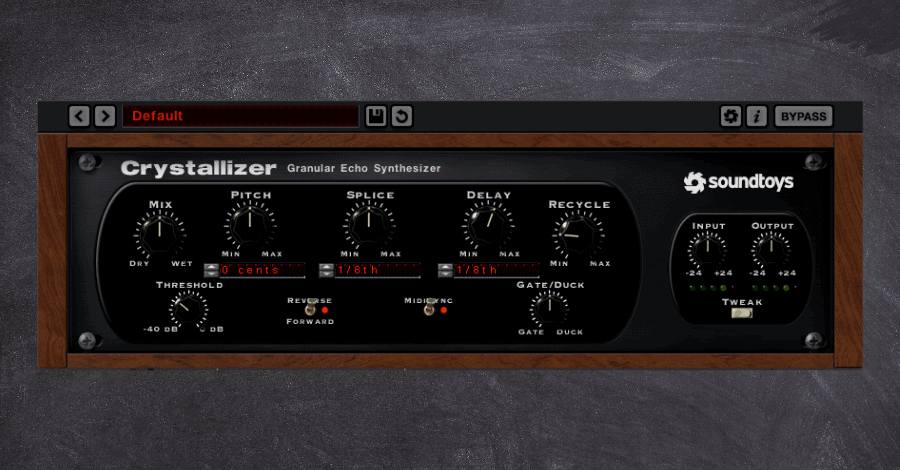
Many delay plugins can be more than just an echoing effect, and Crystliizer took this notion and ran with it. Billed as a "pitch-shifting granular reverse echo" (what a mouthful that was), it is as much an instrument in and of itself as it is a delay unit.
I could spend a thousand words sharing how it's similar to other delays, but it would be easier to talk about it is different.
What Makes Crystallizer Unique
Crystallizer combines all of the wildest, noise-altering effects and puts them into one fairly intensive interface.
It can produce glitchy-stutter effects, reversed echos, affect shimmering soundscapes, and brings a ton of creative looping potential to the table.
Simply put, this plugin is an inspiration machine and can turn any sound you like into something completely different that you absolutely love. Sure, it's damn hard to wrap your head around its complexities, but the 200+ presets should be more than enough to get you started.
How I Use Crystallizer
1. The idea of "less is more" is hard to nail down in music, yet it remains the gold standard. But the zany effects of the Crystallizer legitimately allow you to turn a single sequence or motif into something alive with intricacies and nuances. By simply scrolling through presets while playing your melody, you can begin to see how the ambiance and space take on a whole new life of their own.
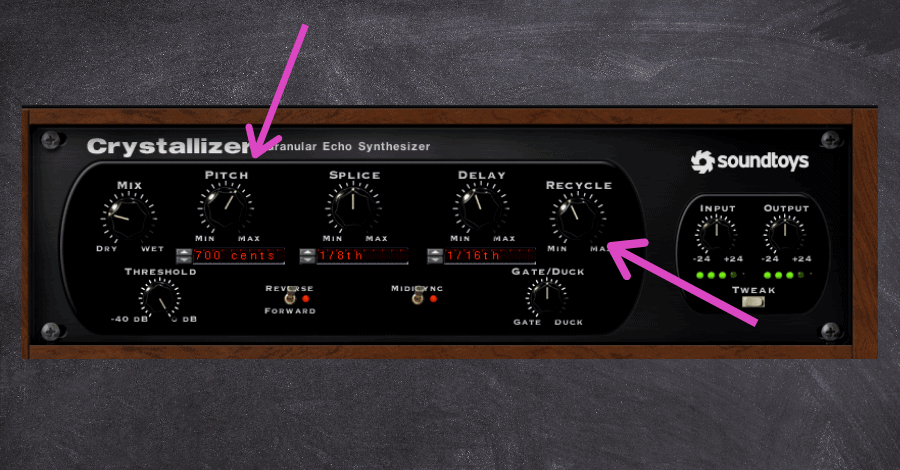
Listen how a basic guitar line turns into something captivating when ran through the Crystallizer
WTF Do These Mean?!
Because this plugin is so wildly different from anything else on the market, I was apprehensive about digging deep into all of its interface's foreign bells and whistles.
But only when I did, did I realize the creative power I had been missing out on. So here's a breakdown of some of the significant parameters within the plugin that you initially might scratch your head at:
- Pitch. Adjusts the pitch of the effected signal, with every 100 cents equalling one semitone. Slight adjustments might make for analog-Esque irregularities, while drastic settings (like +750) will cause entire chords to echo out from a monophonic signal. This trick was used in the audio example above.
- Splice. This parameter determines the length of the grains being played/captured at the onset of the playback and is where the granular synthesis aspect comes in. Shorter delay times (<30ms) will result in more classic slap-back delays, while longer (>300ms) may result in large swaths of audio being captured, looped, and further glitched.
- Recycle. This feedback the captured audio back through the effect, enabling you to send the audio back through the impact at different amounts. Weird? Yeah. The result? Often produces strange and otherworldly spiraling effects.
- Smoothing (hidden in the tweak menu). This parameter creates a crossfade between the delayed signals and does exactly as it says; it smooths out the signal. Reducing the rigid jumps in pitch and transitions between splices can greatly massage more wild effects into the mix.
Soundtoys Little Alterboy
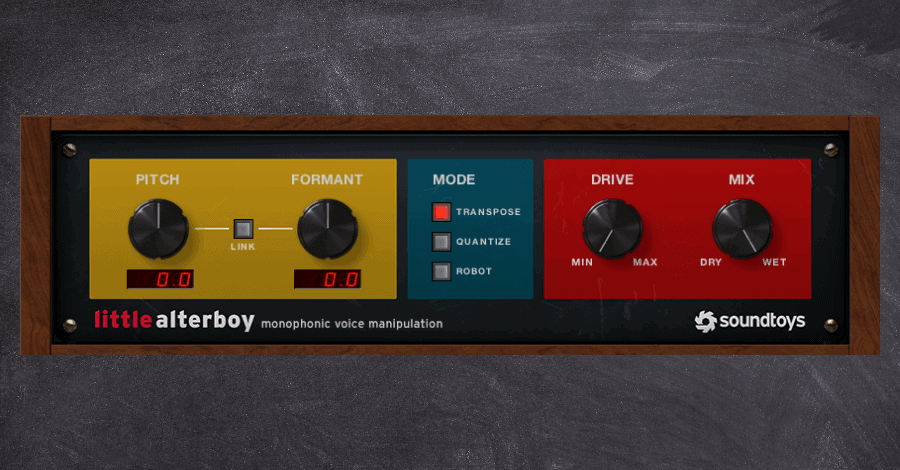
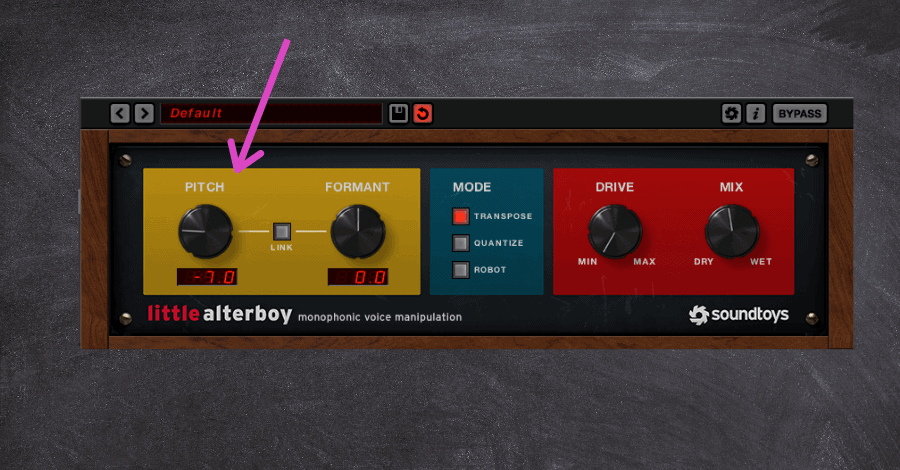
Affected vocals have become a staple in many genres of modern dance music. Little Alterboy is SoundToys’ answer to this current need for mangled, warped, and formant-heavy vocals.
Its straightforward UI allows little room for error, and the ability to sync the plugin up with your MIDI keyboard is a game-changer.
Oh...AND it has Decaptiator's lovely drive function to add a bit more texture and warmth to your already perfect vocal recording.
What Makes Little Alter Boy Unique
This plugin stands out through its myriad uses right out of the box and with only a few adjustments on the plugin.
As mentioned above, the ability to sync up to your MIDI keyboard is what makes this plugin a no-brainer. Sure, Celemony's Melodyne offers more precise pitch adjustments, but it also takes years to learn such complex tools as those. Little Alter Boy is essentially a punch-and-play plugin, which is why it's my favorite.
How I Use Little Alter Boy
1. I worked a lot with vocal samples pulled from Splice, which means I often don't have access to multiple takes, ad-libs, and, most importantly, harmonies.
But layering in Little Alter Boy underneath the dry vocal sample creates instant harmonies from the dry signal. This helps add more interest to a singular element, allowing me to get "less for more" in the arrangement.
Listen how introducing harmonies makes the vocal sample appear complex and nuanced
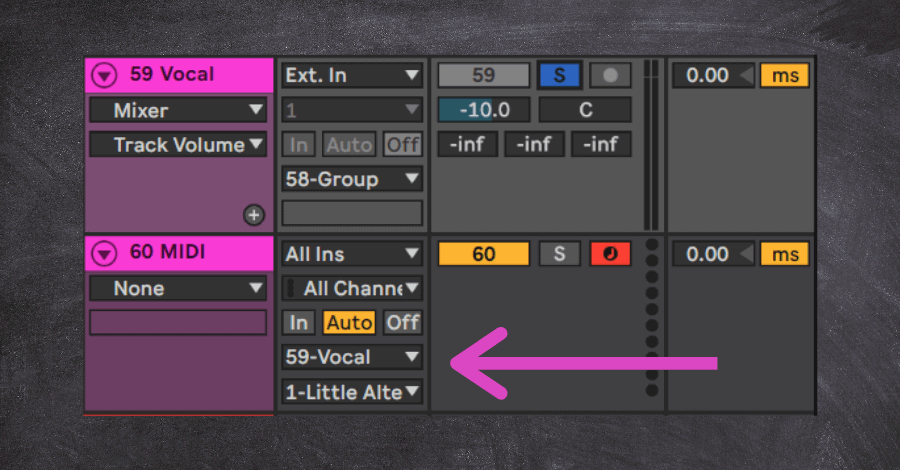
How To Sync Little Alterboy With Your MIDI Keyboard
- Add Little Alter Boy to the audio channel you wish to effect
- Create a blank MIDI channel. I usually like to place this MIDI channel directly under the audio channel it’s affecting, just to stay organized.
- Route the MIDI’s output to the audio channel containing LIttle Alter Boy
- Have the secondary routing directing to MIDI to the Little Alterboy Plugin
- Arm the blank MIDI channel, hit play, and see how the pitch shifts as you play your keyboard!
When Do Soundtoys Plugins Go On Sale?
Soundtoys plugins are notorious for very rarely going on sale, and for a good reason. They're already the most popular plugin bundles in the game!
Occasionally, they run great black Friday sales or offer discounted versions of singular plugins (like $29 for the Little Plate plugin). This is a great way to pick up a few of their better options, but rest assured, it's been YEARS since I've seen Decapitator or Echoboy host a discount.
The best way to get these plugins is through enrolling in some form of education to use the educational discount (a whopping 50% off in most cases). All students of the Hyperbits Masterclass can take advantage of this fantastic discount when they enroll in the course.
Final Thoughts on Soundtoys plugins
Soundtoys plugins are an essential piece of any producer's arsenal for myriad reasons. They are incredibly powerful, relatively inexpensive, and can almost single-handedly tackle mix issues no matter your skill level. There are a few competitors at this price point, but Soundtoys plugins are an absolute necessity.
Making professional music is damn hard, and processing sounds and audio is one of the trickiest parts of the entire process (even when you have tools that are as powerful as these). If you are wanting to start producing music that is as good, if not better, than the artists you look up to, the Hyperbits Masterclass is the perfect solution. Enroll instantly, and start leveling up your music today.
These Might Also Interest You:
8 Creative Ways to Use Sample Packs & Soundbanks


