

The Ultimate Guide to the Loudness War
"The debilitating loudness war has finally been won."
— Bob Katz (Grammy winning mastering engineer)
The loudness war is a very misunderstood beast.
All of us have had that moment – you know exactly what I’m talking about. Sitting in our studios, referencing a track we’ve slaved for hours and hours over, only to find that it doesn’t quite stack up to the professional tracks in your library. You think, “man, this is pretty well balanced and the mix sounds pretty tight - but for some reason, my track is WAY quieter than the reference.”
It turns out that loudness is NOT as big of a deal as we originally thought. In this post, we are going to dig deep into the common misunderstandings and misgivings about the loudness war that has permeated the internet's forums, blogs and Youtube comments over the past decade.
By the end of this article, you will gain a much greater sense of how loudness is measured, as well as how we can reference properly, generate a healthy amount of loudness and not get overly frustrated in the process.

The Death of the Loudness War

The loudness war is basically over. Loudness has finally been defeated.
Sure, people are still making very loud tracks - and it’s still a very valid goal for many producers out there to mix and master their music as loud as possible. Truth is, I do tons of mixing and mastering work every week, and to date, getting solicitations to make a mix as loud as possible is still, hands down, THE most popular request I get. However, with the boom of streaming services like YouTube, Spotify and Apple Music, for the average listener using streaming services, loudness simply doesn’t affect them anymore.
So, why is the loudness war over?
Well, all the streaming platforms have individually decided to match the loudness of the music on their platform to one singular loudness level. So, whether you make super loud dubstep or very light orchestral music, the average loudness for all listeners on a given platform will be exactly the same.
The platforms in question have adopted using a target playback level with LUFS (Loudness Unit Full Scale). More on LUFS later, but basically here is the level your music will now be streaming at based on the platform you use…
So, if you make a track that is -6 LUFS, Spotify is going to lower the gain of that track until it’s 8 LUFS quieter and streams at -14 LUFS. This essentially eliminates the need to master your music at extreme levels of loudness. At the end of the day, it all gets turned down anyway.
The pros of this?
Well, we can now have more dynamics in our music - which translates to added emotion and an enhanced musical journey for the listener.
In fact, music that has a greater dynamic range and a lower LUFS value can actually now sound louder when streamed through one of these services, as opposed to a track that’s been over-limited with a small dynamic range. Here’s an image to help wrap your head around this concept…
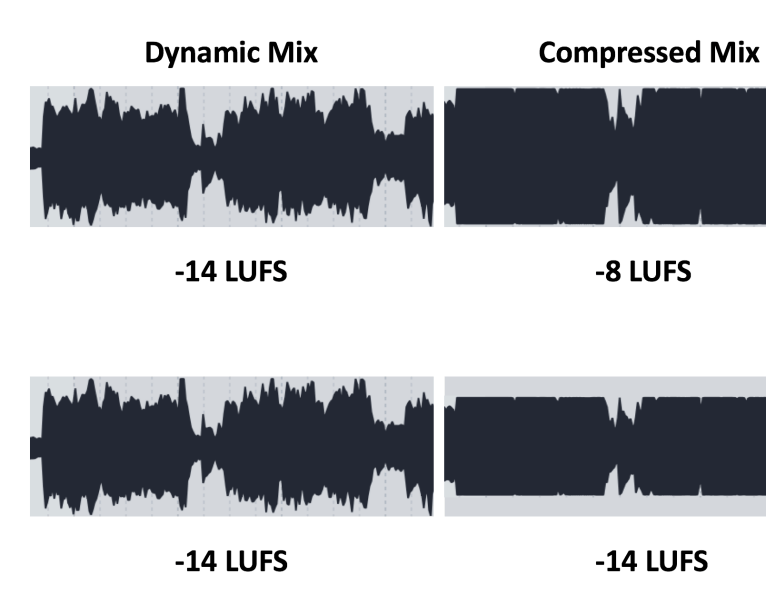
Pretty crazy, right? The world of music production is changing fast - and we stand by the fact that this is a very positive shift for engineers, producers and artists alike.
Understanding loudness (LUFS vs. RMS)
So first off, what the hell are LUFS?
If you haven't heard of RMS or Root Mean Square, it is basically a measurement in dBs of the average loudness or volume of a song. That said, with the advanced metering technology of today, LUFS has evolved as a more accurate measurement of average loudness.
The main difference between the two is actually really simple: RMS measures the total signal, and it takes in all frequencies. LUFS, however, takes out all outlier signals (both frequency outliers and peak dB outliers). This means that LUFS meters are ignoring the moments or instances in a track that has extremely short increases in volume (like an intense drum transient) or extremely loud sub information.
And what does that mean for us? LUFS is a much more accurate measurement of perceived volume because our metering tools aren't getting distracted by outliers. This becomes really important in referencing and matching your mix and master to a reference track.
Proper Loudness Referencing
So, how does this help us with referencing? Which by the way, referencing is one of our all time favorite topics in The Hyperbits Masterclass.
Before LUFS, when you brought in a reference track to your DAW you had to master your song and compare to the mastered reference track. This is fine for the final mastering stage, but can be difficult to use for when you’re referencing your pre-master mix.
Because a mix is much quieter and more dynamic than a mastered waveform, it’s often hard to determine mix problems that are preventing your track from sounding like your reference. Obviously, the best way to fix this issue is to lower the volume of the mastered reference files to be more in line with your mix. Well guess what? LUFS is a tool that can accurately tell you how much you need to lower your reference tracks by.
Unlike RMS or your ears, LUFS will accurately take into account the perceived level of the audio making gain matching simple and achievable. If we were to do this with just RMS, the meter can get tricked by those outliers we spoke about earlier.
In order to do this, simply measure the LUFS value your track is hitting in a drop, verse or break section, and then measure the LUFS of the reference. Next, lower the reference to match in LUFS value – it should now be much easier to hear where your mix and the reference track are truly different in both frequency and dynamics.
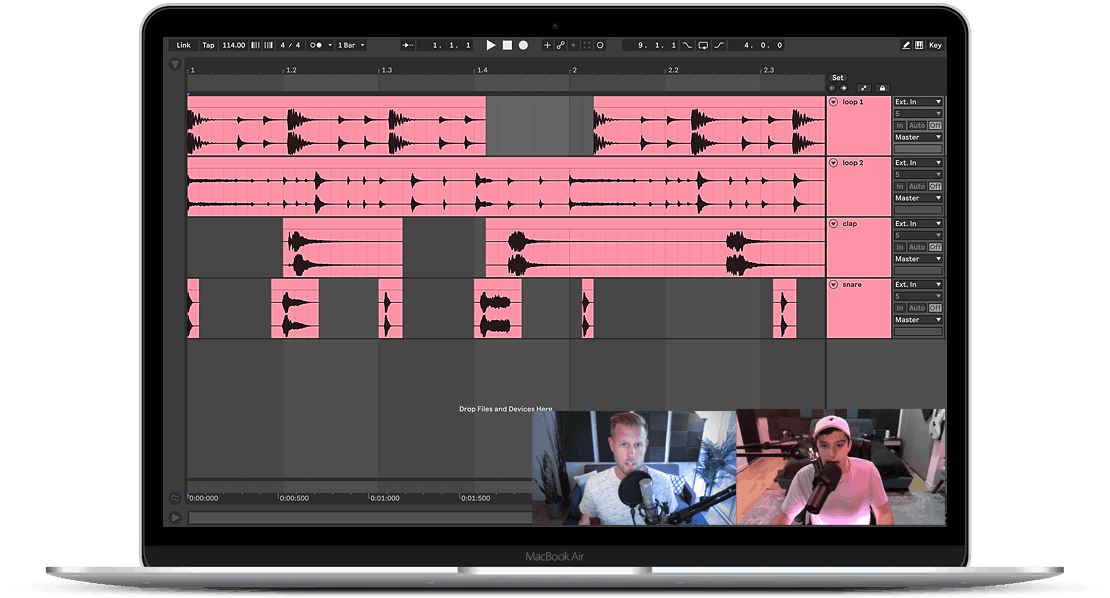
Here's an example below using Logic's built in Loudness Meter...
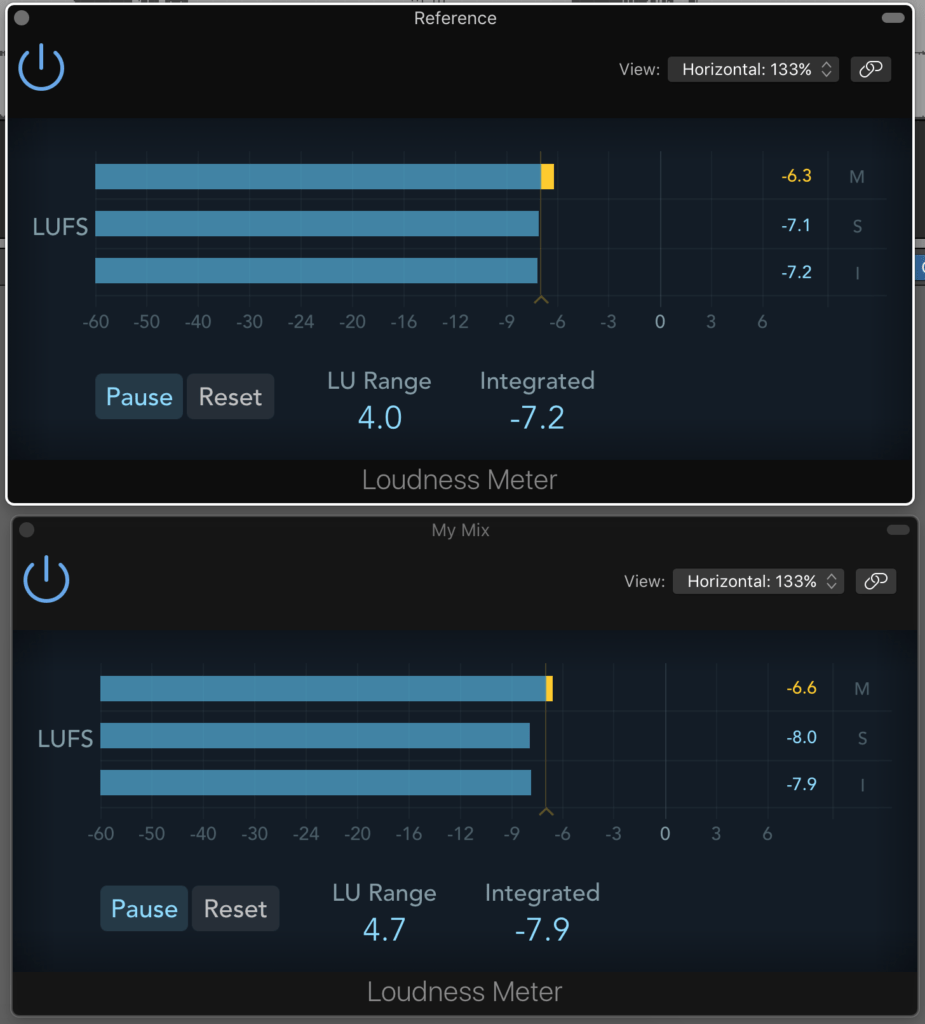
Taking this even further, we can also check what our songs are going to sound like when streaming through services like Spotify or Apple Music, because we can anticipate the final result.
This is amazing stuff — we can then theoretically make mixing and mastering decisions knowing the final playback level our track. You also will get less intimidated when you reference a really loud song, and instead, can focus on the clarity and fullness of our mix.
Referencing can be so much more than just when it comes to loudness too! Check out our 10 Ways to Steal Like an Artist post.
Don’t Obsess Over Loudness

All this talk about loudness, and I almost forgot the most important point – do NOT get super stressed out by loudness.
This can easily become an obsession and start to hinder your production because you, as the producer, are focused more on generating appropriate loudness levels than doing the things that really matter – like composing a beautiful melody, creating smooth transitions, or programming a memorable drum groove.
With the rise in popularity of streaming services, loudness just simply shouldn’t be a large focus of your production.
And look, I get it. I’m not immune to the loudness war. Hell, I’ve written tons of music where I almost mentally despised a track, simply because I couldn’t get the final result to be as loud as my reference. This sort of mentality has got to go.
Every song is different and sometimes, you have just happened to choose sounds that weren’t capable of being as loud or as clear as a louder reference. To deal with this, simply use multiple reference tracks. Think of your multiple reference tracks as more of a sliding scale – shoot to have your mix & master somewhere in between your references, rather than just obsessing over one individual song. Oftentimes, the songs that we love are dramatically different from one another in terms of loudness and clarity.
But How Loud Should We Be?
With all this being said, there still is a respectable level of loudness your productions need to be, but the tools needed to achieve this are free or cheap or easily accessible, and something that doesn’t need to a burden in your music production.
Now the first caveat here is something I touched upon above: production and sound choice are crucial in obtaining the end result you are looking for.
Let’s pretend for a minute that your drop has big saw chords as a main element, but you’re referencing to a track with just a bassline and drums in the drop. It might literally be impossible to get your track as loud as the reference, even with the proper knowledge and tools at your fingertips.
You can always get somewhere close, but I highly recommend not getting hyper focused on matching tracks to one another unless they are almost identical in sound design and style.
So basically, all I’m saying is, don’t freak out. Get your tracks to a reasonable level of loudness (-10 to -7 LUFS). Even though streaming services cut off even quitter than this, we still want our productions to be relatively loud for when they aren’t on services that match LUFS levels (Soundcloud, downloads, etc.). Between -7 and -10 LUFS is where most commercial electronic music sits.
Now this would most likely be at the drop or chorus of your track. As long as this part is clear and relatively loud, you can experiment with lowering other sections of your track in volume to bring back dynamic variations across the whole track.
Encoding
It’s also important to remember that encoding and converting your file to an MP3 will also add some gain and potential clipping to your song. This is why so many people have different opinions on what is the best ceiling value to set your limiter. Many engineers suggest setting your ceiling at -1dB, which will allow the encoding to do its thing without clipping. Worth noting: this does sacrifice some potential volume (for the sake of retaining the cleanest signal possible).
Personally, I set my ceiling anywhere from -.6 to -.2 dB. This means there is a chance that when converted to an MP3 there might be some minimal clipping, but the amount is usually not enough for me to hear anything that I would deem as an ugly artifact or even digital distortion.
Tips When Mixing for Loudness
Let’s talk about what we can do to increase loudness in subtle ways to make sure we hit the modest LUFS values we spoke about above. At this stage, we should be comfortable with referencing and understanding the limitations of our track. We should also know that we might need several reference tracks to get our production sitting where it belongs.
Here is a list of the 4 best ways to increase the LUFS value of your track without introducing unpleasant distortion or the destruction of dynamics…
- Saturation throughout the production process
- Bus compression in layers
- Oxford Inflator
- Chaining Limiters
Saturation Throughout
One of the easiest ways to get your track to sound not only louder, but fuller too, is to saturate your sounds. I’ve done loads of tutorials and blog posts on saturation, watch a 47-minute live workshop I hosted about saturation or check out 20 of my favorite saturation plugins.
In layman’s terms, saturation adds harmonic content to any sound you place it on. It essentially makes a sound richer and perceptually louder. By doing this throughout the mixing process in a subtle fashion (and maybe even in the mastering process too), we can get a much louder track without the need for over-limiting or over-compressing.
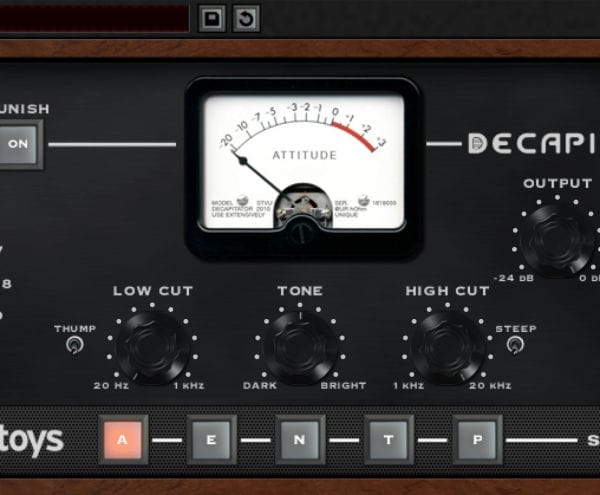
My favorite saturation plugins for these techniques are the SoundToys Decapitator, the Fielding DSP Reviver and the built-in Ableton Saturator.
Bus Compression
Bus compression can be a powerful tool in making your mix feel more glued together. It makes all the different elements in your mix get slightly reigned in dynamically so they sit in a more “glued” or similar place in the mix (i.e. not having one sound be significantly louder than another).
One method you can use to increase the perceived volume of your track is to chain together 2-3 different bus compressors in the mastering chain. Now the key, here, is to be subtle. Shoot for only 1 to 2 dBs of gain reduction on your compressors. The trick is to really is about having as little compression going on as possible but to still get a less dynamic final result. Try starting your attack setting at approximately 30ms and your release setting at approximately 50ms. A ratio of 2:1 or maybe as high as 4:1 should be fine as long we are achieving 1 to 2 dBs of gain reduction based on the threshold.
Obviously, compressors vary by settings and style, but if you chain a couple of your favorite compressors together with similar settings to those above you can achieve a nice increase in perceived loudness in your master. My favorite compressors to use are the Waves SSL Comp, Fab Filter’s Pro-C2, the built-in Logic compressors, and the Plugin Alliance Vertigo VSC-2.
Pro Tip
Try using the sidechain feature of your compressors if possible. Sidechain is more than the pumping dance music effect we all know and love. Try using sidechain as a method to filter out of parts of the original signal, making the compressor react differently. The built in Logic compressor is really good at this. The idea here is to filter out the low-end signal with a high pass filter so that the compressor only reacts to the upper frequencies. The whole signal will still be compressed, but it will be much less dramatic, only reacting to the mid and upper frequencies (instead of the loud sub information). Check the image below…
Oxford Inflator
A secret weapon many producers are using is the Oxford Inflator. I won’t get into details about what it is (read the manual if you’re interested), but it basically increases the perceived volume of a sound without using saturation, compression, EQ, or limiting. Basically, some crazy coding voodoo magic :)
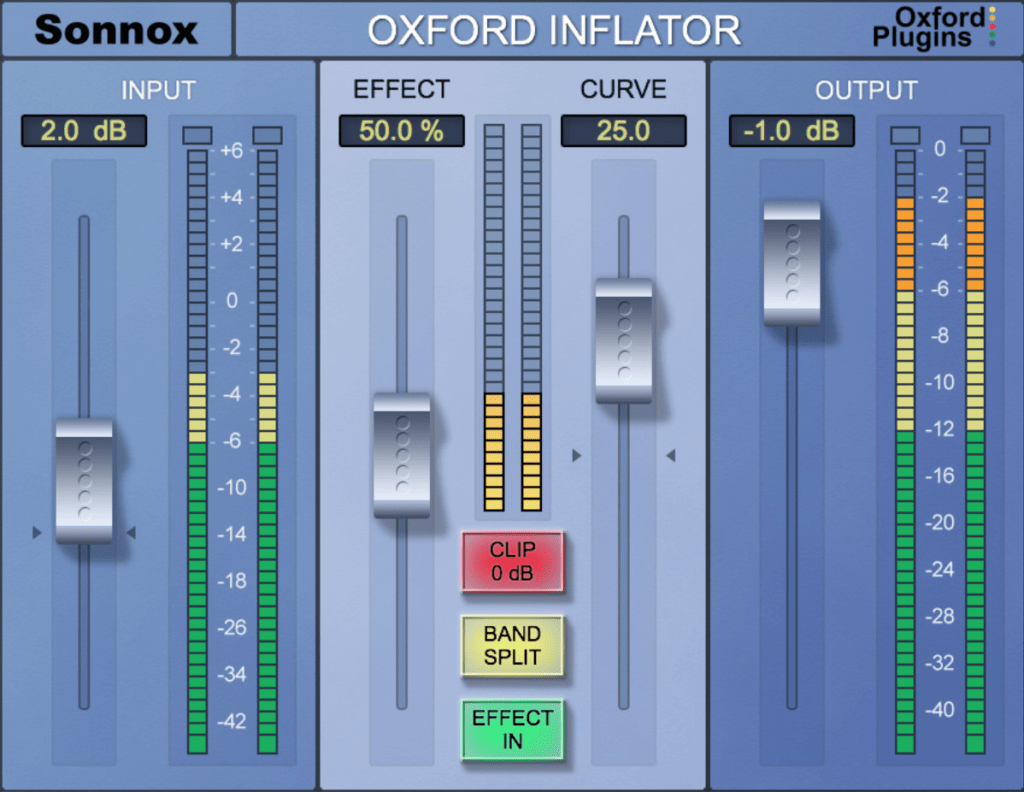
You have to just trust me here and give it a shot. Simply turning the effect knob up makes almost any sound you run through it sound fuller and more alive. Definitely worth every cent of the asking price.
Chaining Limiters
Very similar to chaining bus compressors, you can chain limiters. The idea here, is that several limiters can share the work of what just one limiter is doing. The Fab Filter Pro-L limiter is far and away my favorite limiter, and it’s a super transparent, go-to professional limiter. I’m sure I’ll get some haters for this, but - you basically don’t even need hardware limiting if you use this limiter.
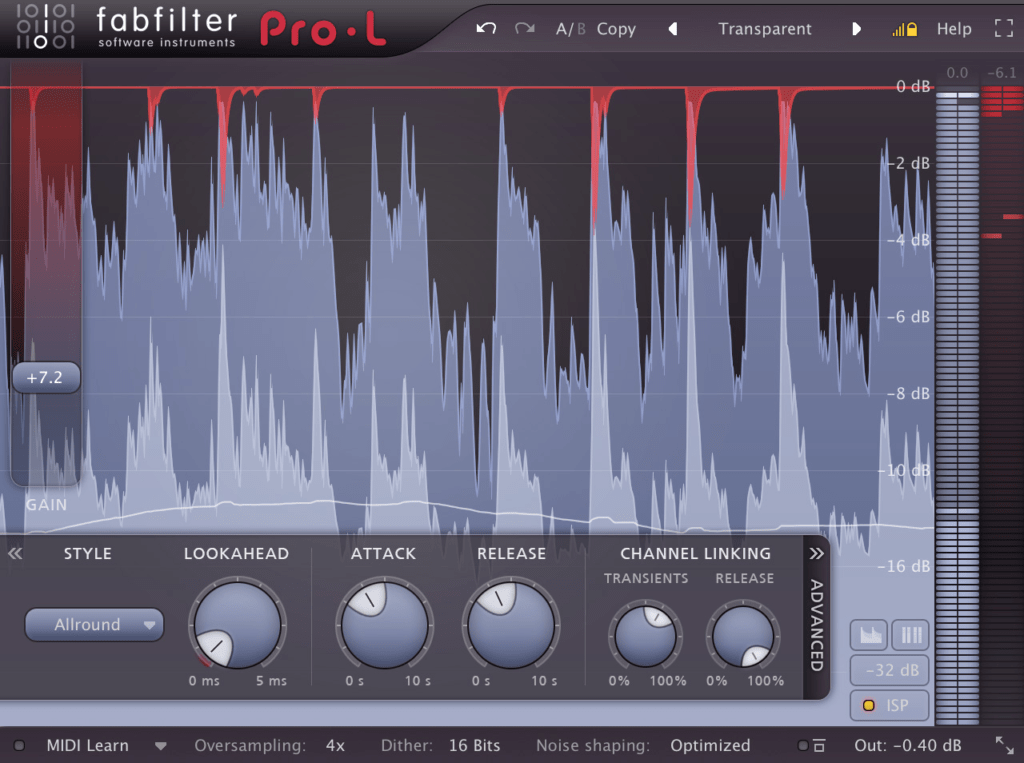
If you can’t get to where you want to be with one limiter, try putting two or three together to slowly limit the sound instead of dramatically lowering the peaks with one limiter. A big trick here is to set the output of the first limiter to something much lower than you’d want for the end result. Limit into a ceiling of -2 to -1 dB first, and then into your final ceiling of -.5 to -.2dB. This way your first limiter is focused on limiting the signal a lot less aggressively and your next limiter is taking care of the final level increase.
8 Video Steps to a Louder Mix
At the end of the day, loudness will always be a necessary component to creating commercially relevant music, but with the influx in popularity of streaming services, it’s safe to say that the loudness war is officially over. It's done. Nada.
Not only that, but you will make your music audibly worse if you end of focusing on generating a loud track instead of focusing on achieving a relatively loud mix with proper dynamics. In order words - don't compete with the loudness war.
So, the next time you’re entering the final phases of a track, perhaps the question you should really be asking yourself — how much quieter can I get away with making this track? What do you guys think? To what extent does loudness still matter?

Hyperbits
FOUNDER, HEAD-HONCHO, THE BIG CHEESE
A bit about me in case you're new here: my music has been streamed over 52+ million times.
I've done official remixes for artists like Beyonce, Tove Lo, and Nick Jonas, signed record deals with Universal, Island, and Sony, and worked with brands like Target, Samsung, and Equinox. I've even DJed some of the world's biggest stages, like Electric Daisy Carnival, Terminal 5, Fonda Theater, and Echostage.
If you have questions about music production or the Hyperbits Masterclass get in touch. I'm here to help.